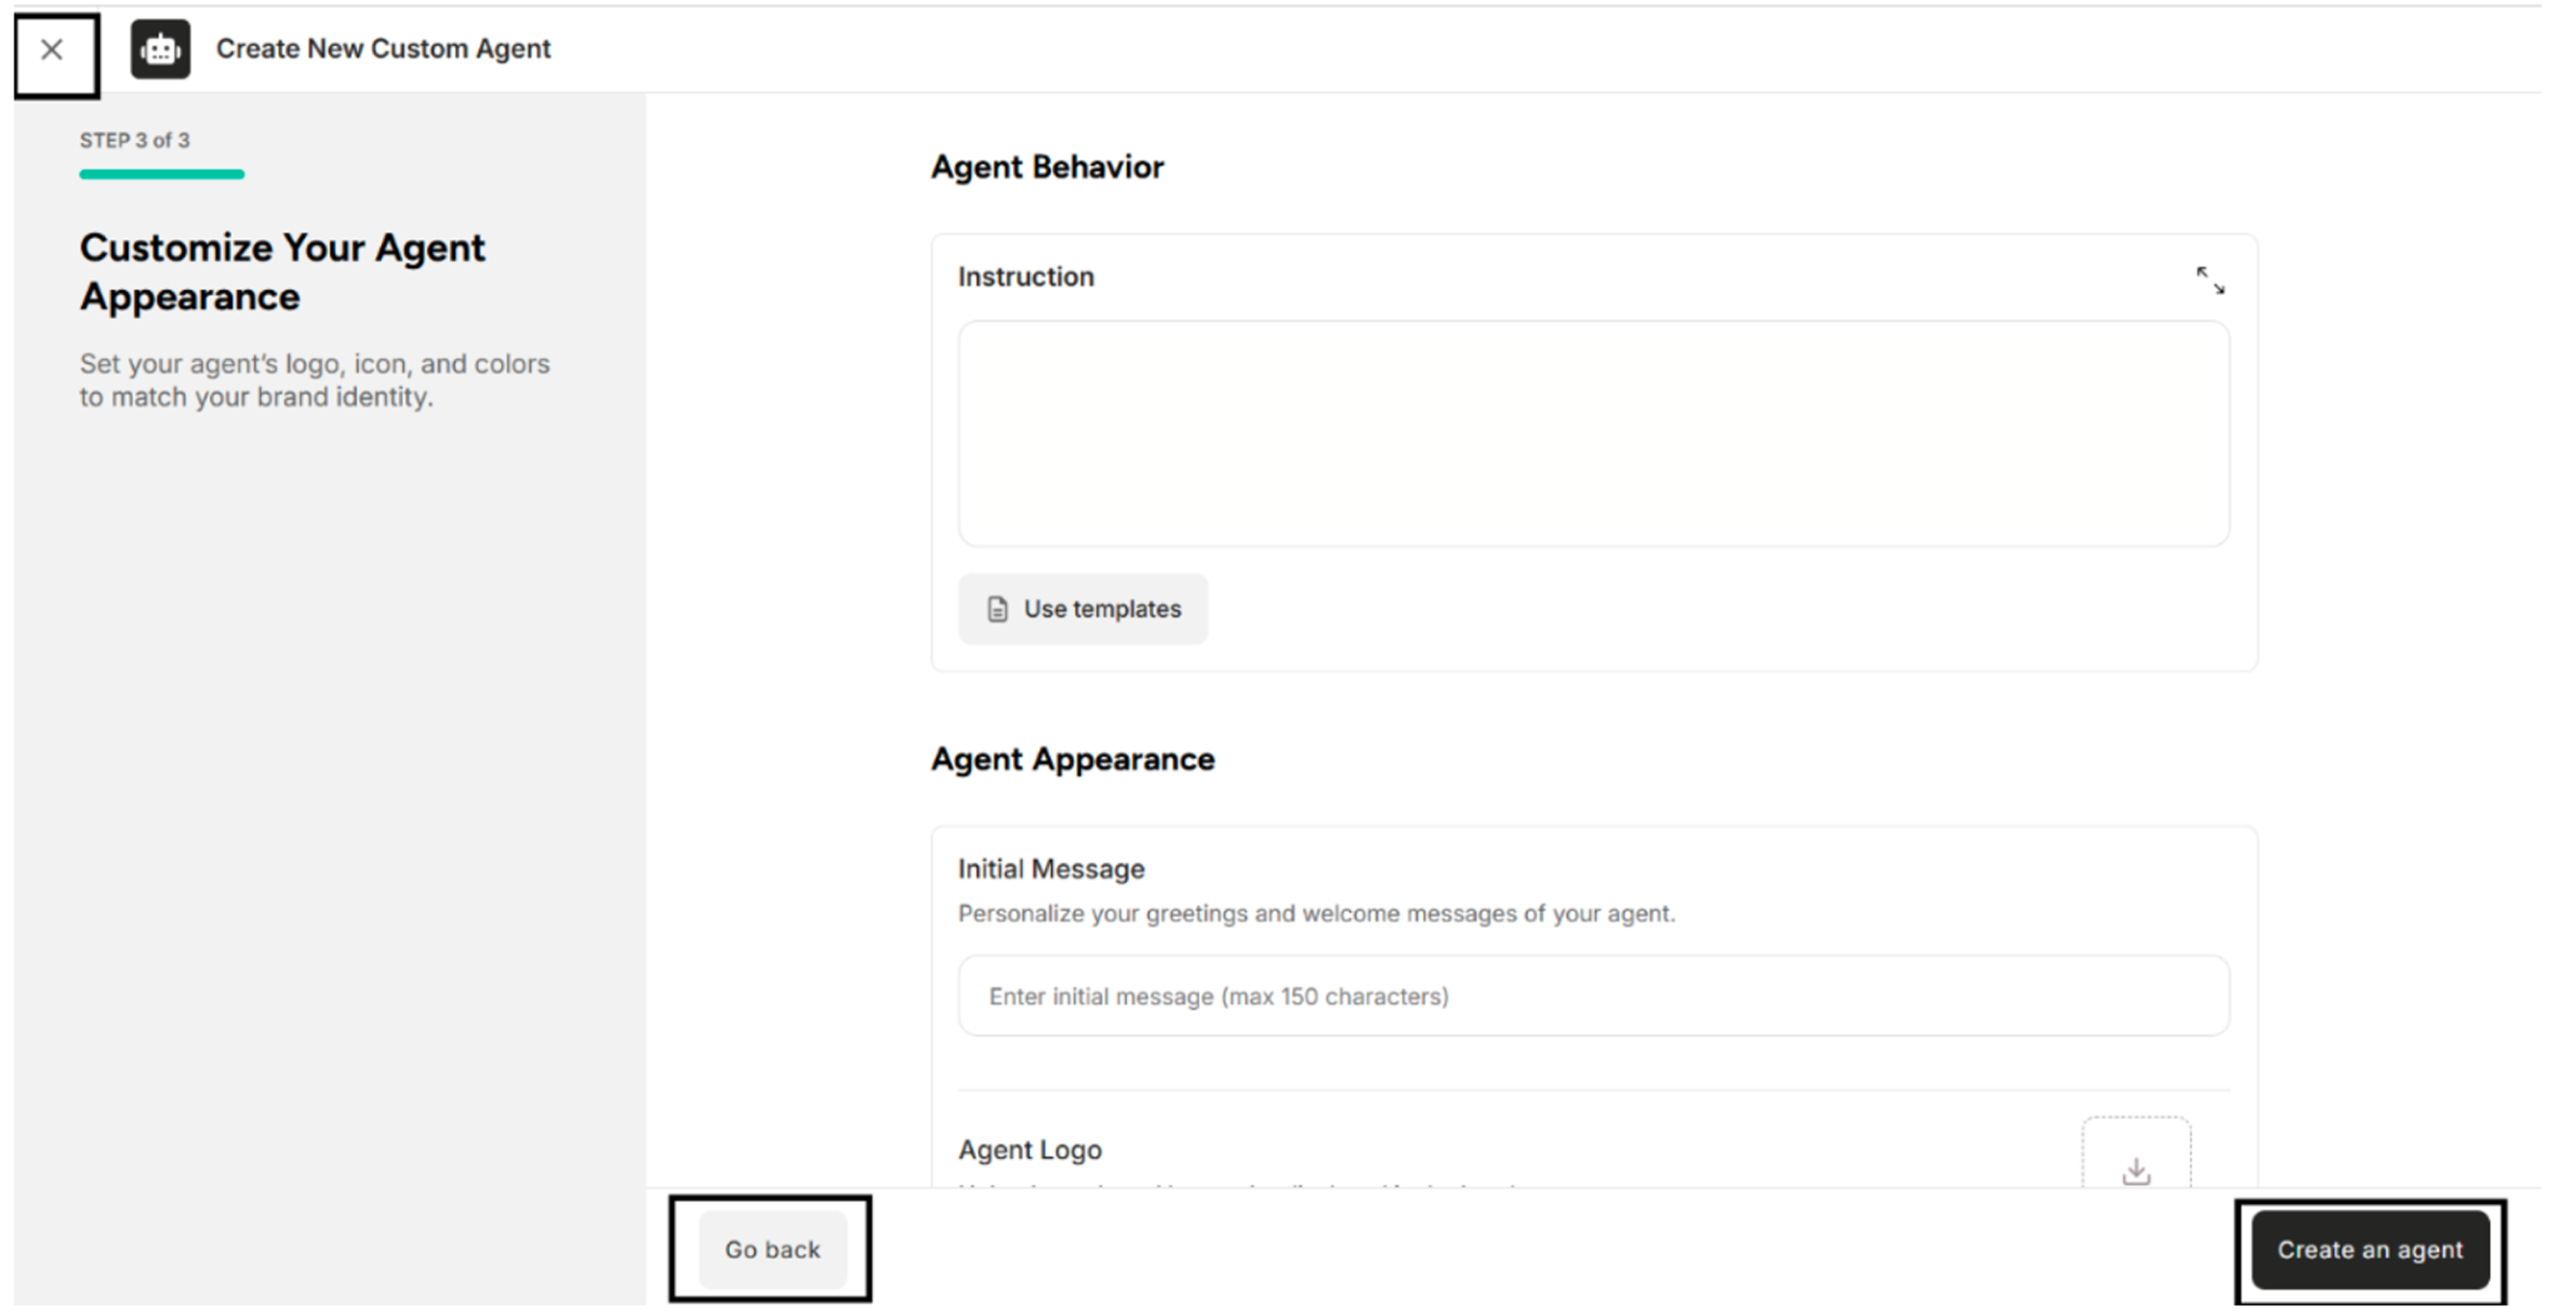
3. Step 3 of 3 - Customize Your Agent Appearance
In this section, users can customize the agent's appearance according to their preferences.
| Functionality | Description |
|---|---|
| Agent Behavior | Set instruction or use templates |
| Agent Appearance | Enter initial message, upload Agent Logo, set the Widget Panel or Widget Button Size, Widget Button Icon or Chat Color, Widget Button Color |
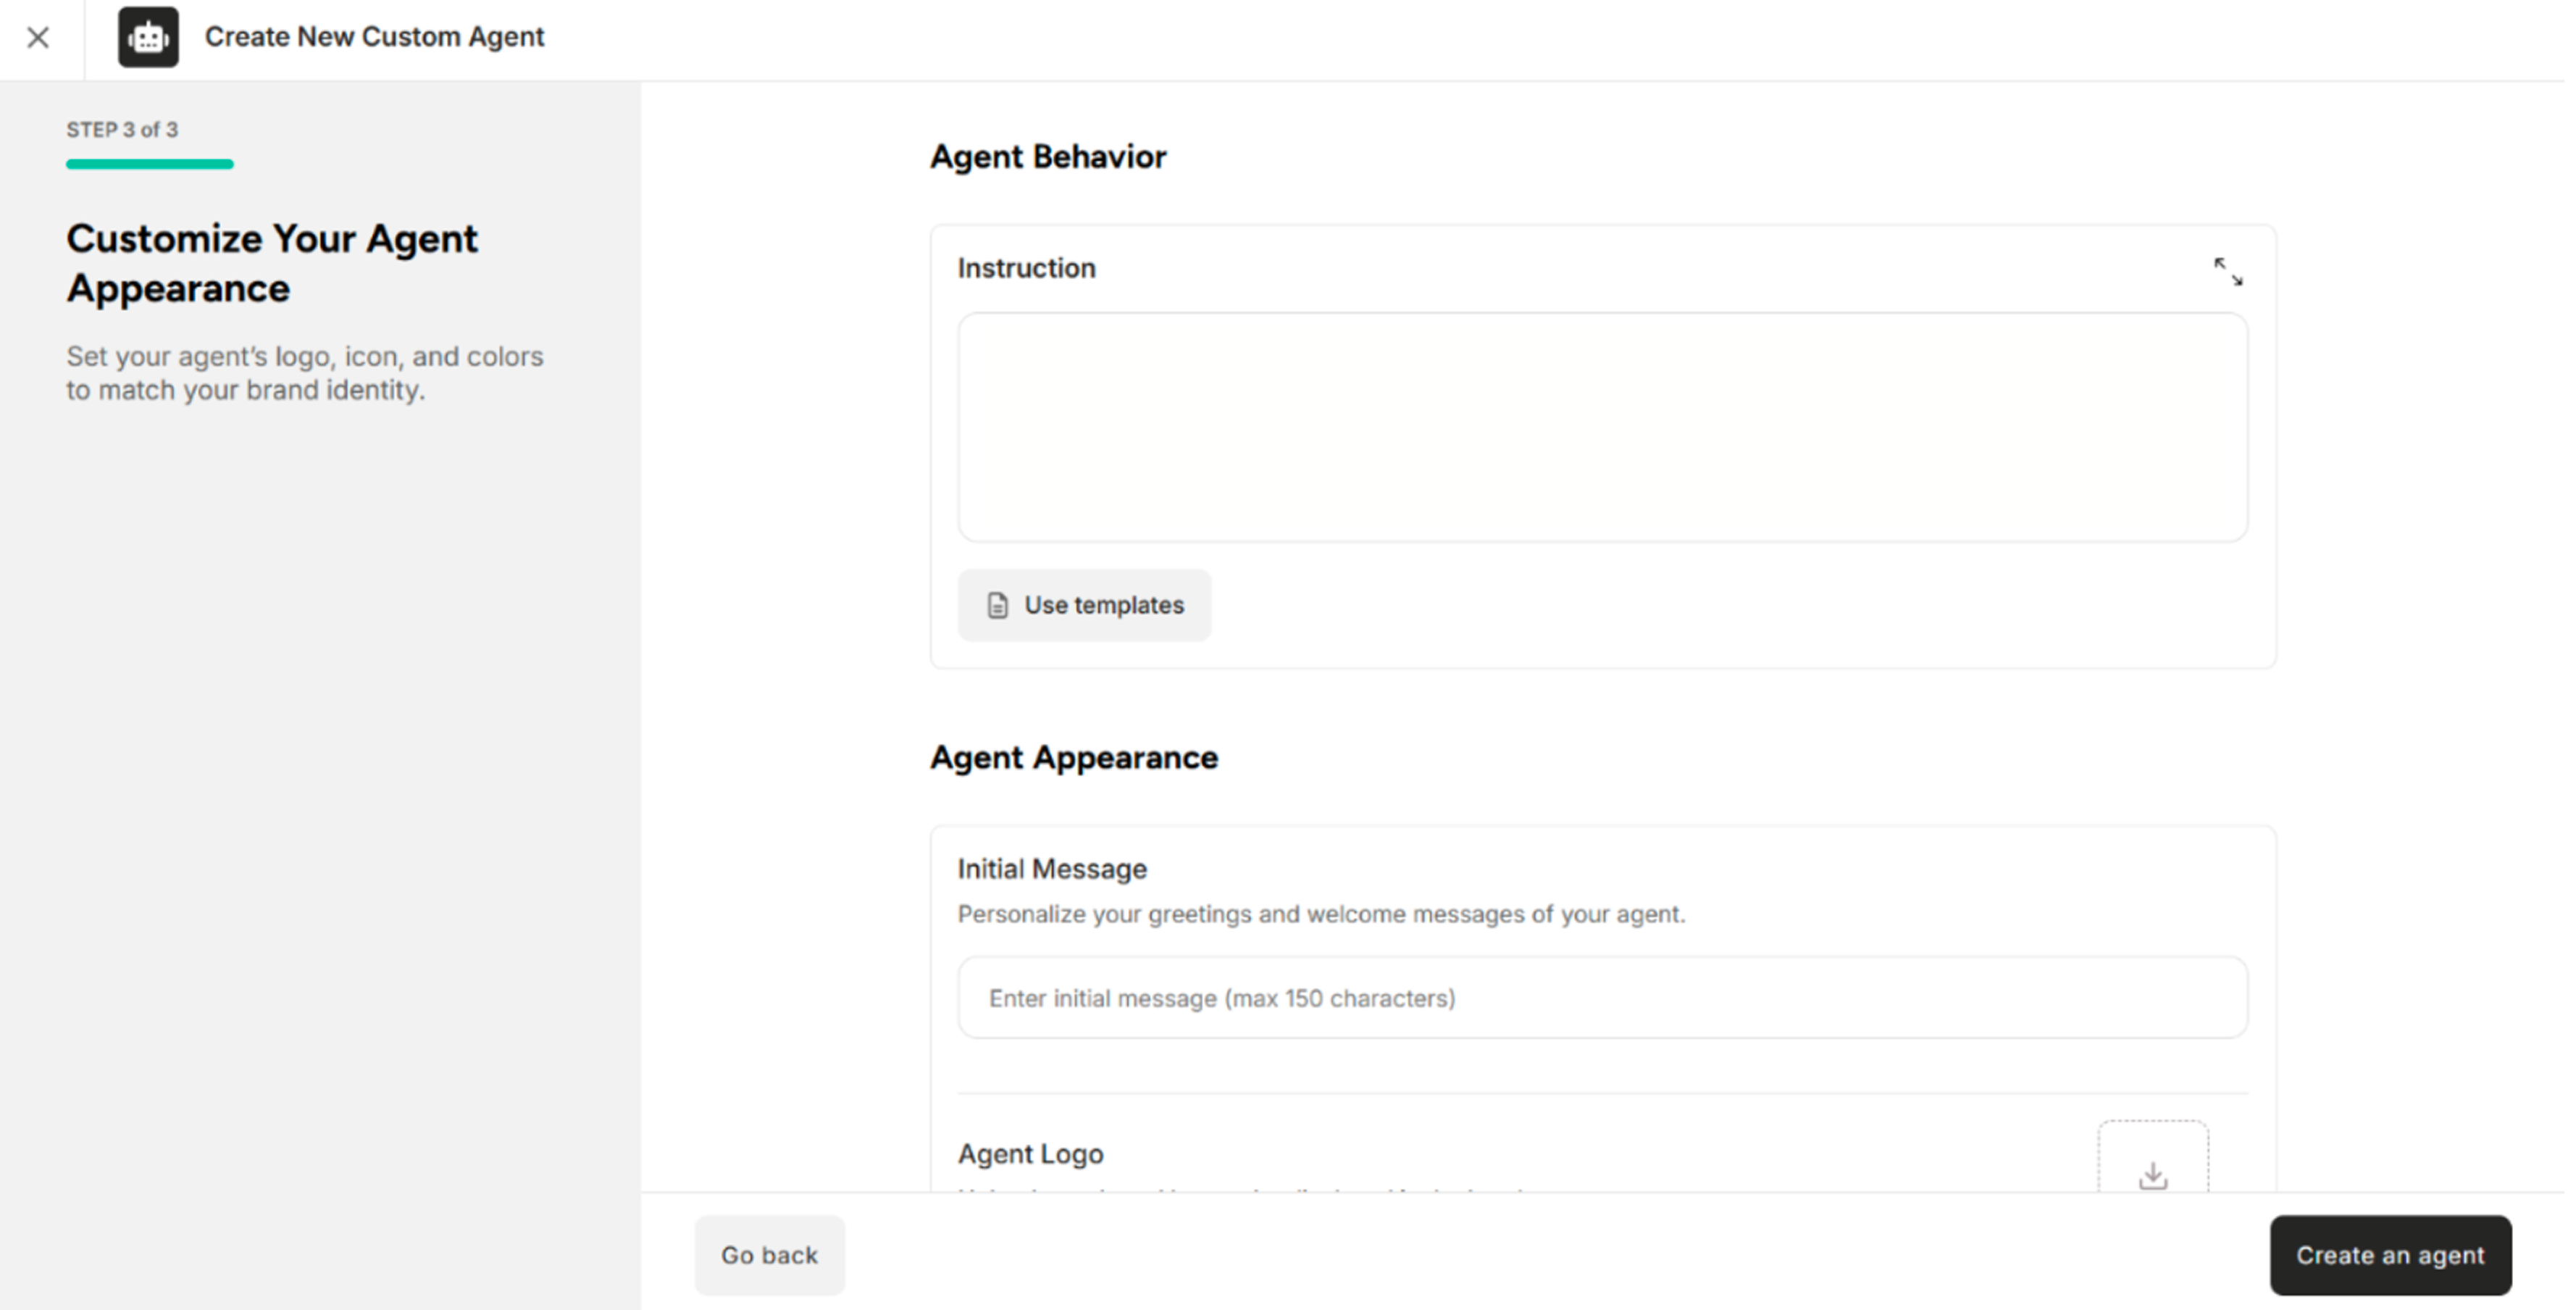
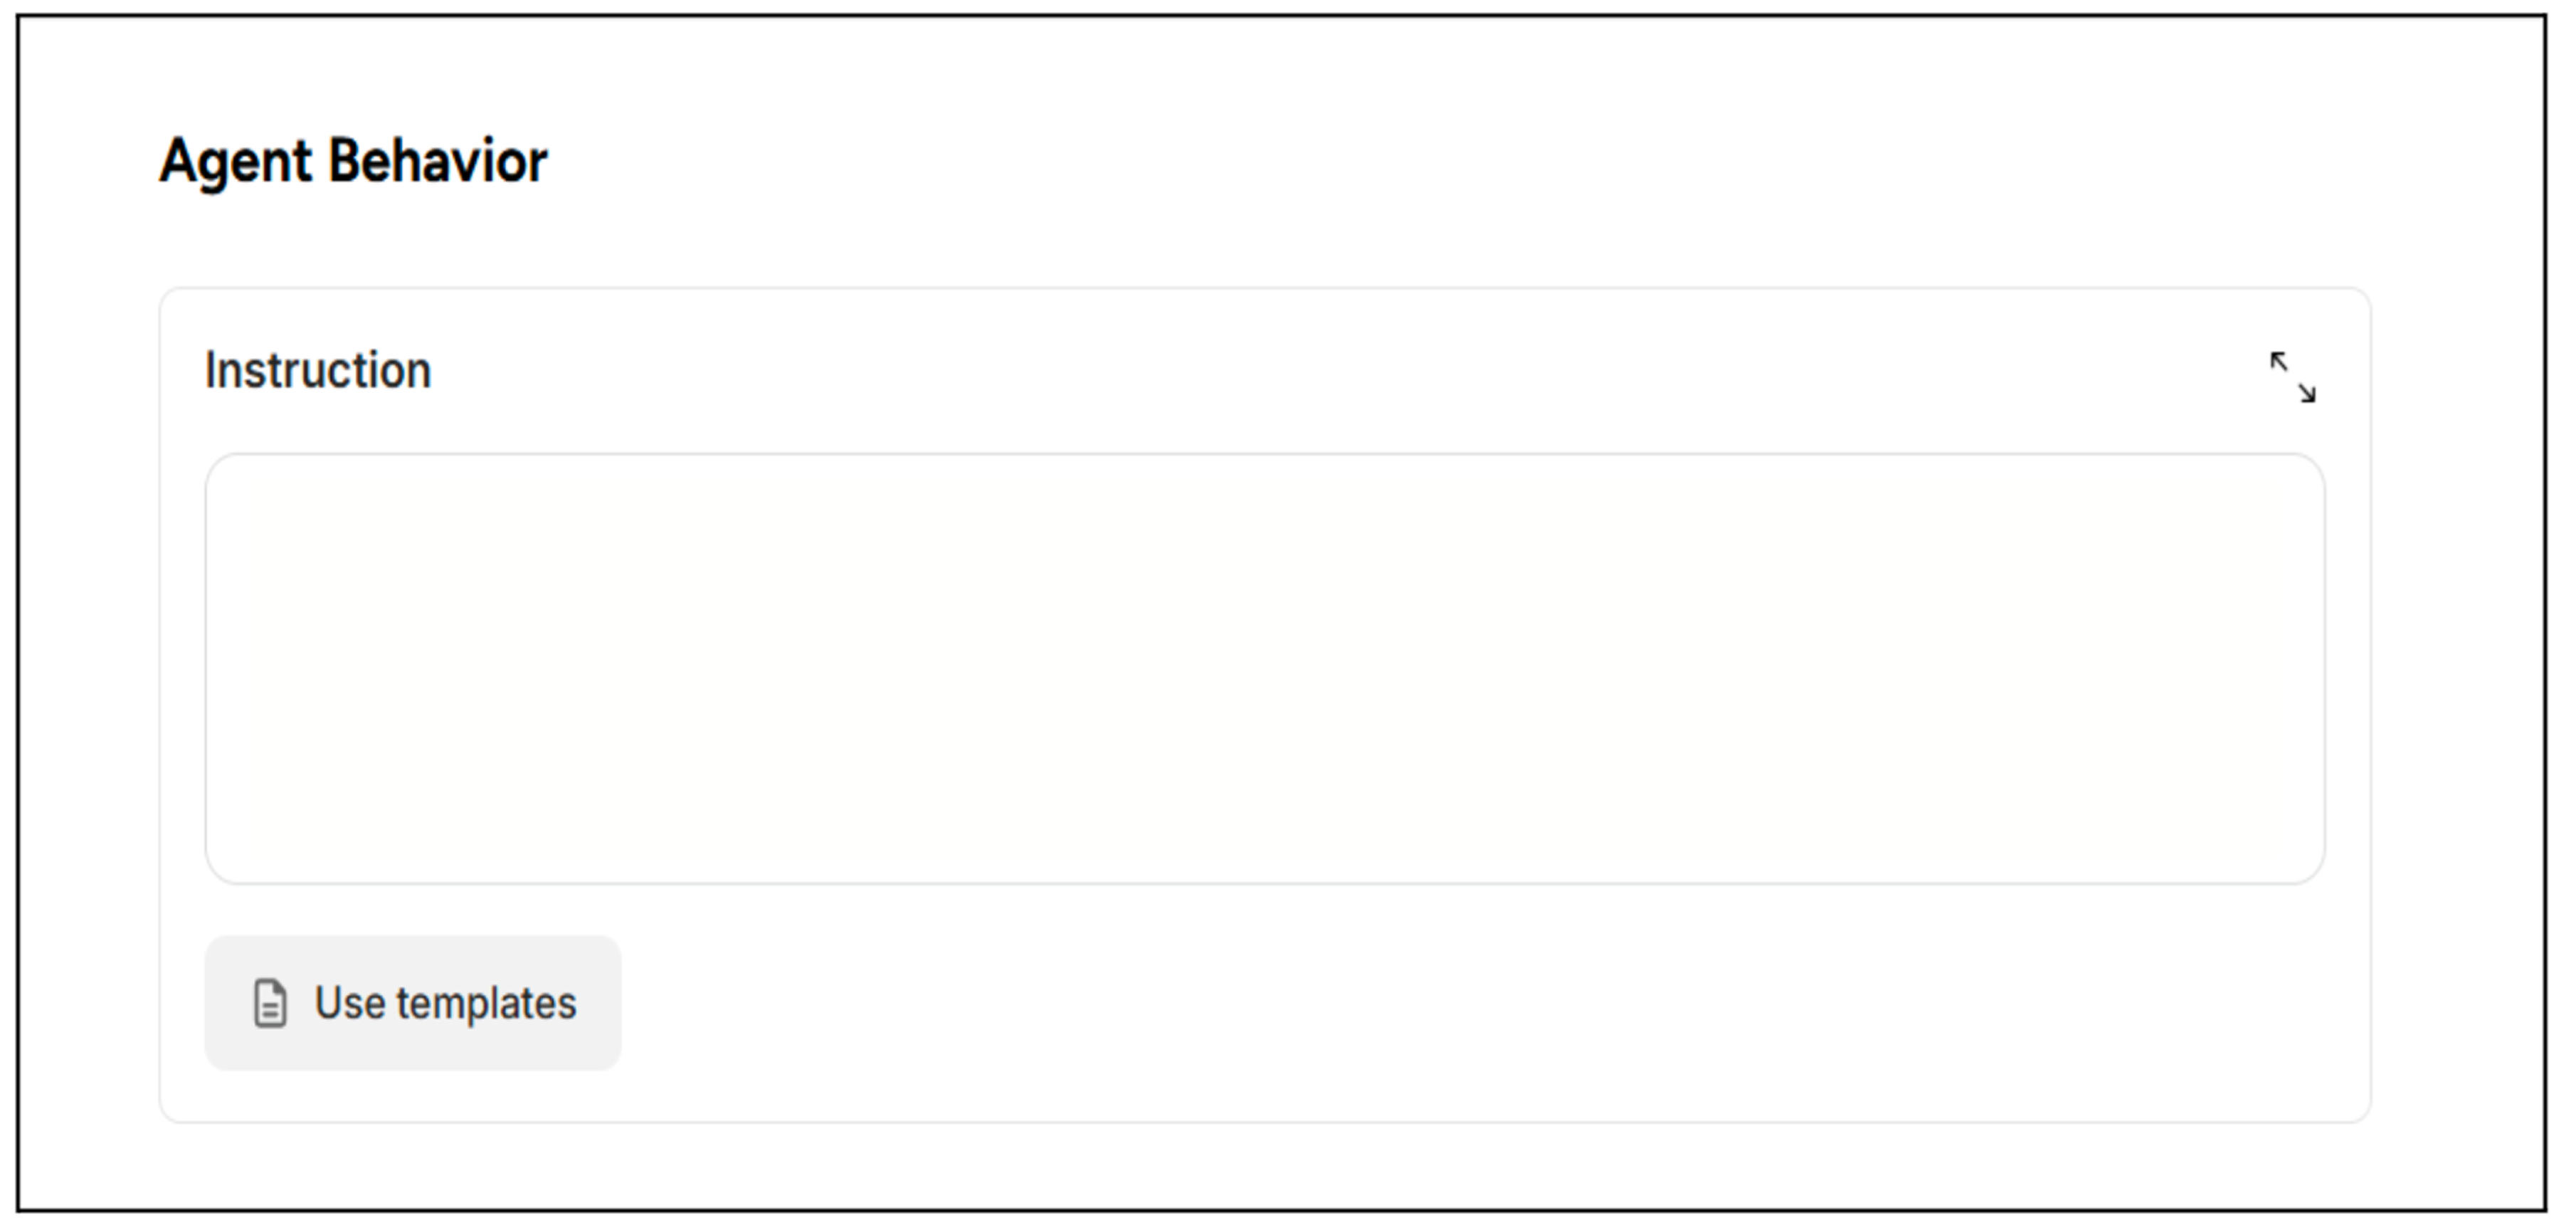
1. Agent Behavior
| Field | Description |
|---|---|
| Instruction | Add instruction or use predefined templates |
Table: Field Available in the Agent Behavior Section
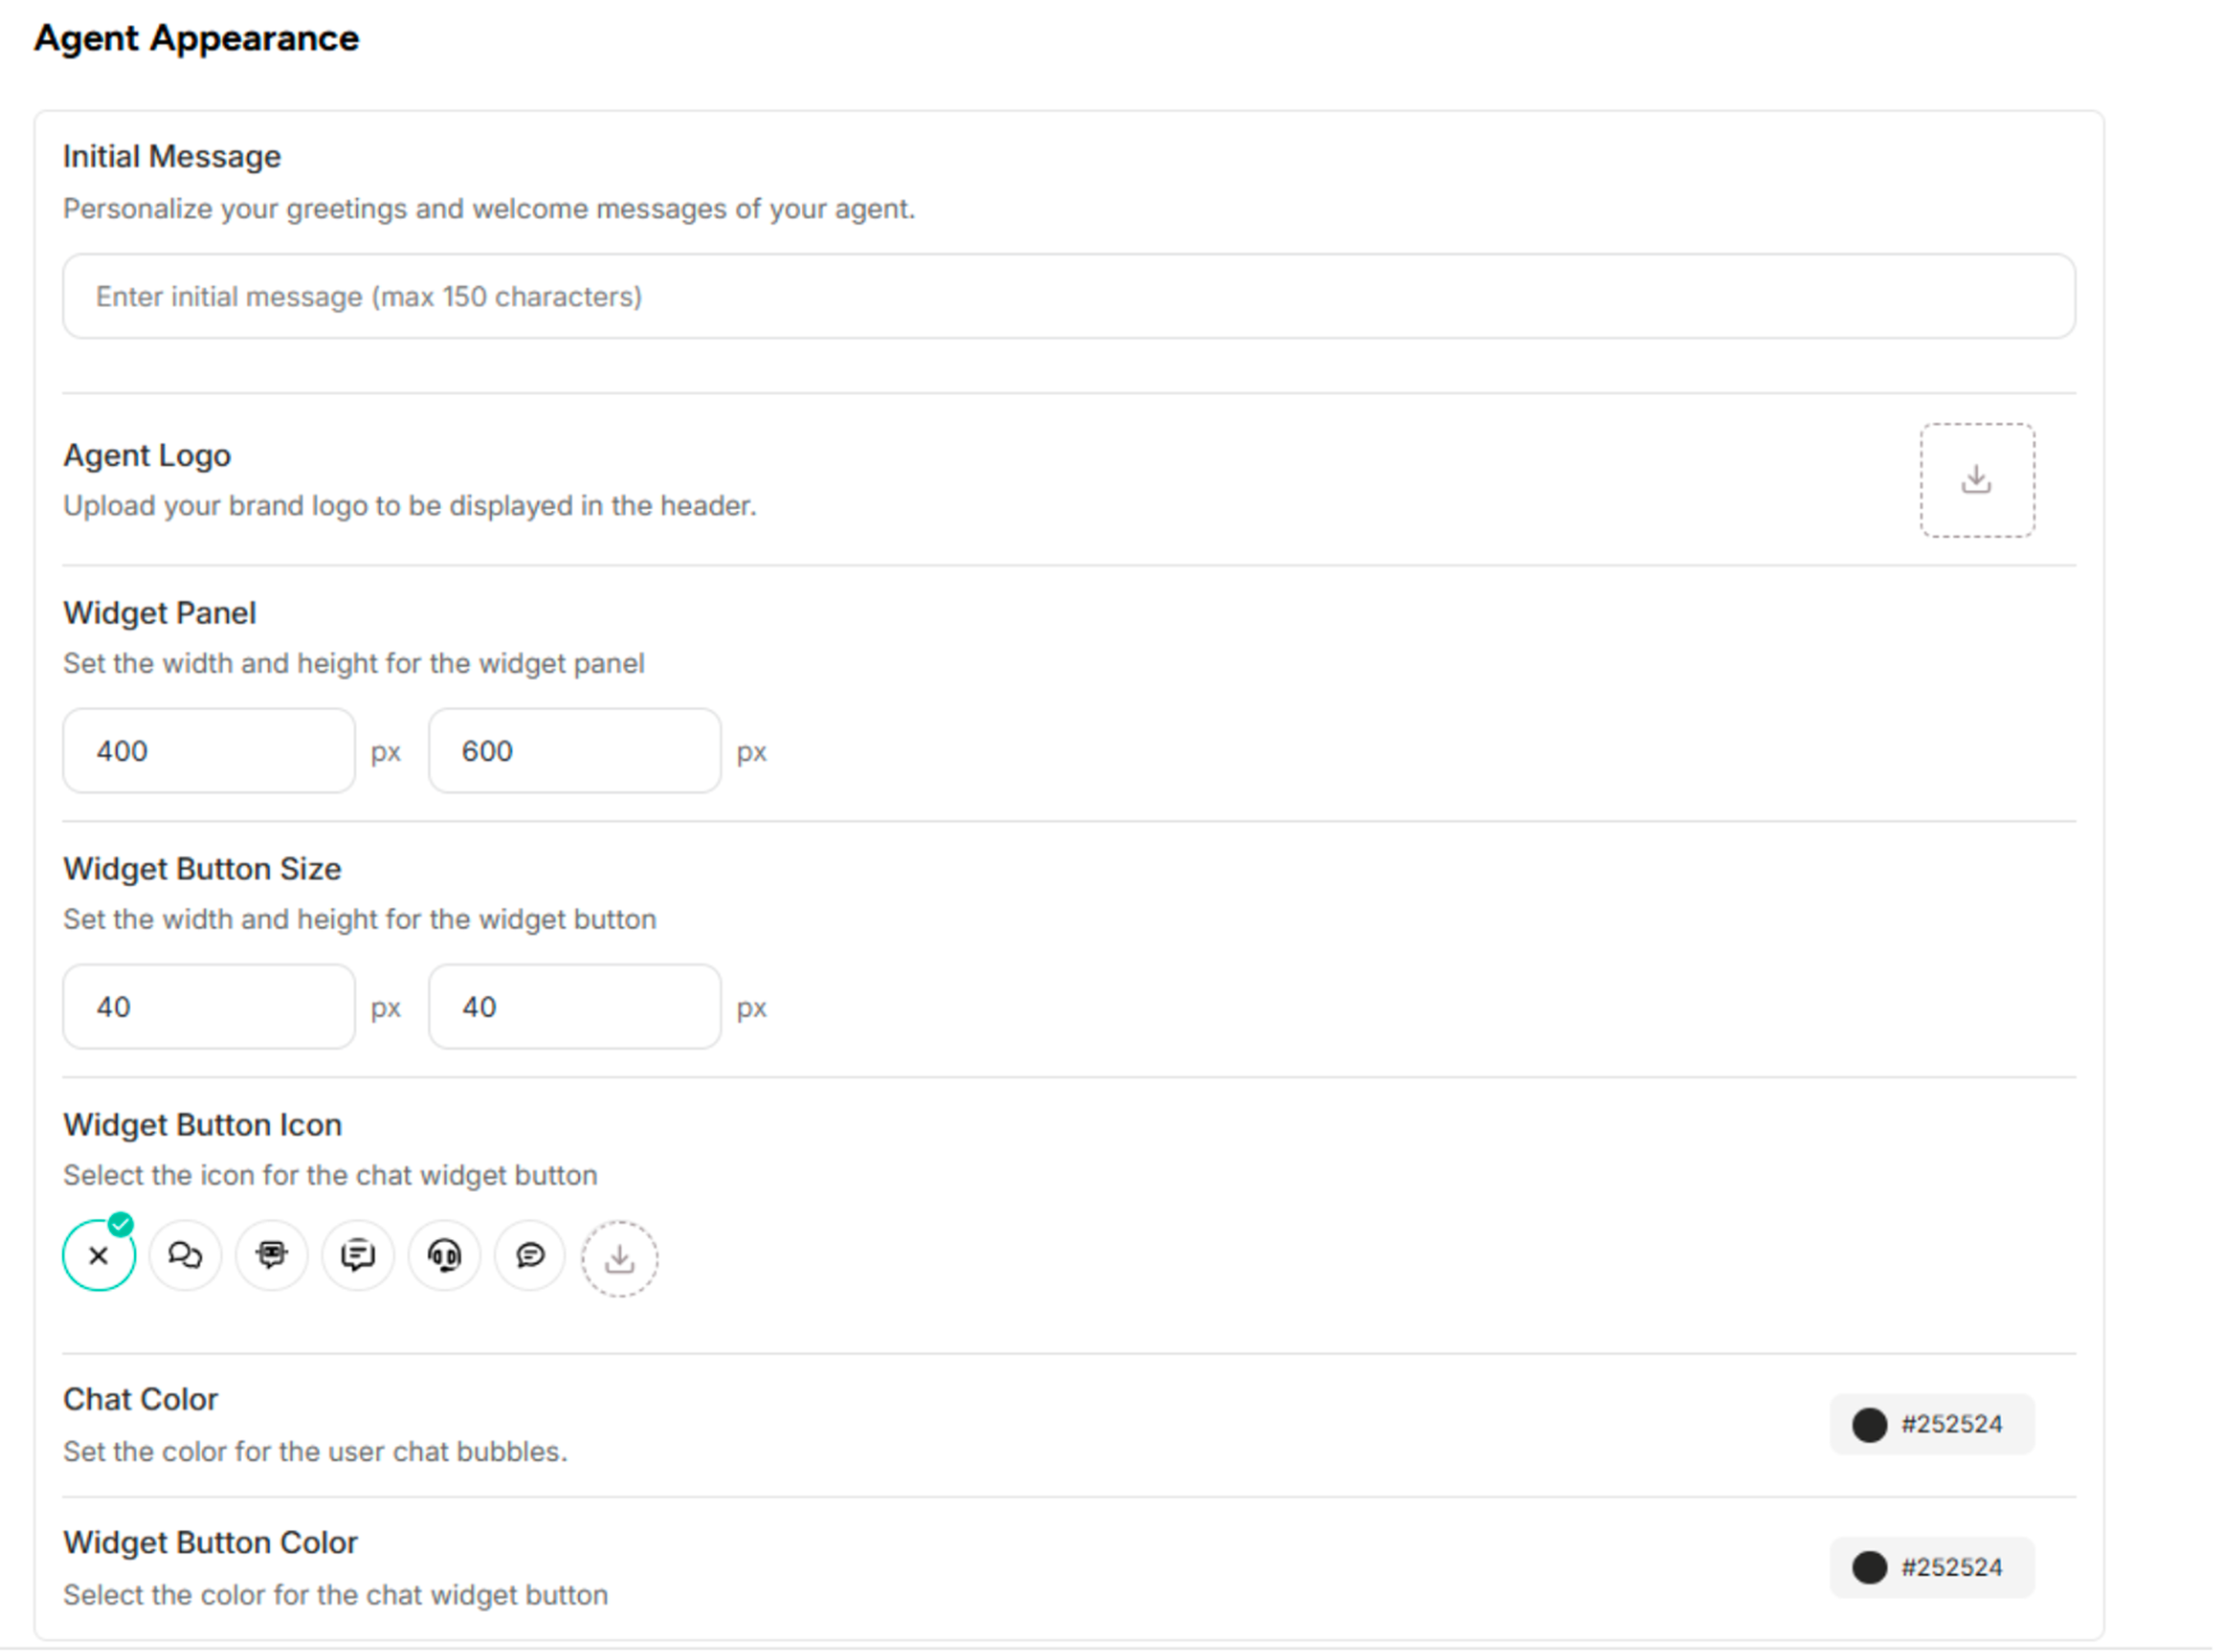
2. Agent Appearance
| Fields | Description |
|---|---|
| Initial Message | Personalize the greetings and welcome messages of unstructured agent. |
| Agent Logo | Upload the Agent logo to be displayed in the header. |
| Widget Panel | Set the width and height for the widget panel |
| Widget Button Size | Set the width and height for the widget button |
| Widget Button Icon | Select the icon for the chat widget button |
| Chat Color | Set the color for the user chat bubbles. |
| Widget Button Color | Select the color for the chat widget button. |
3. Buttons Available in the Customize Your Agent Appearance Interface
| Button | Description |
|---|---|
| Create an agent | Create a new agent and direct user to the chat screen. |
| Go back | Return to Step 2 where the data were imported. |
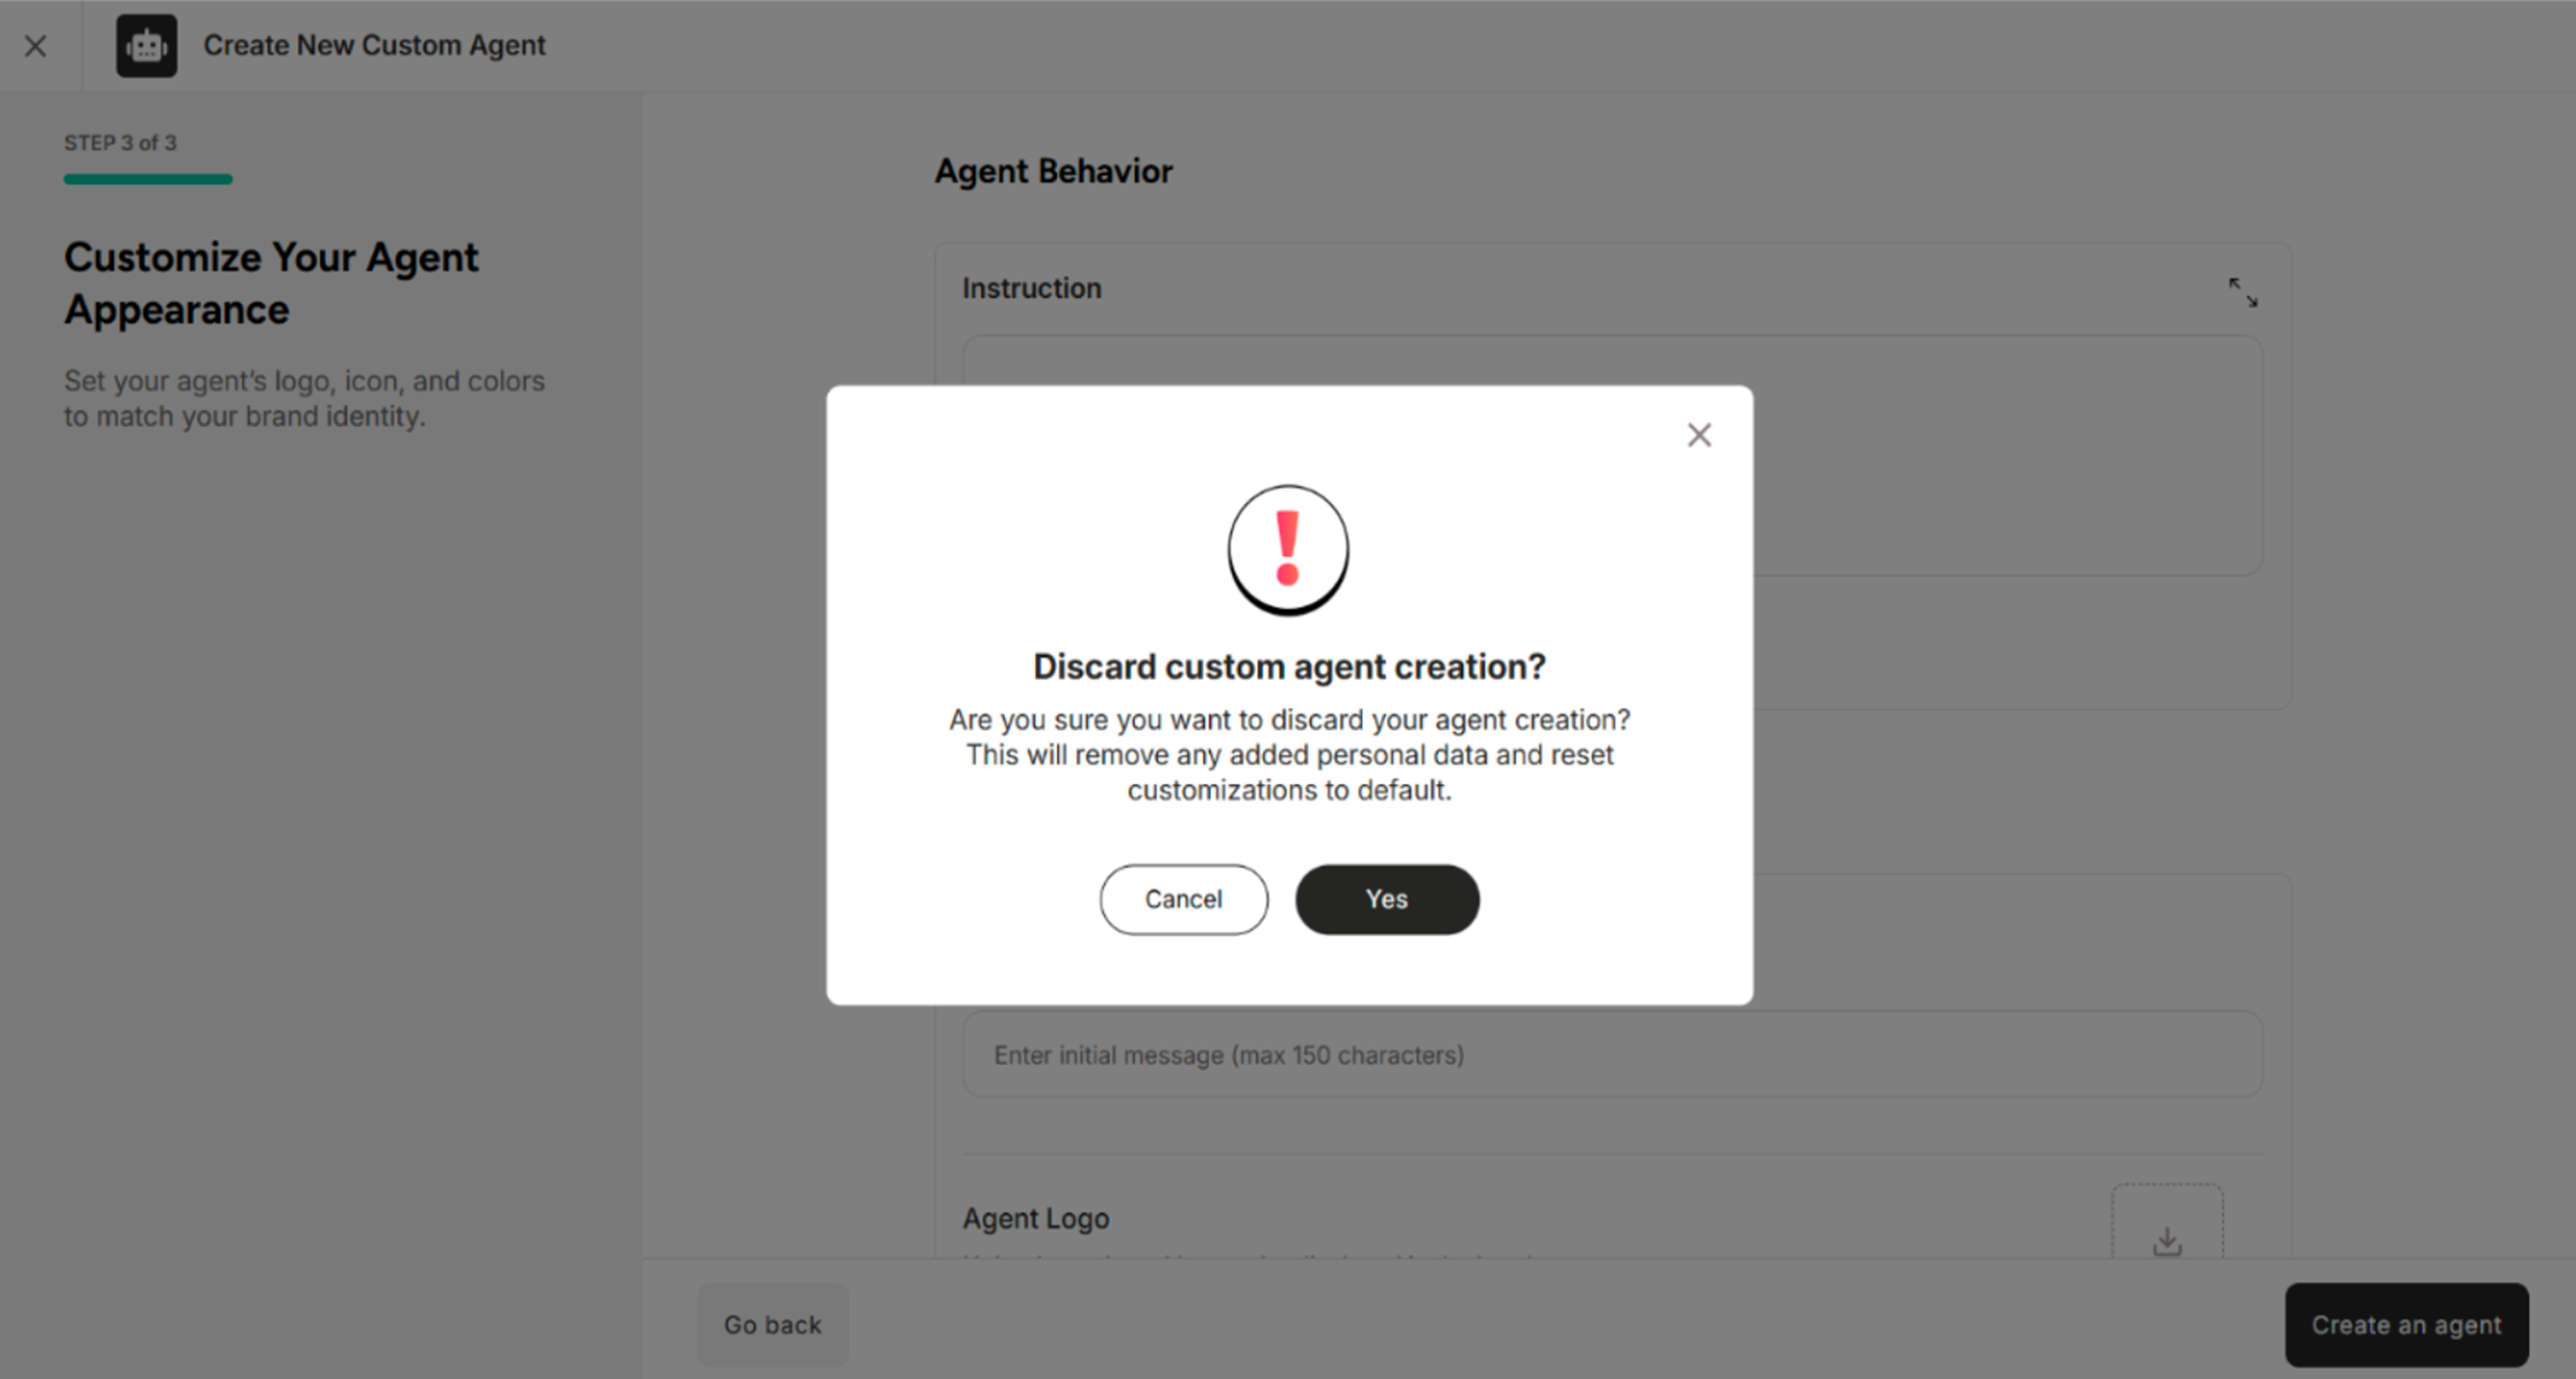
| Cross Button | Discard the process of creating the agent. |