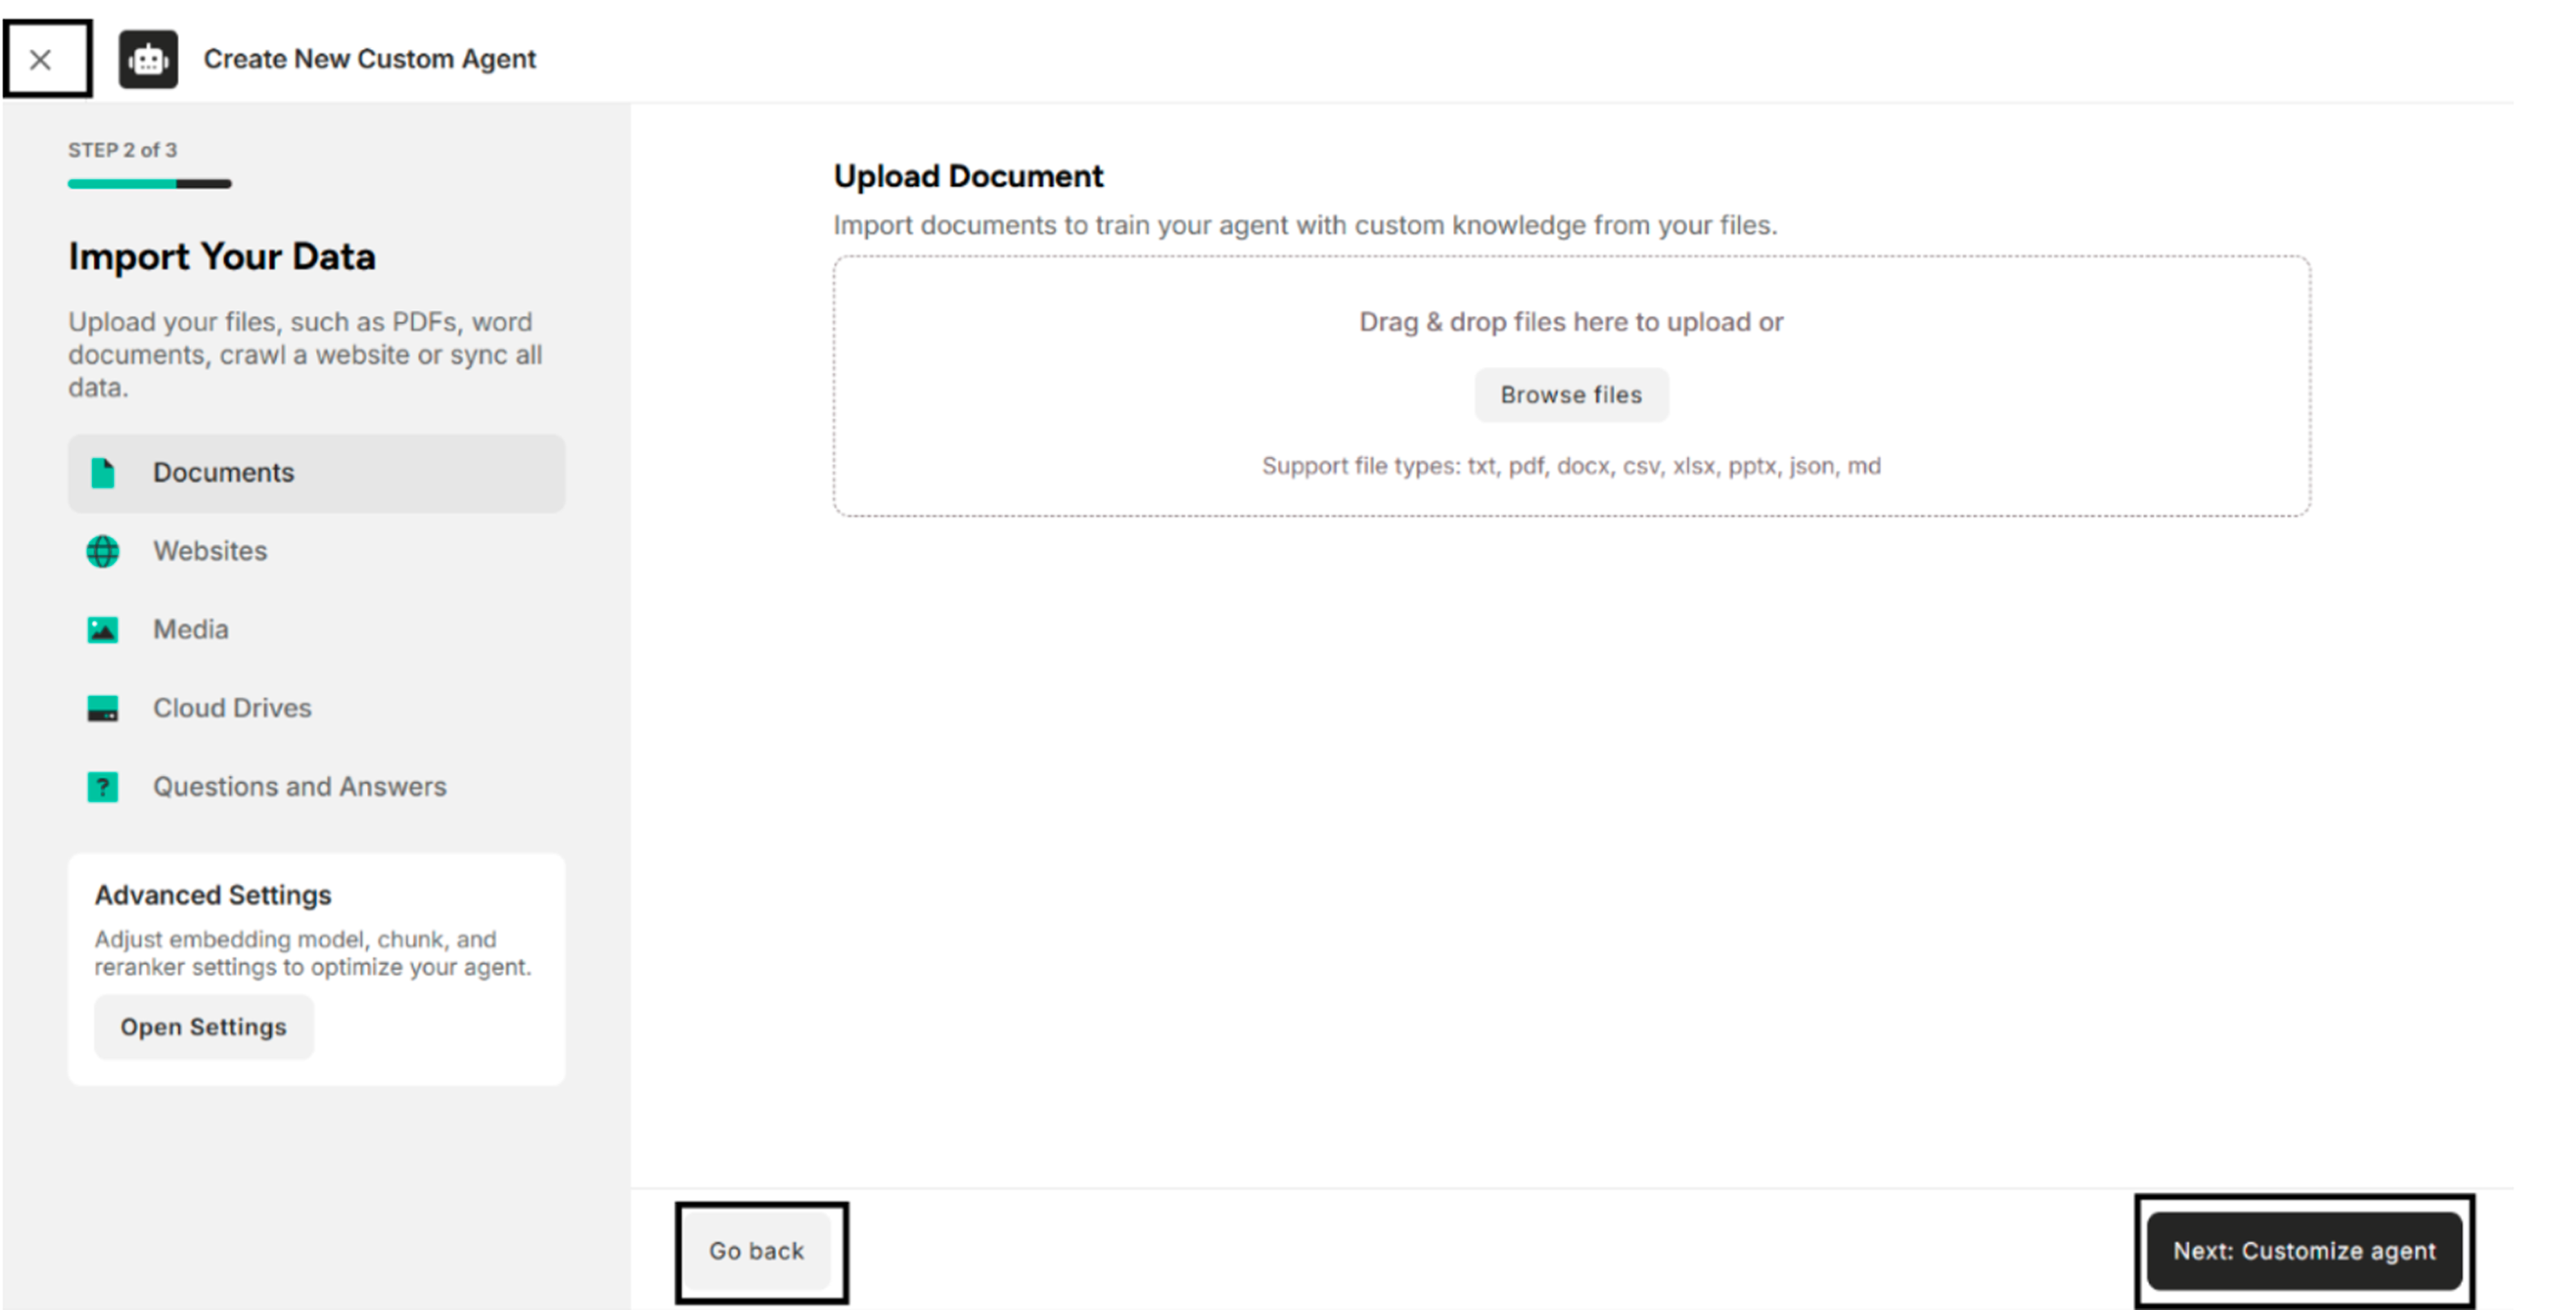
2. Step 2 of 3 - Import Your Data
In this section, users can create the Unstructured Agent in the following ways:
- Import Data from Documents
- Crawl or Add URL Links from Websites
- Import Data from Media
- Import Data from Cloud Drives
- Import Q&A Pairs from Questions and Answers

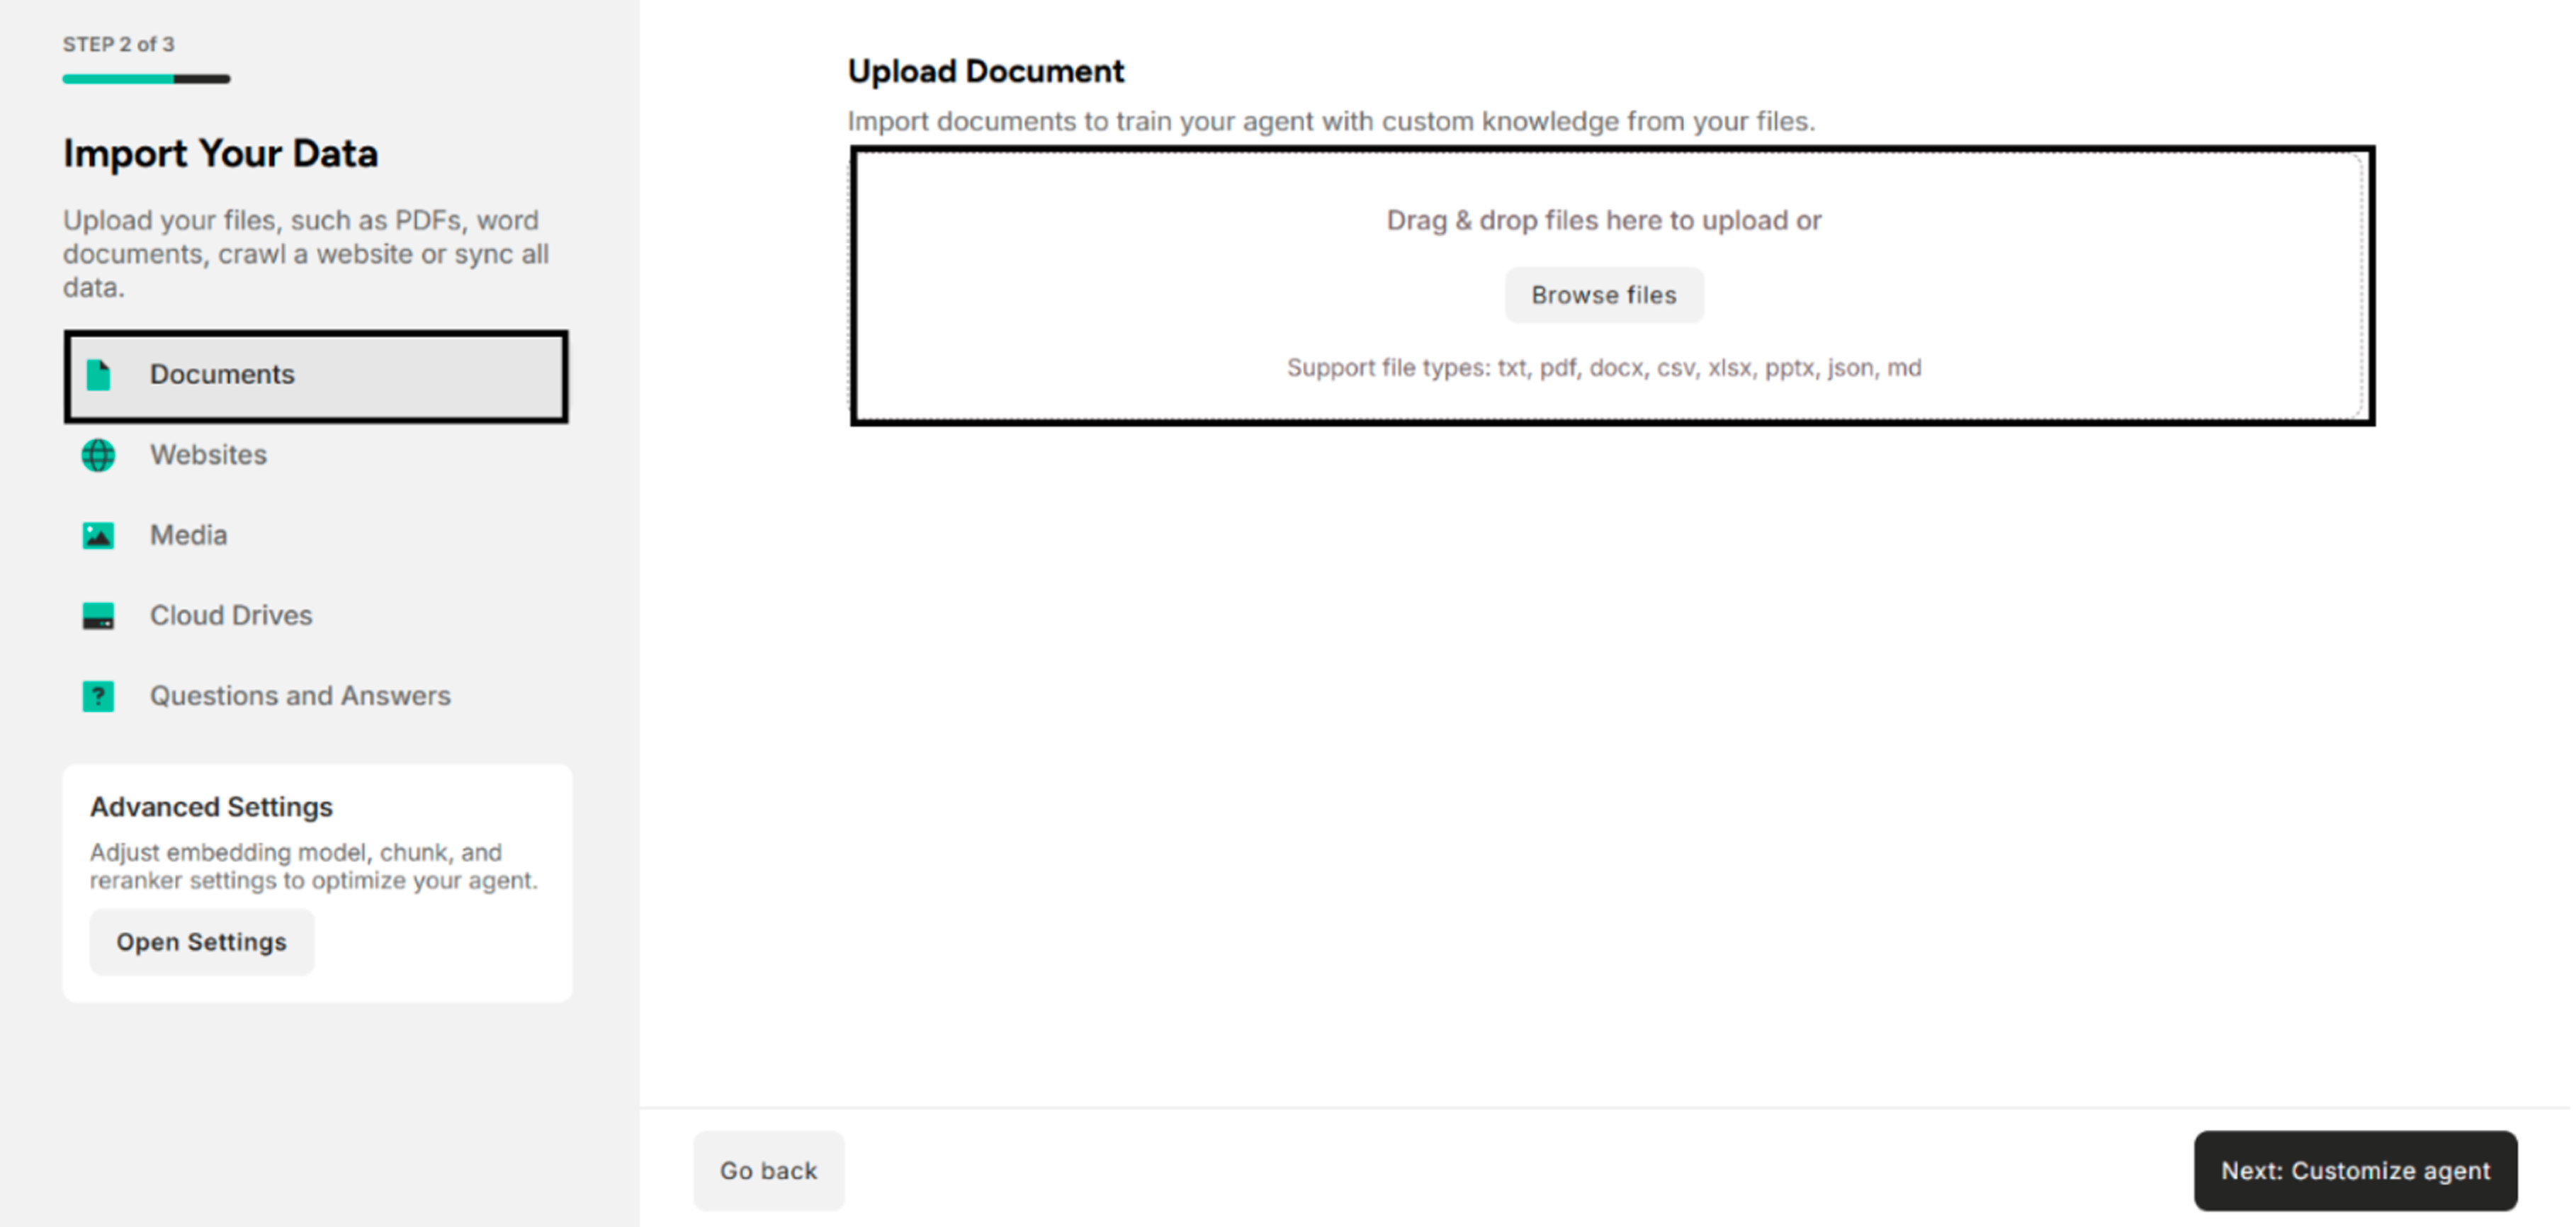
1. Import Data from Documents
| Field | Description |
|---|---|
| Import Documents | Drag and drop local files or browse files. The supported file types are txt, pdf, docx, pptx, csv, xlsx, json, md. |
2. Crawl or Add URL Links from Websites
There are two methods to create Unstructured Agents with websites.
| No. | Methods |
|---|---|
| I | Create Unstructured Agent by Adding Website URL one by one (Single Link) |
| II | Create Unstructured Agent by Web Crawler (Crawl URLs) |
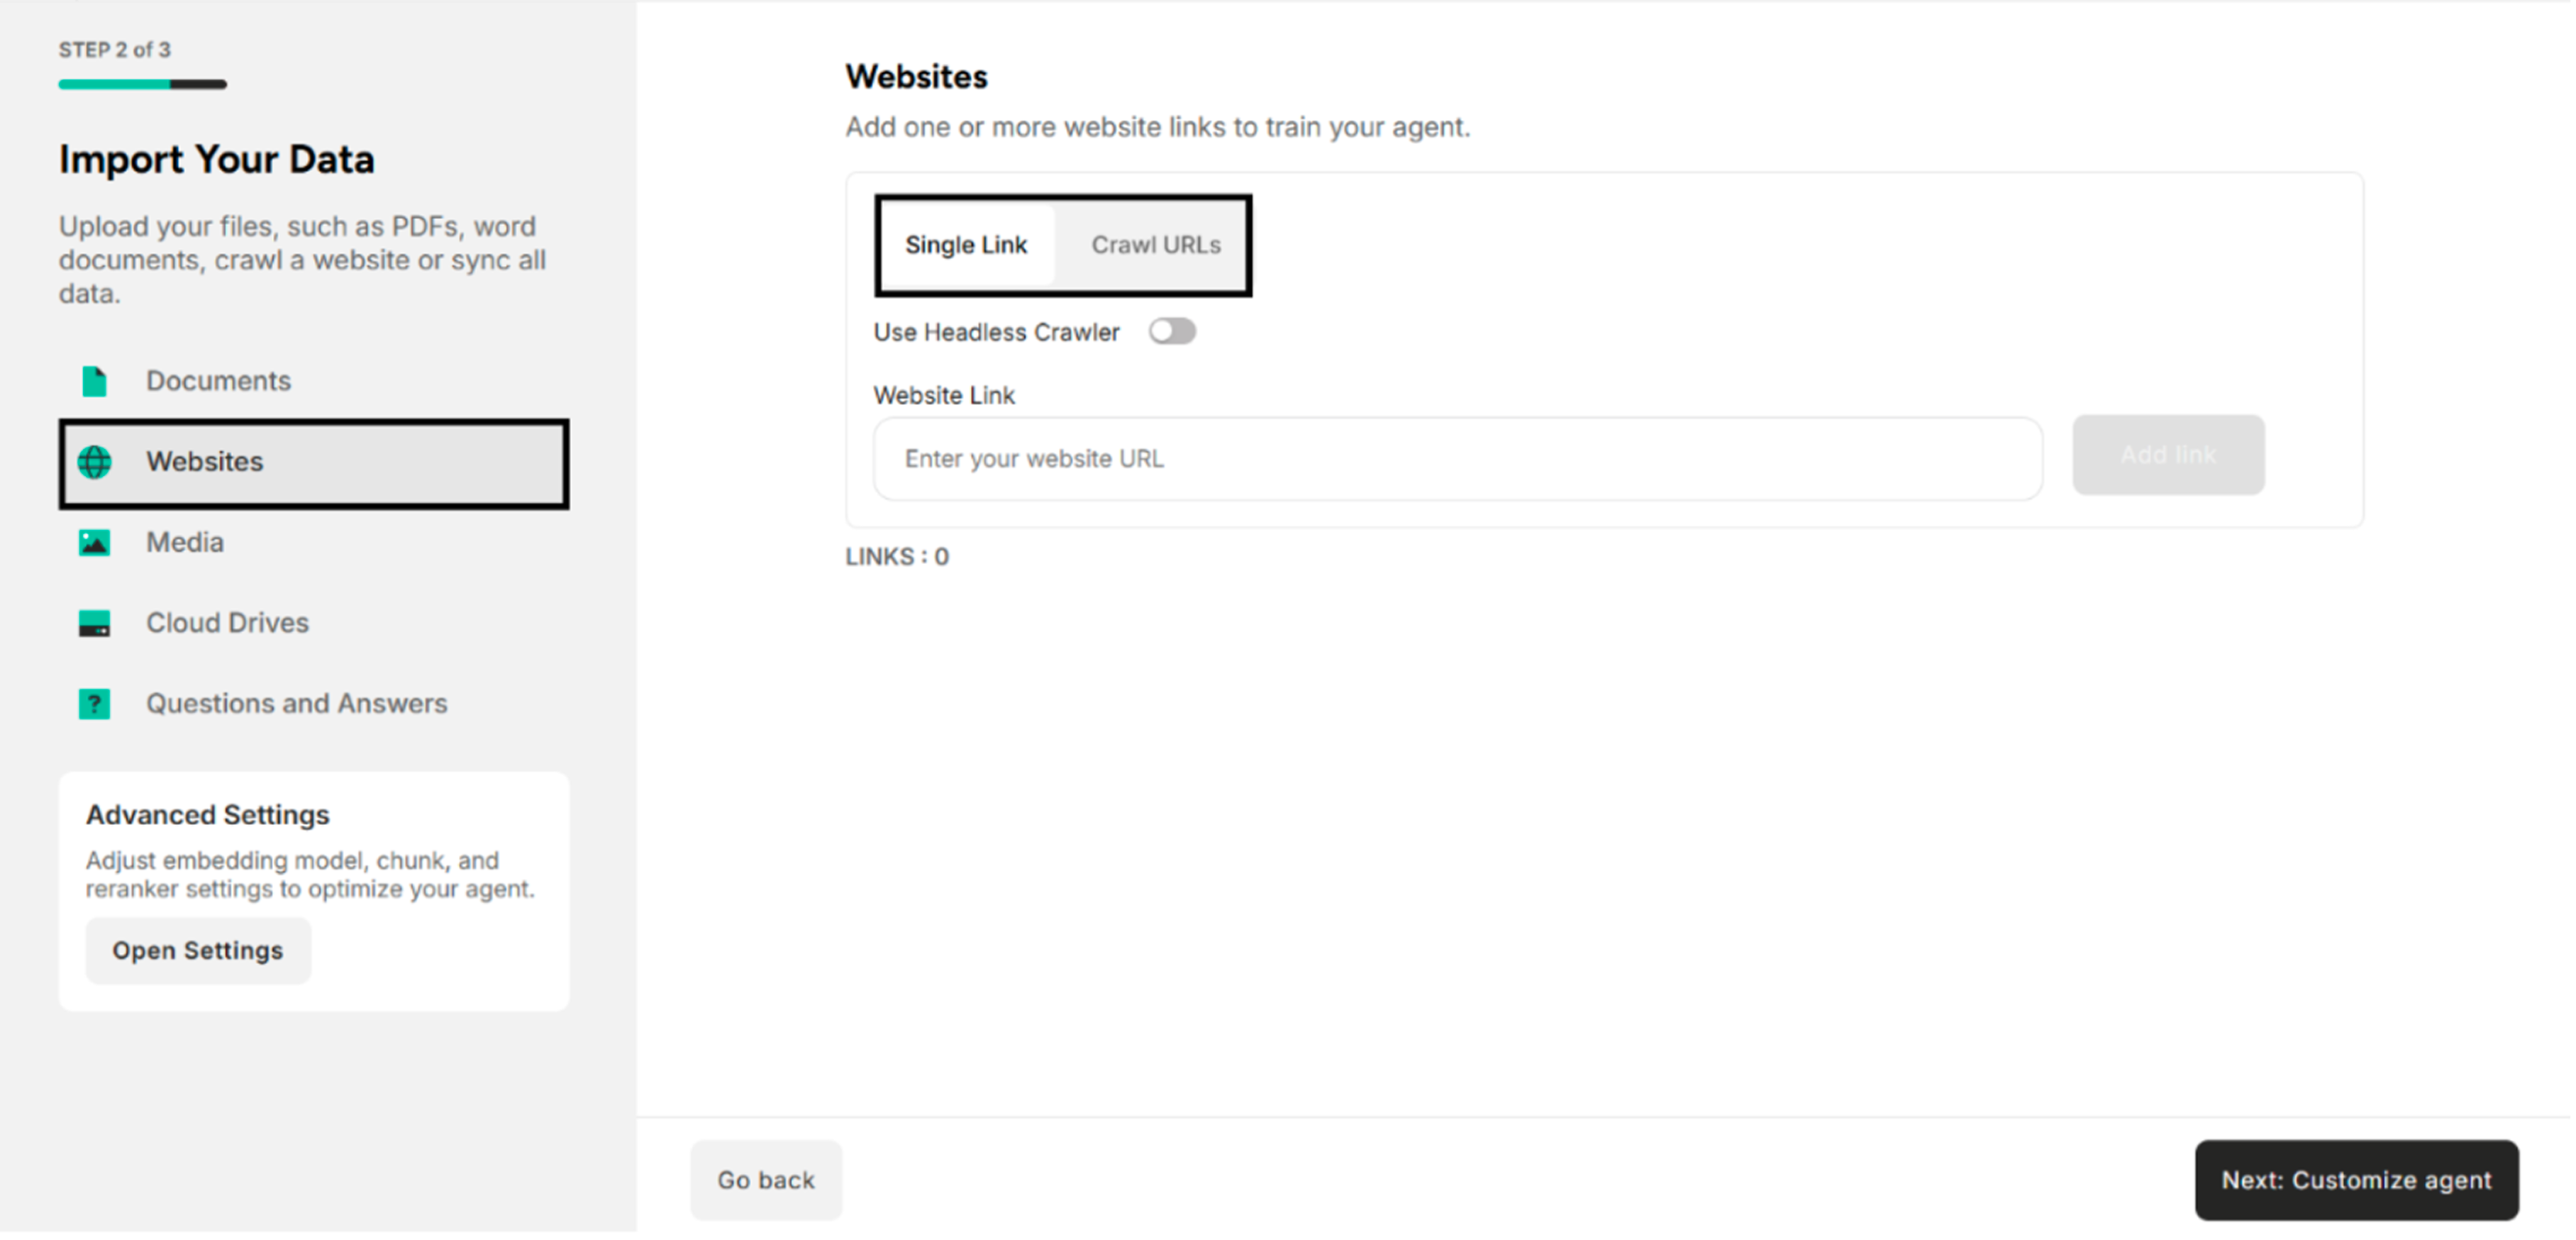
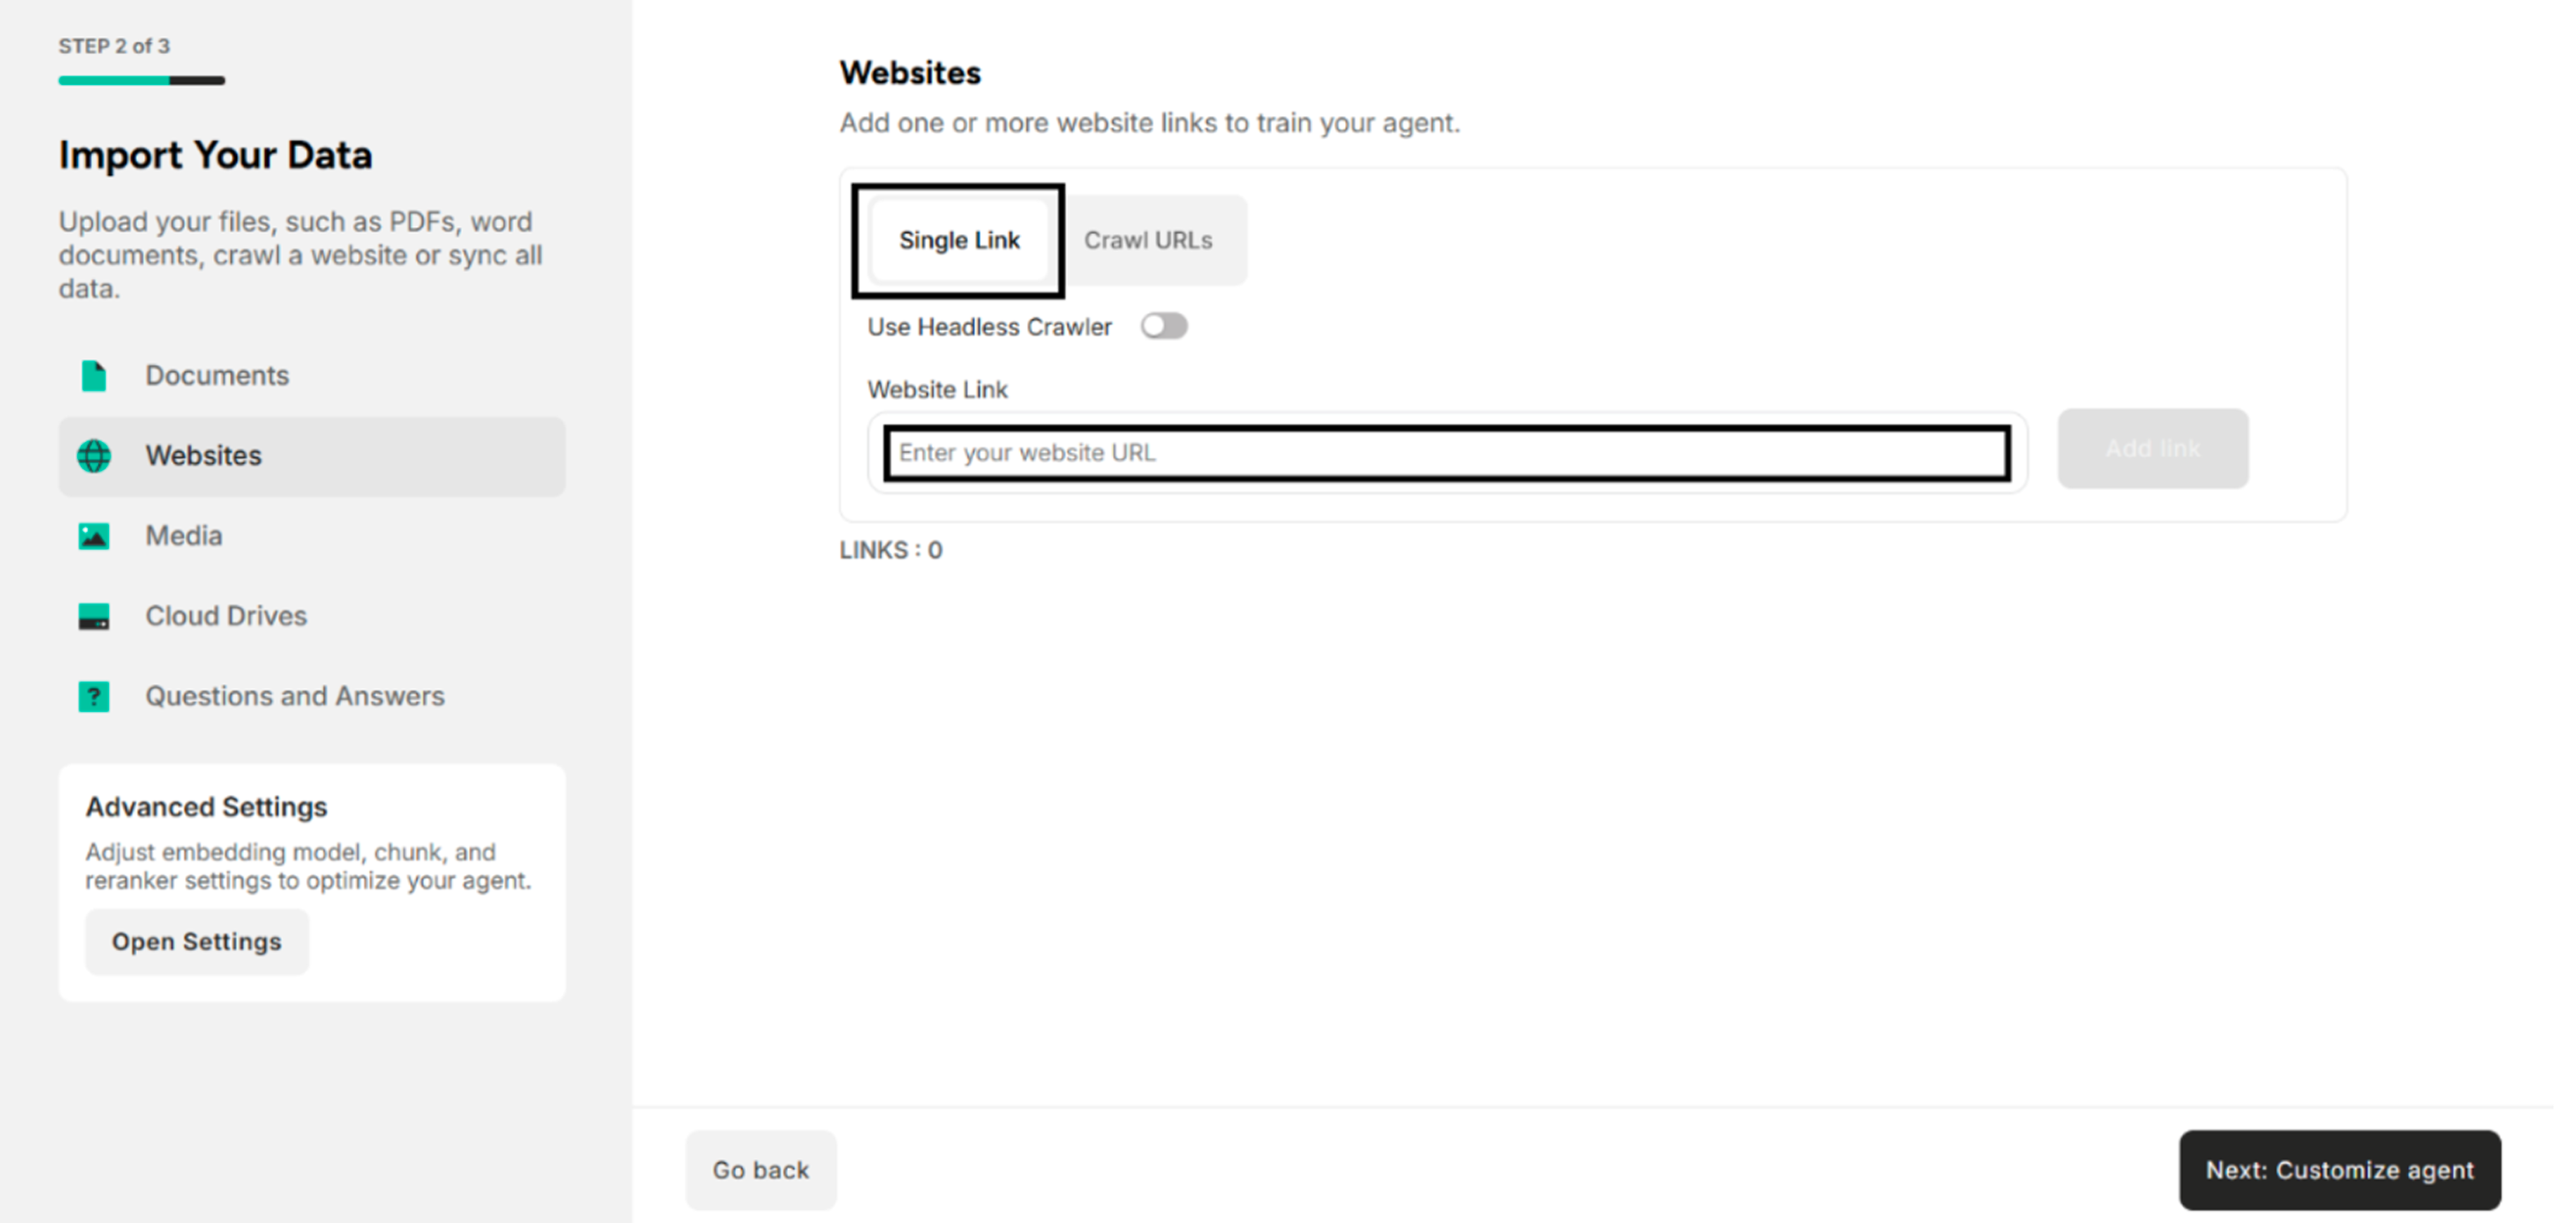
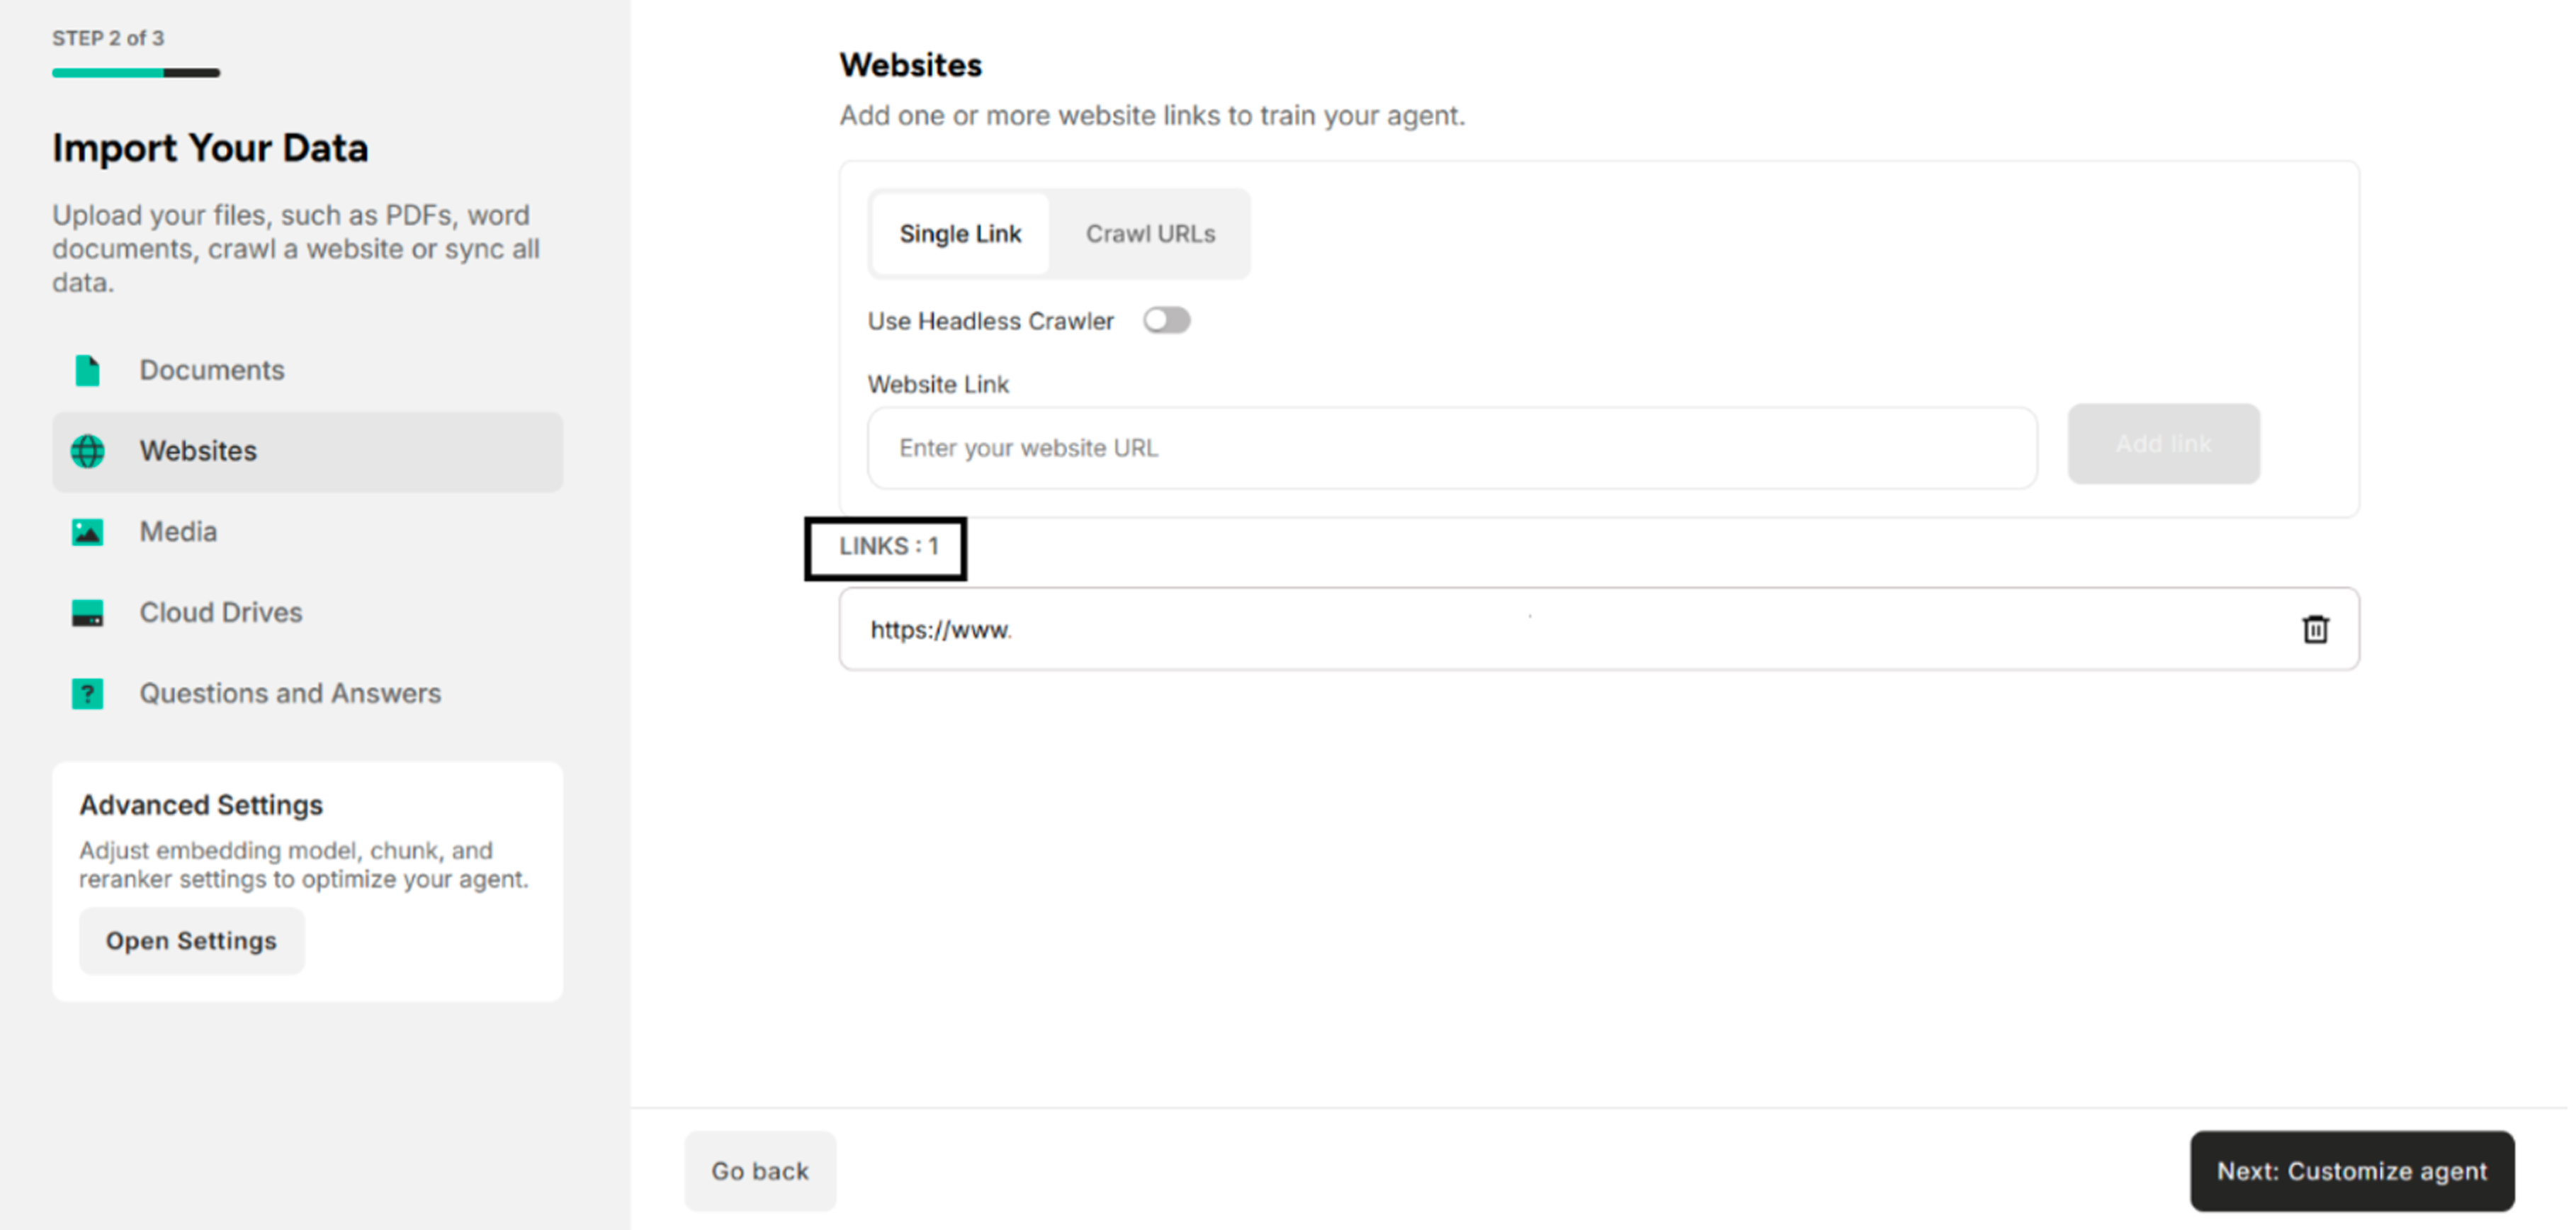
2.1. Create the Unstructured Agent by Adding the Website URL One by One
Step 1. Choose "Single Link" and click "Enter your website URL" under Website Link
Step 2. Enter the URLs link in the Input Box
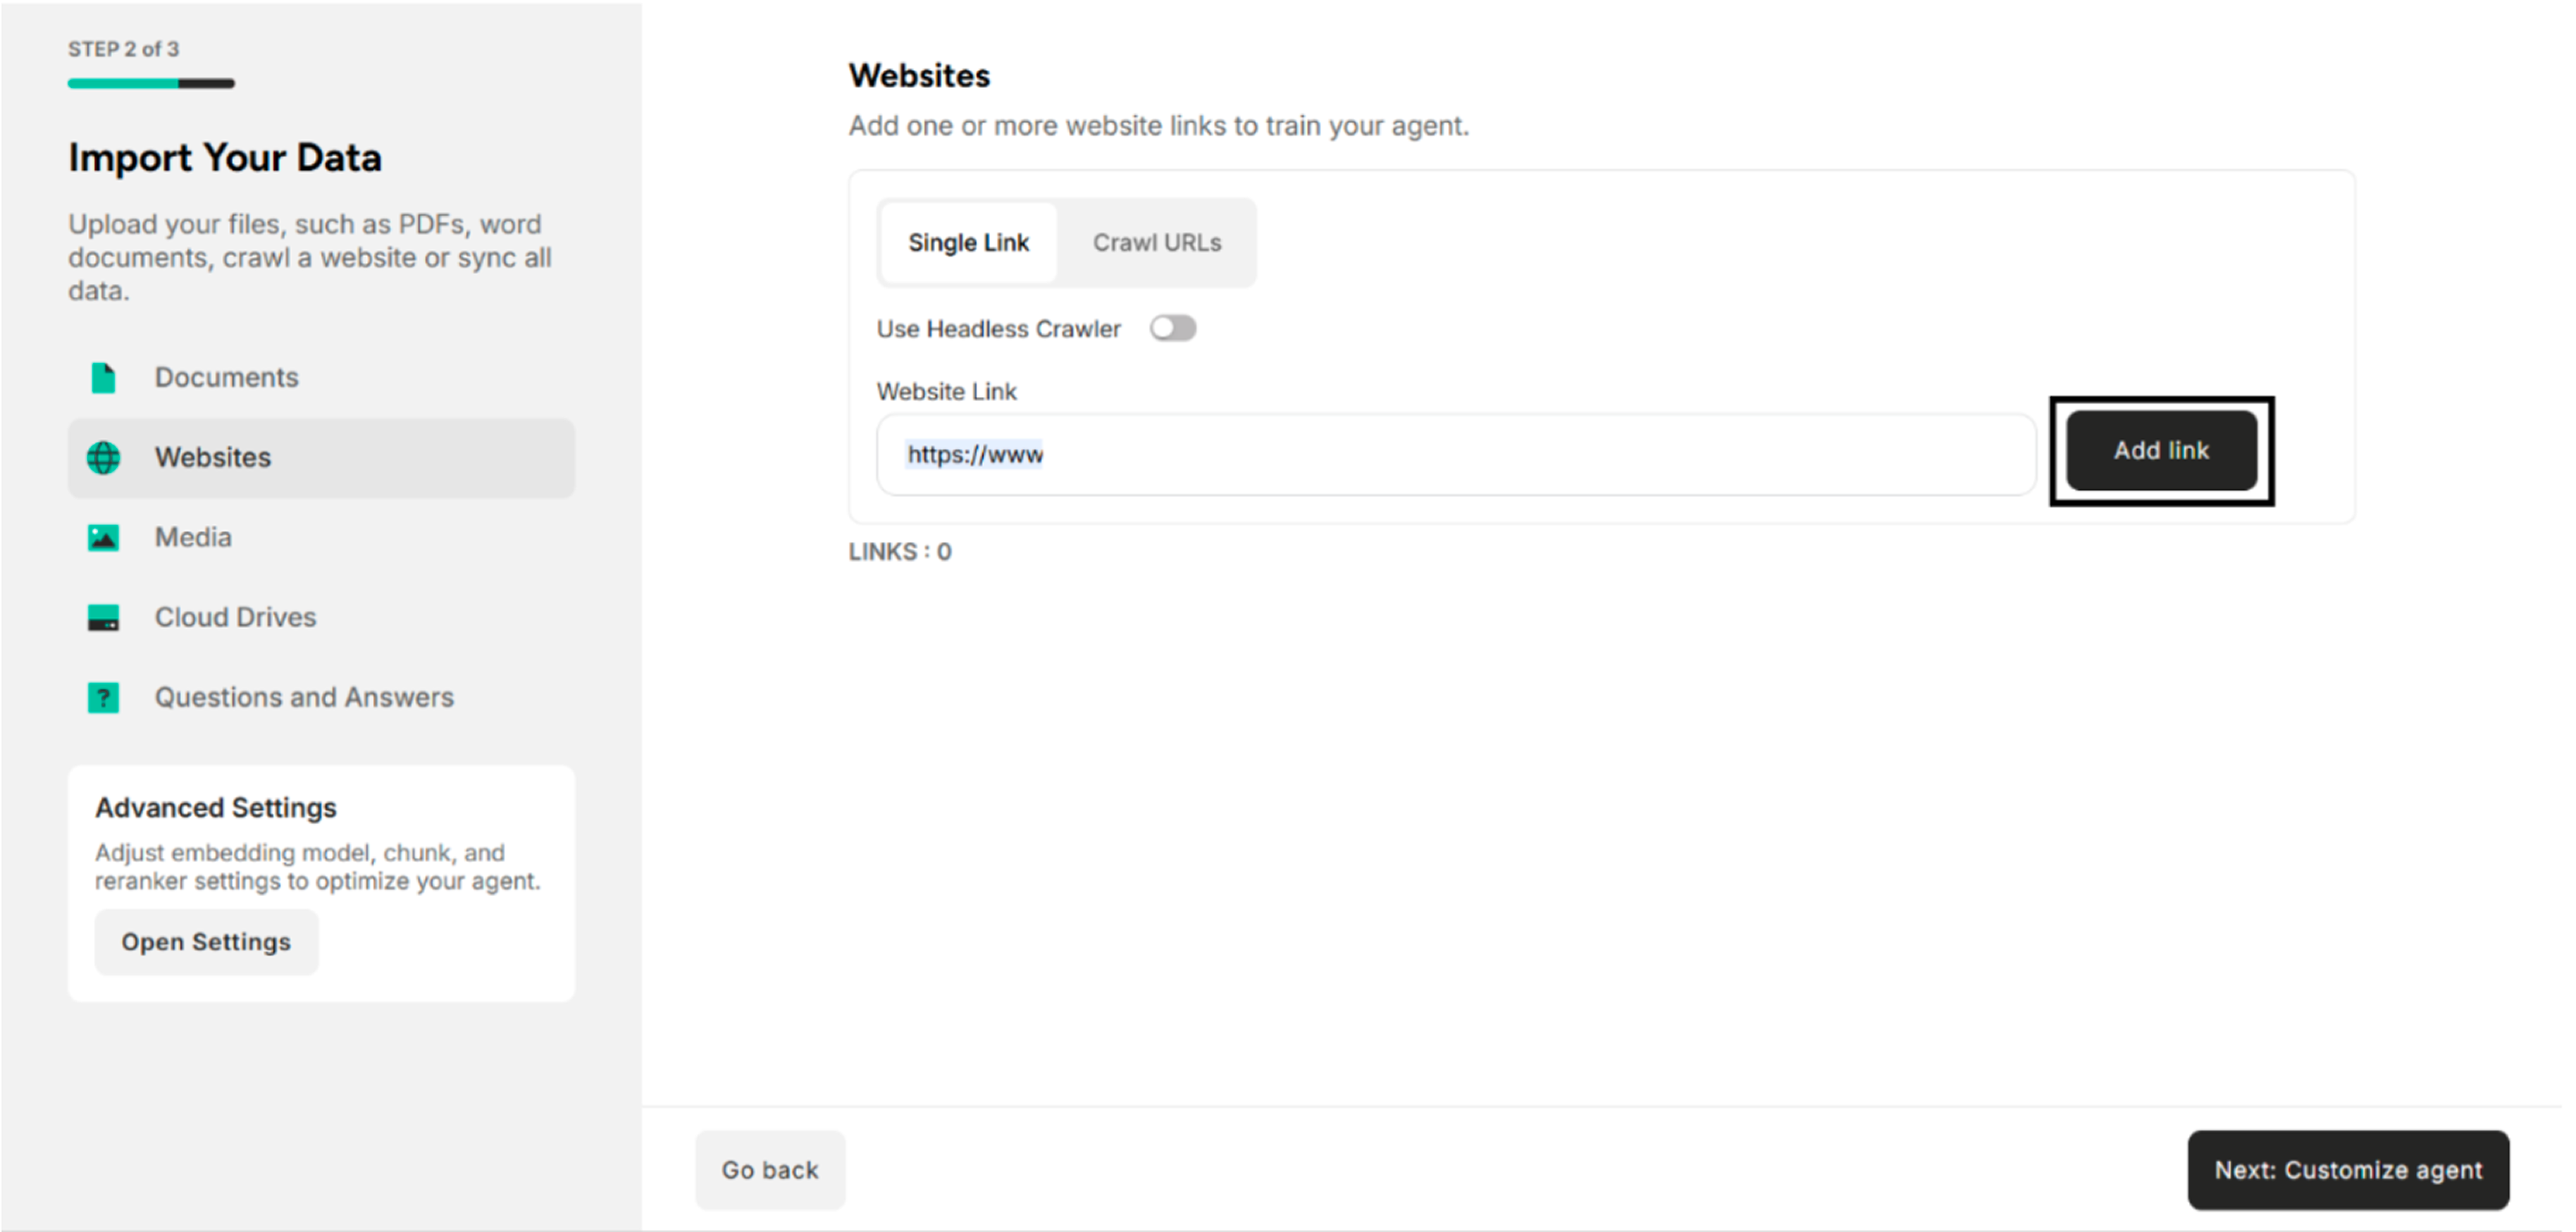
Step 3. Click "Add Link"
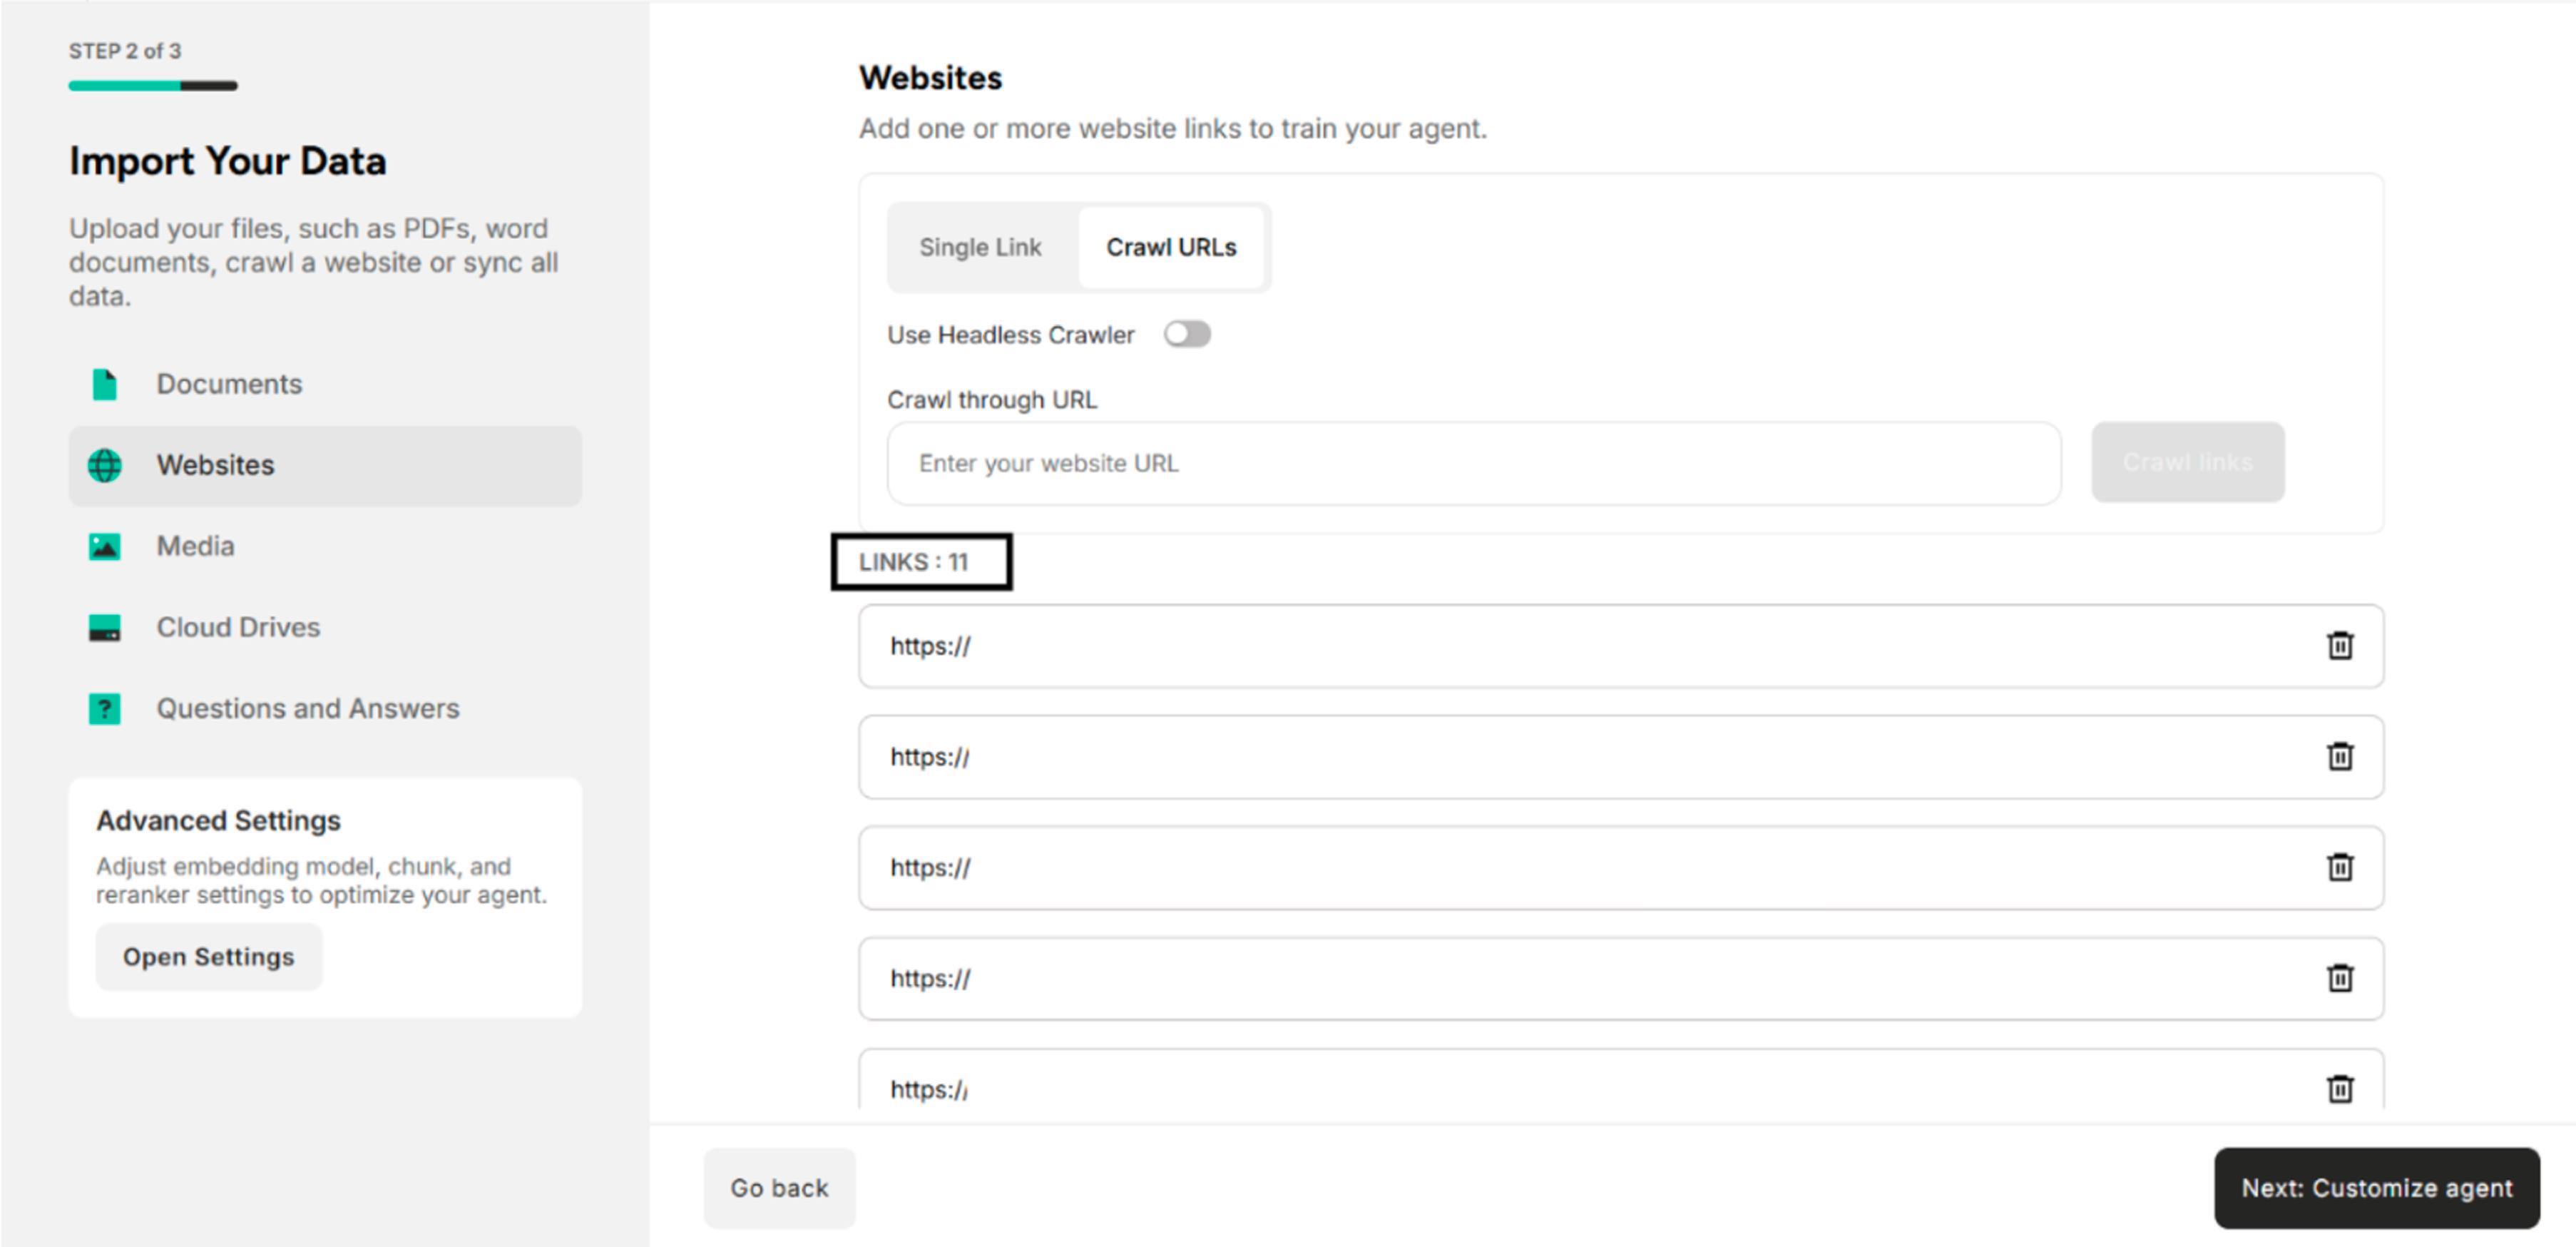
2.2. Create the Unstructured Agent by the Web Crawler (Crawl URLs)
In this section, there are two modes for users to choose between headless or non-headless mode before initiating a web crawl.
| Mode | Description |
|---|---|
| Headless Crawler | If headless mode is ON, the system will use crawl4ai. |
| Non-Headless Crawler | If headless mode is OFF, the system will use Cheerio for crawling. |
Step 1. Choose "Crawl URLs" and click "Enter your Website URL" under Crawl through URL
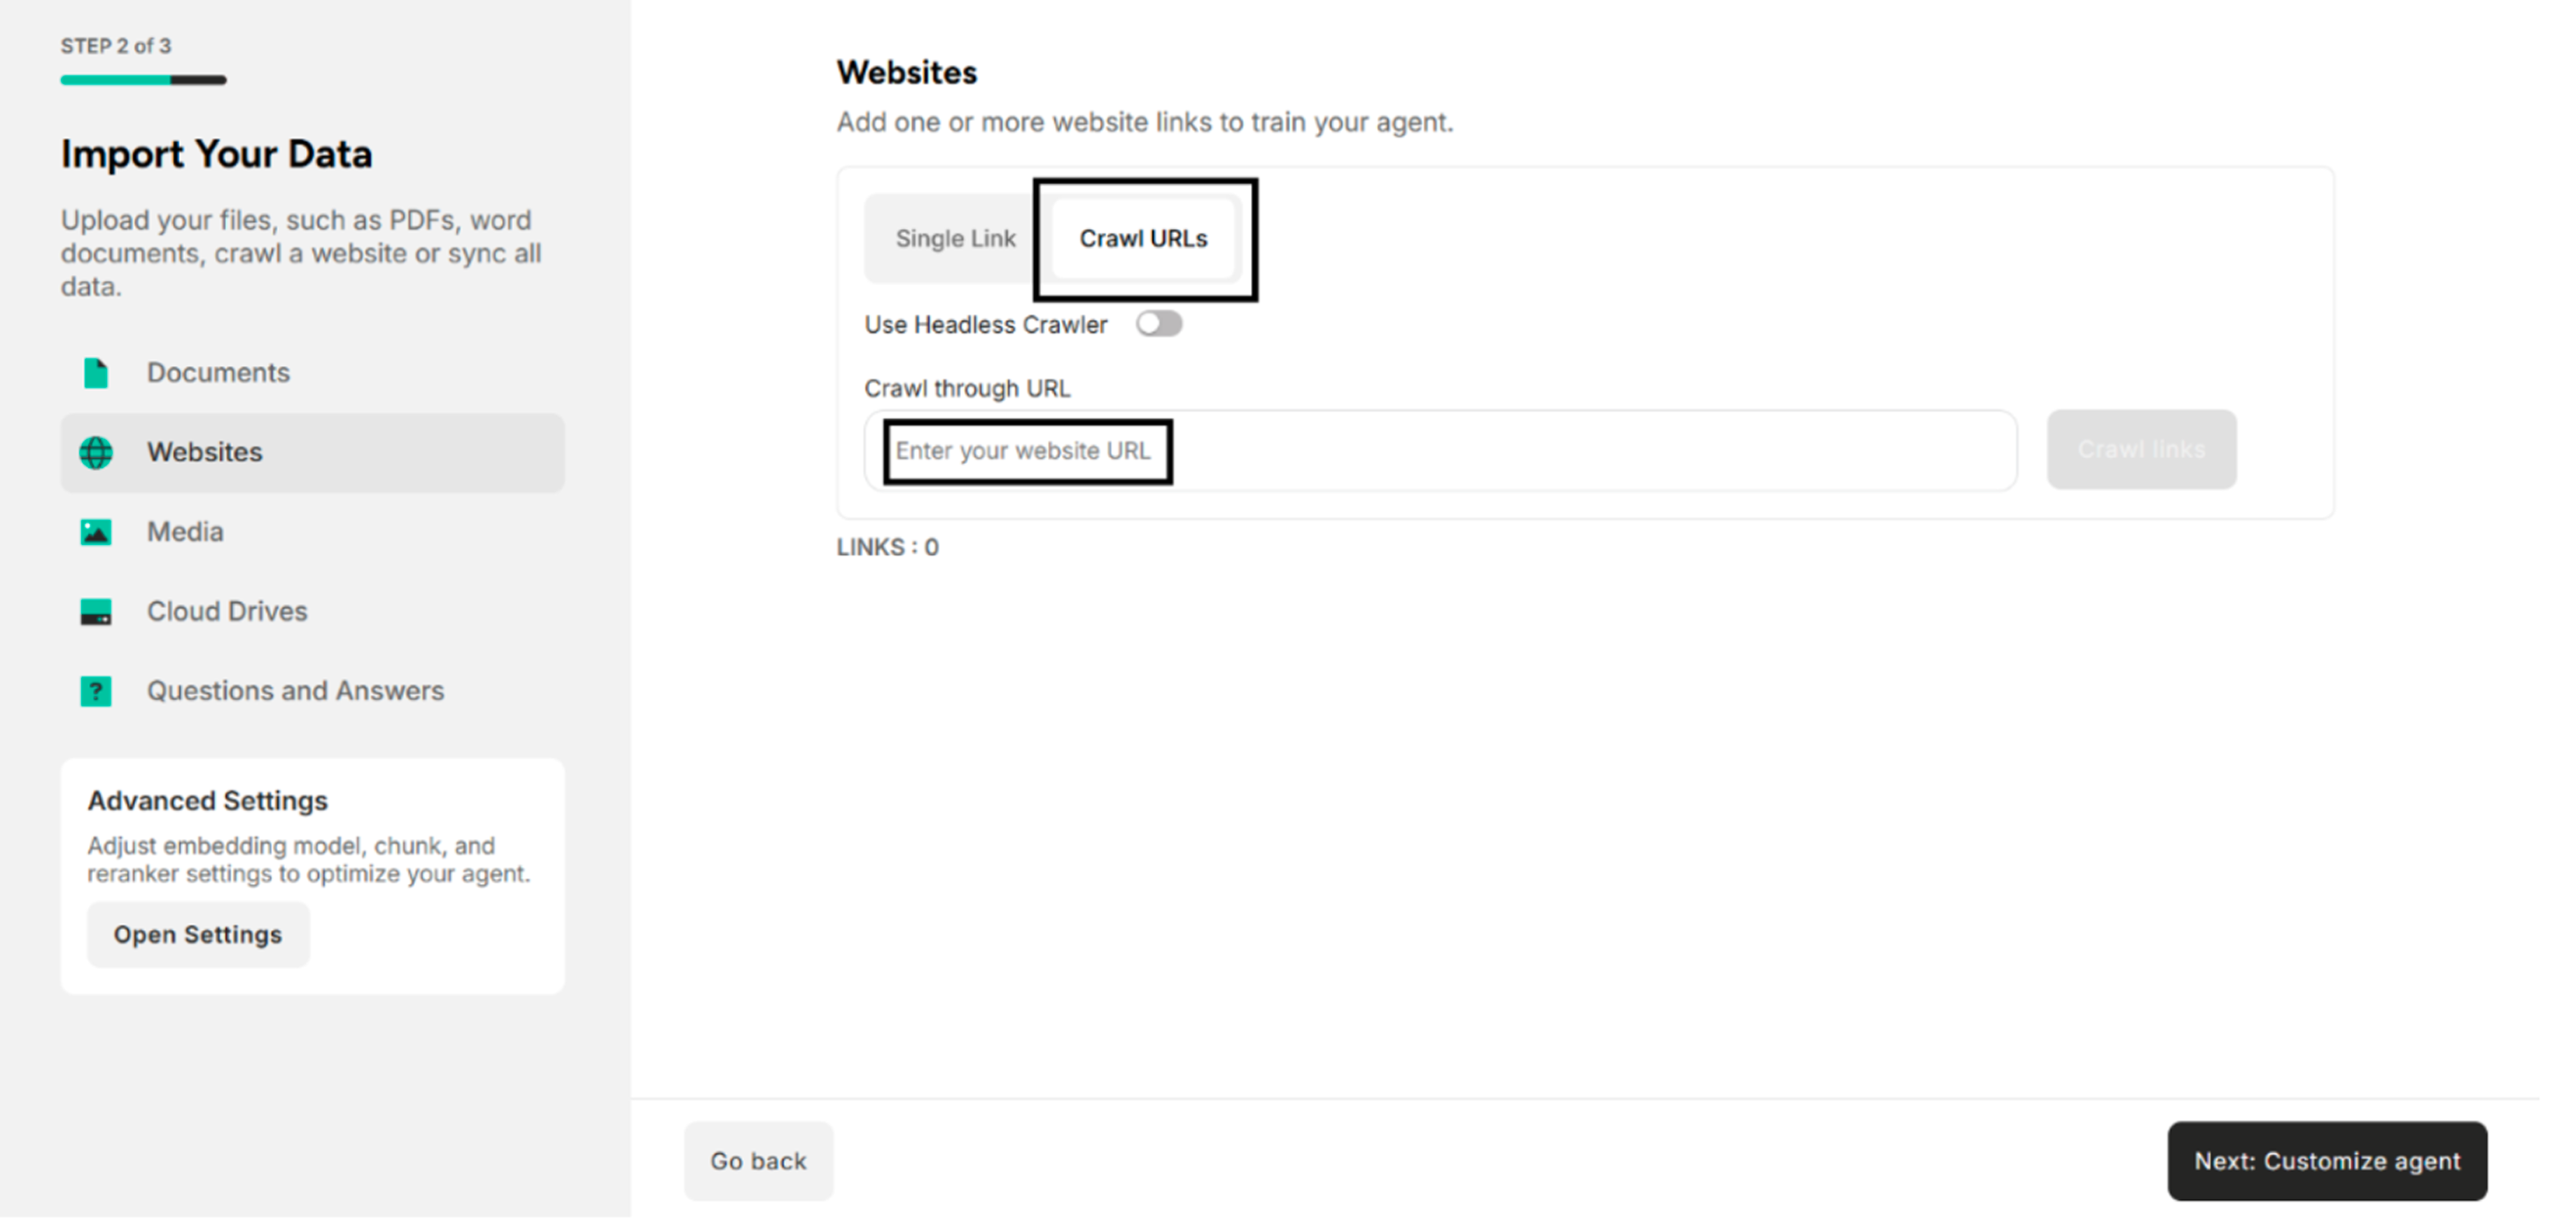
Step 2. Enter the URL link to be crawled under Crawl through URL
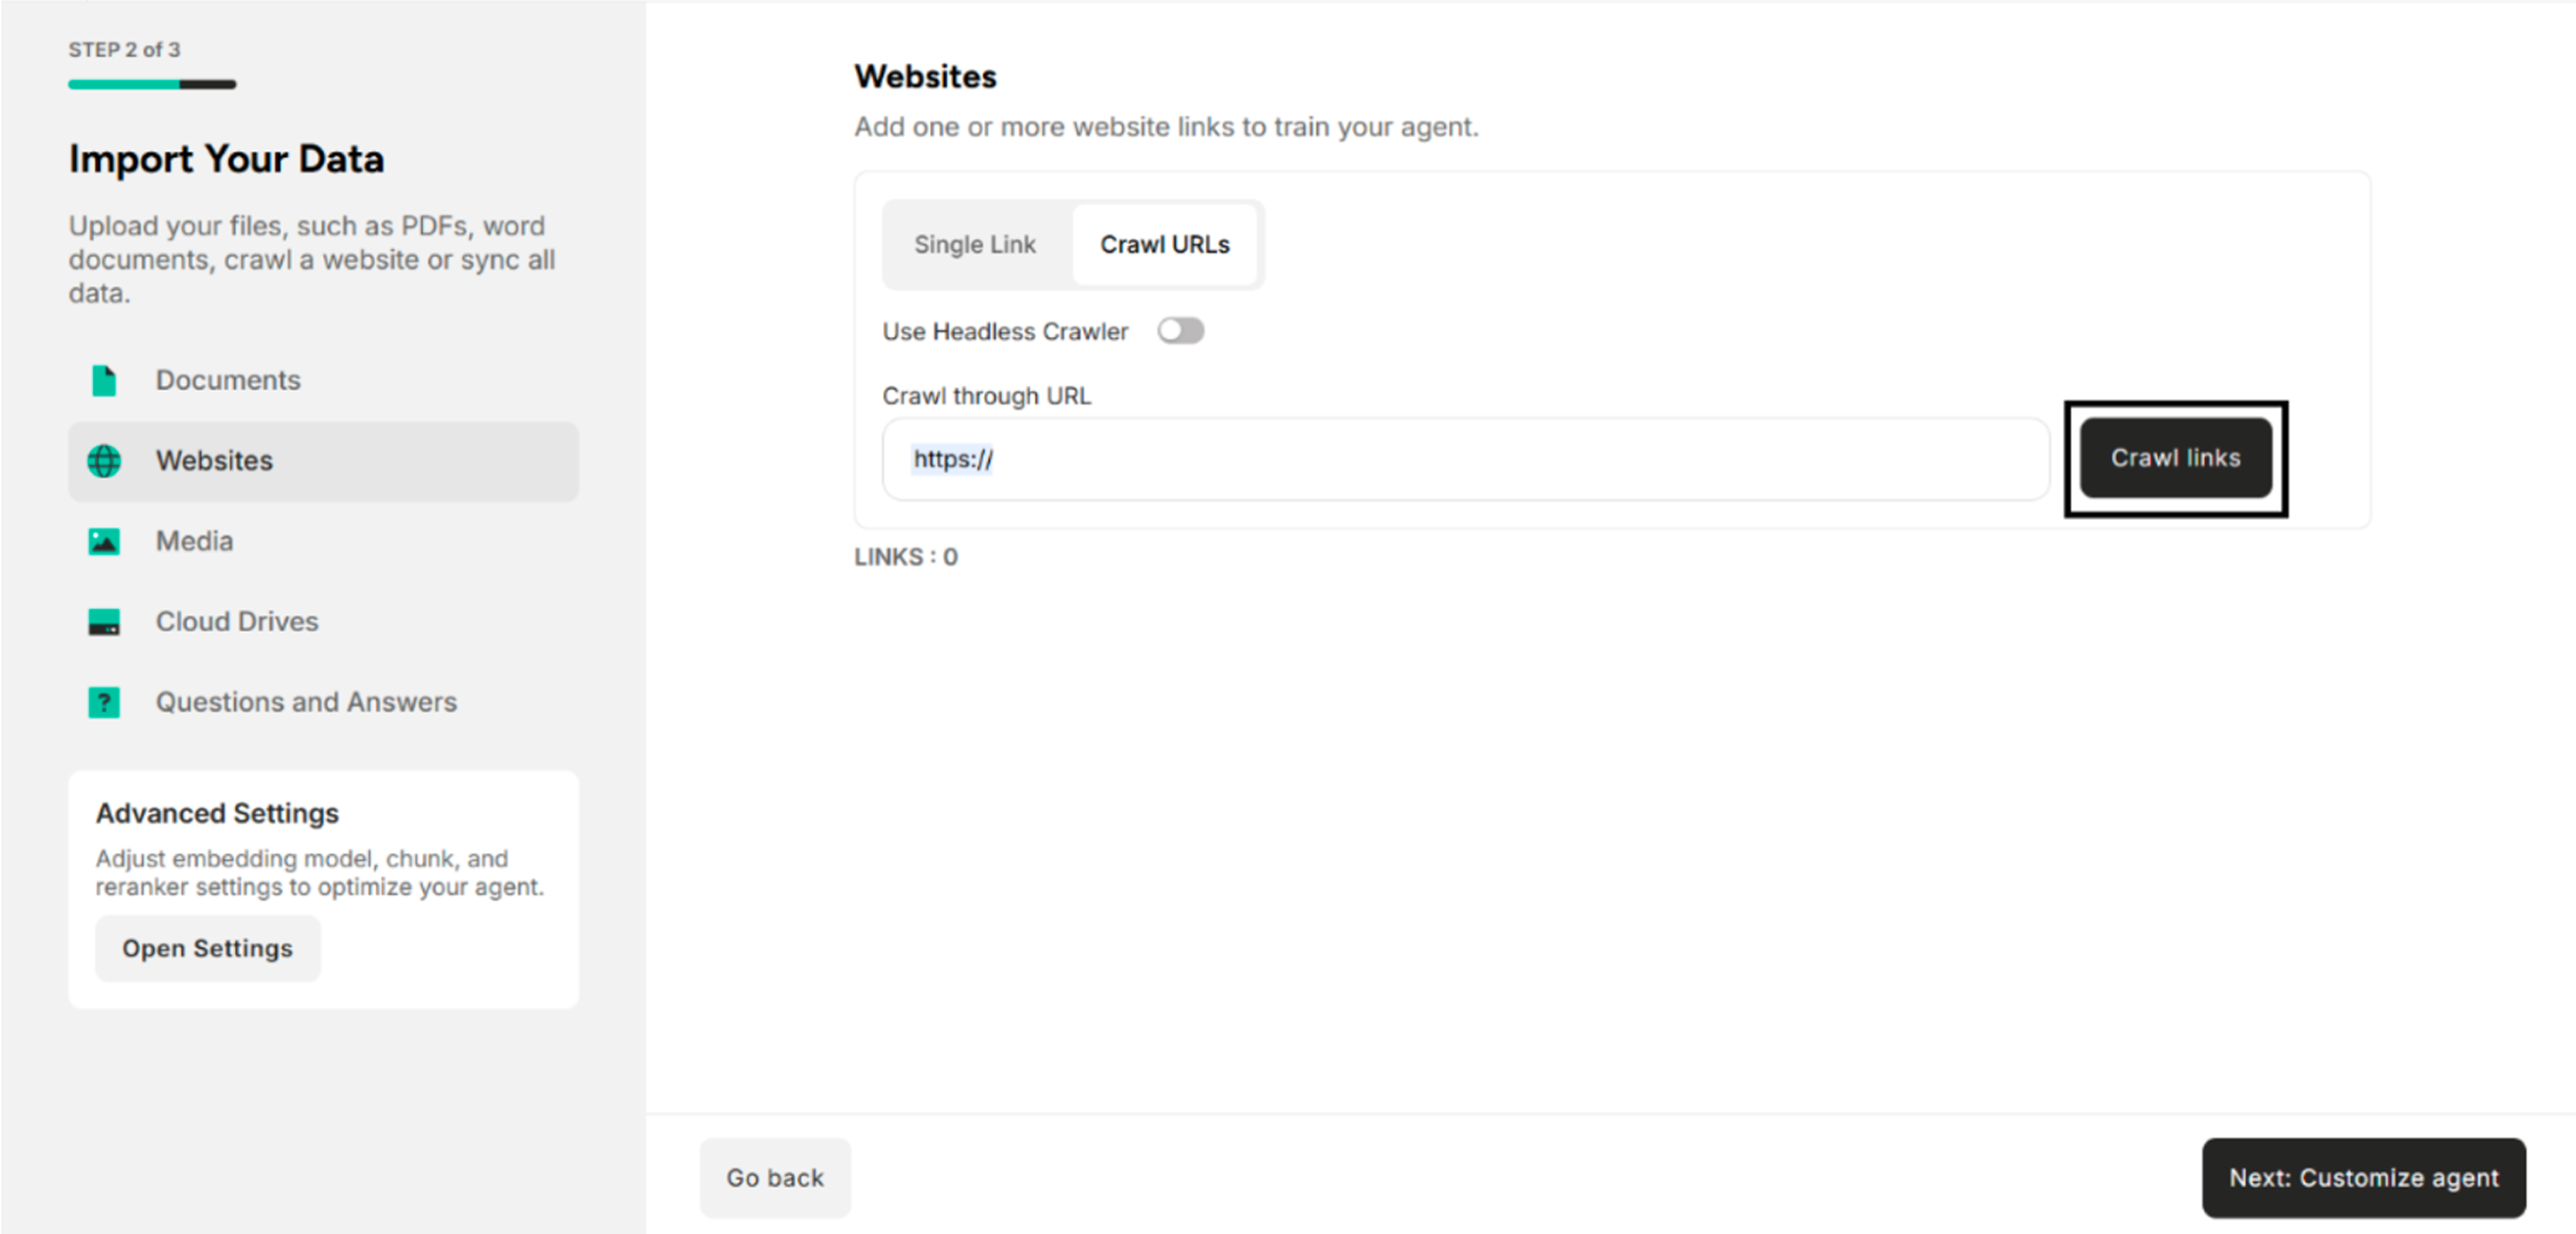
Step 3. Click "Crawl Links" in Websites Section
| Button | Description |
|---|---|
| Cancel | Cancel the crawled URLs |
| Confirm Links | Confirm the crawled links in the Confirmation box |
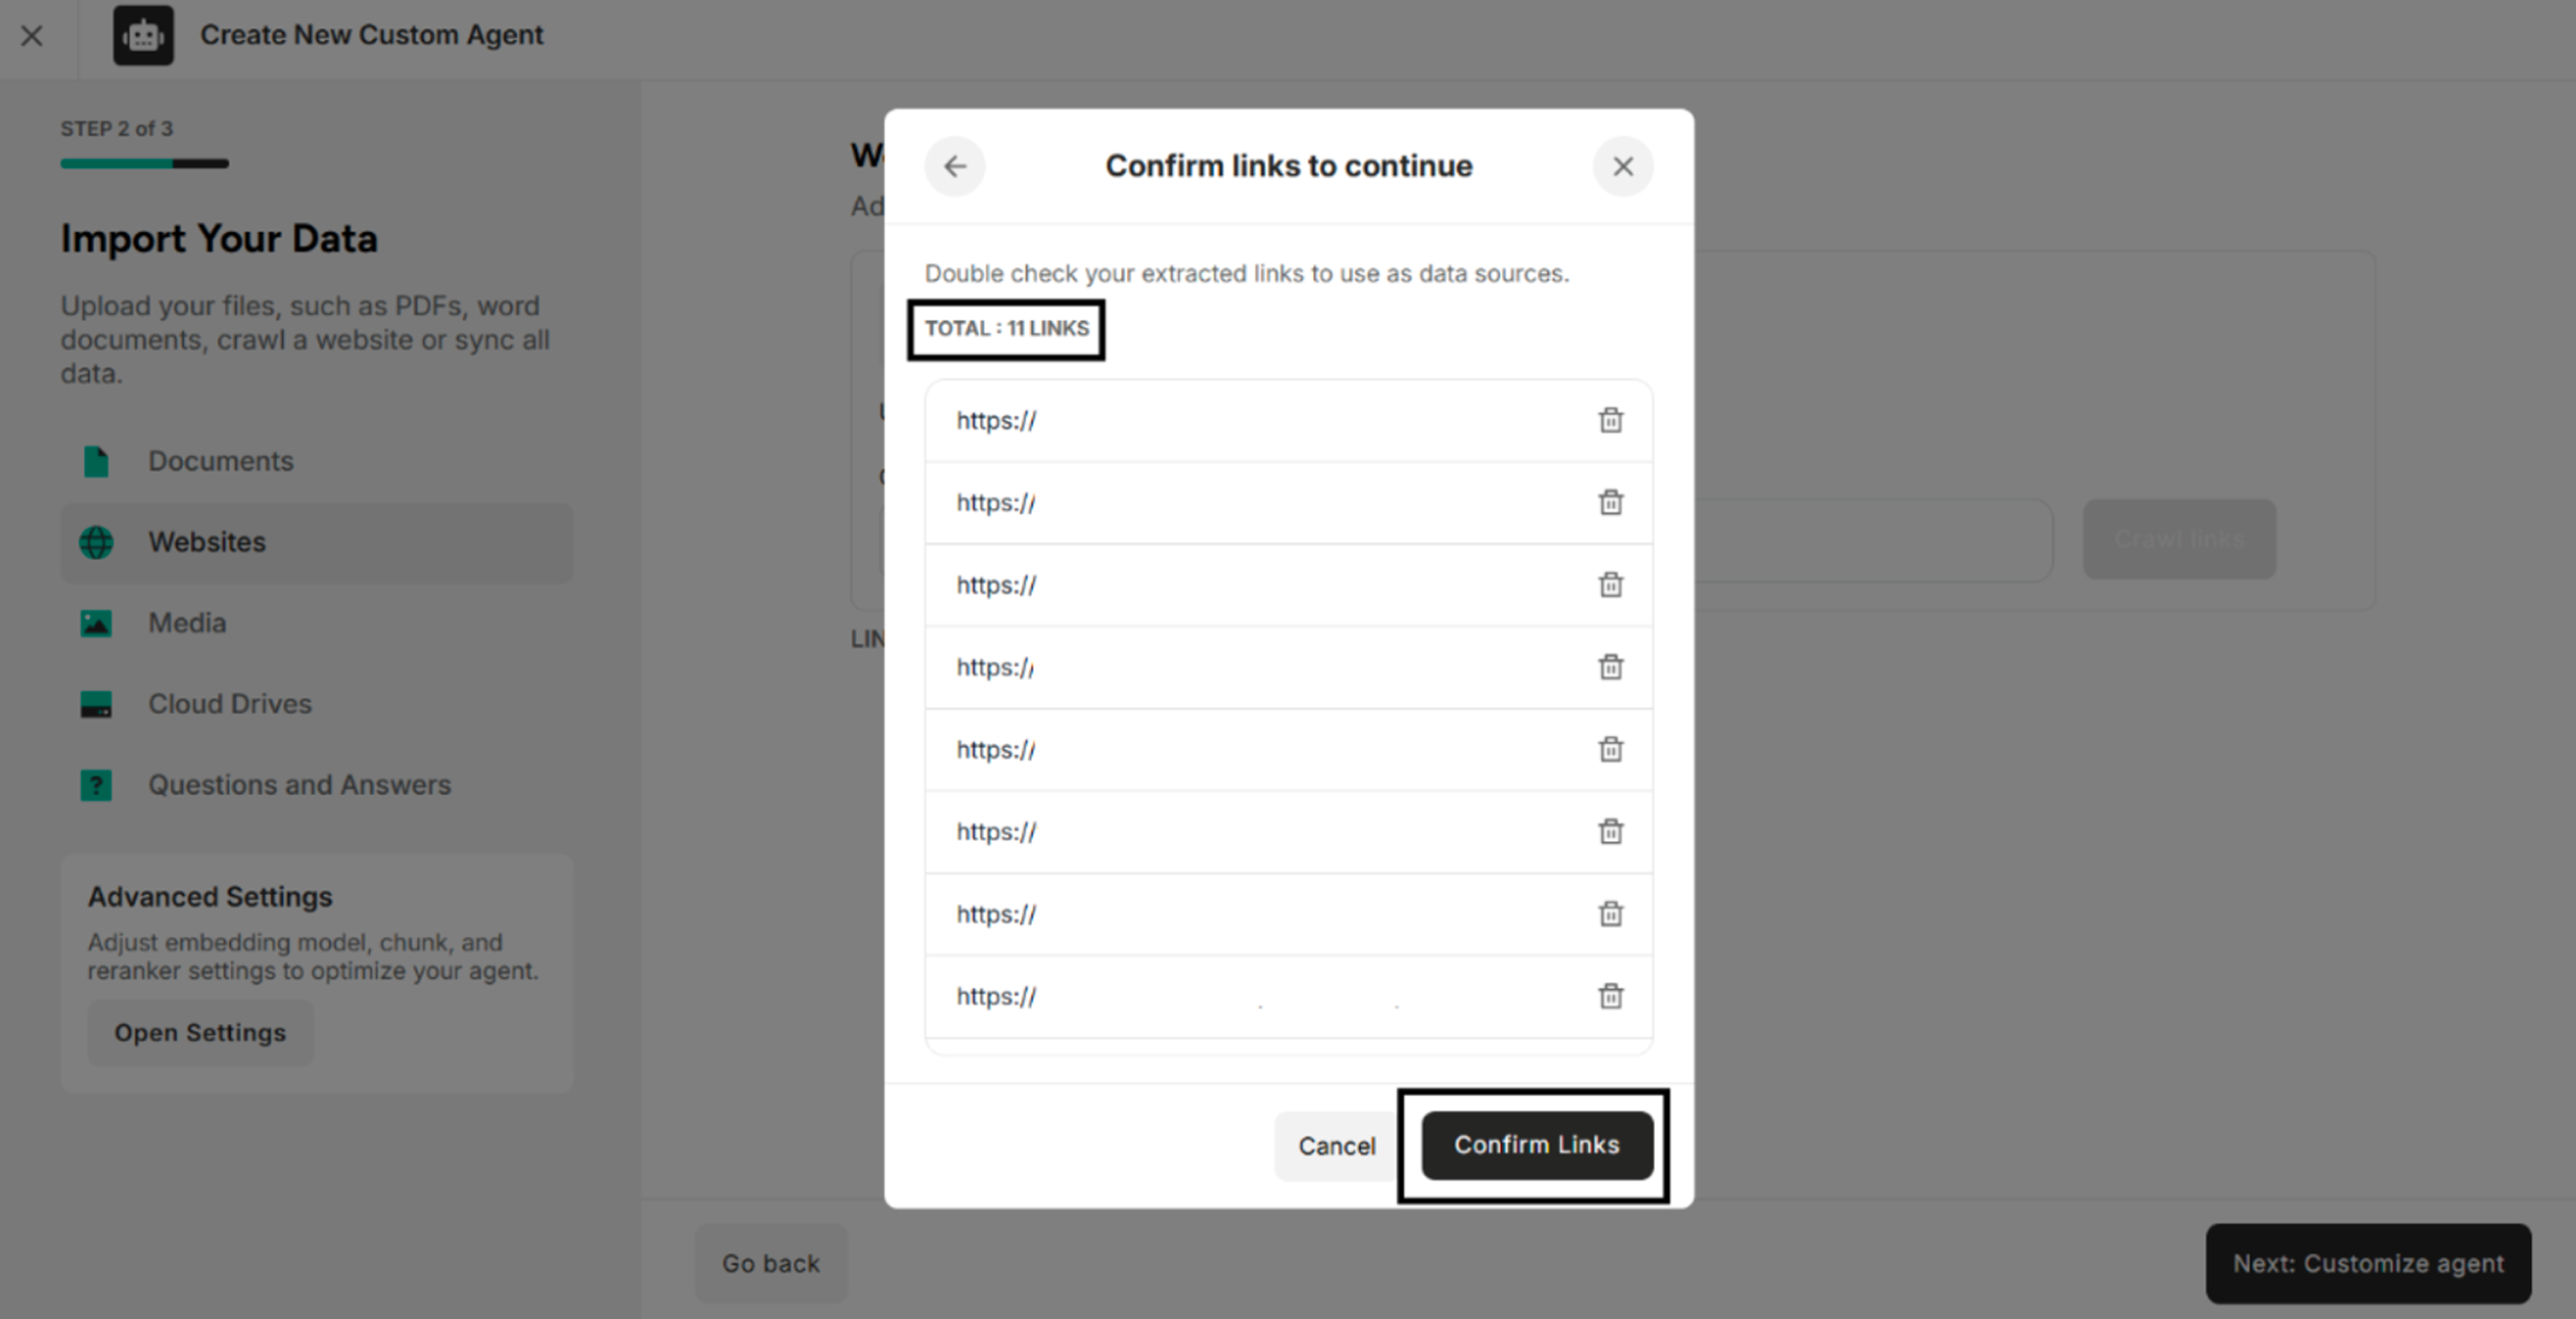
Step 4. Click "Confirm Links" in the Confirmation Pop-up Box
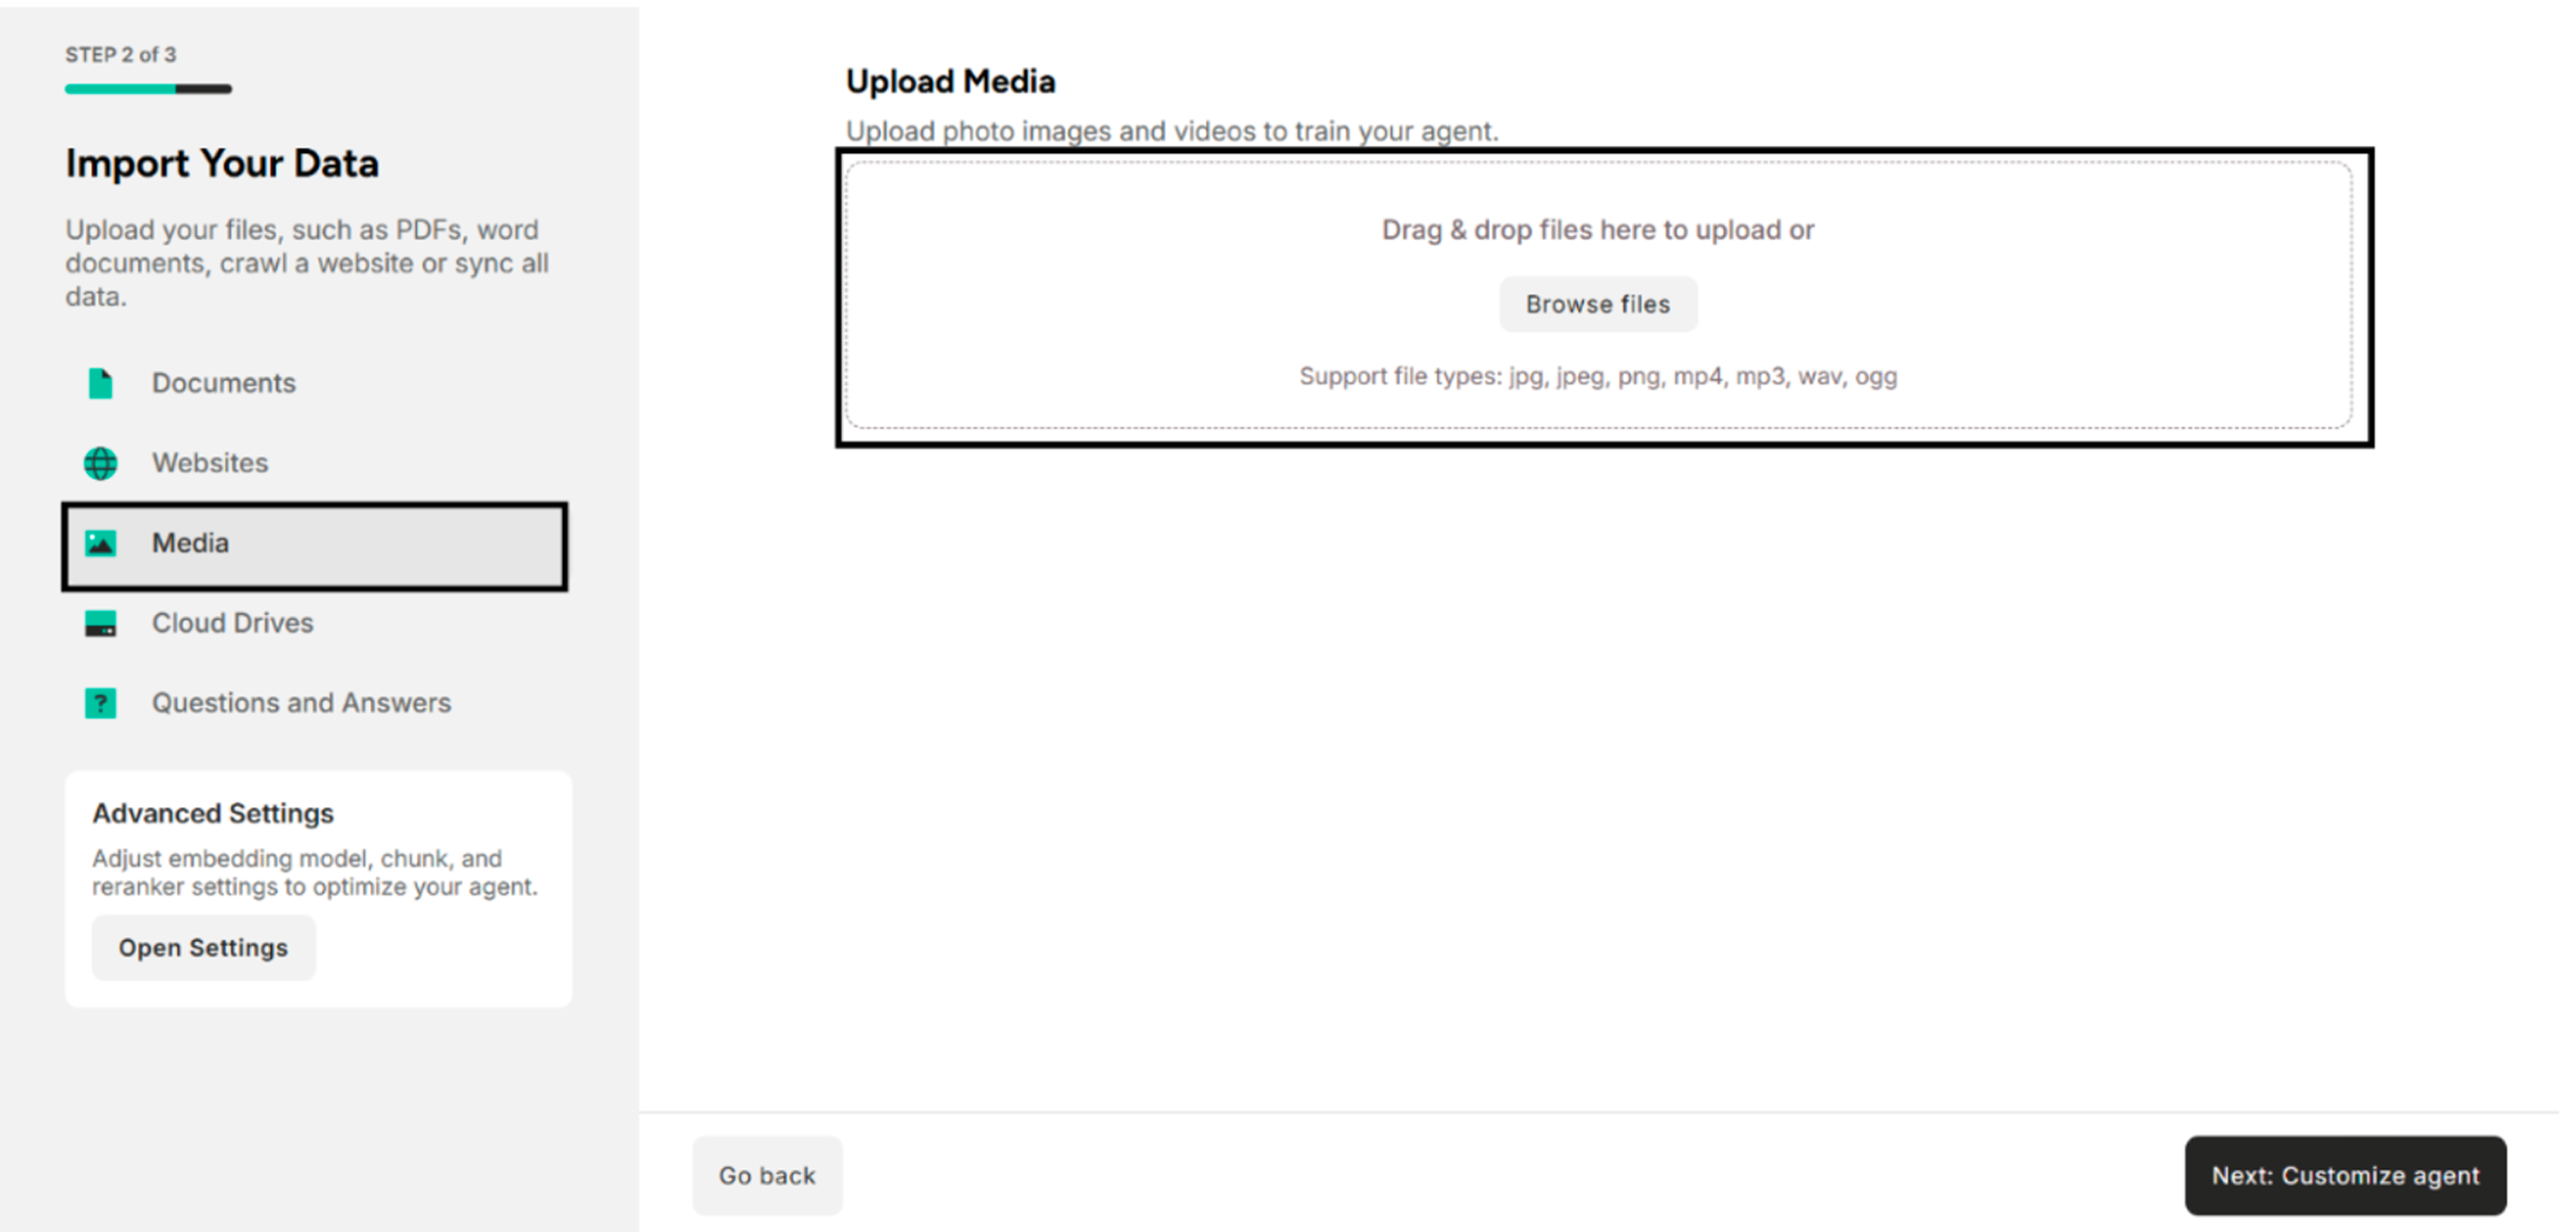
3. Import Data from Media
| Field | Description |
|---|---|
| Upload Media | Drag and drop local photo files or browse files. The supported photo file types are jpg, jpeg, png, mp4, mp3, wav, ogg. |
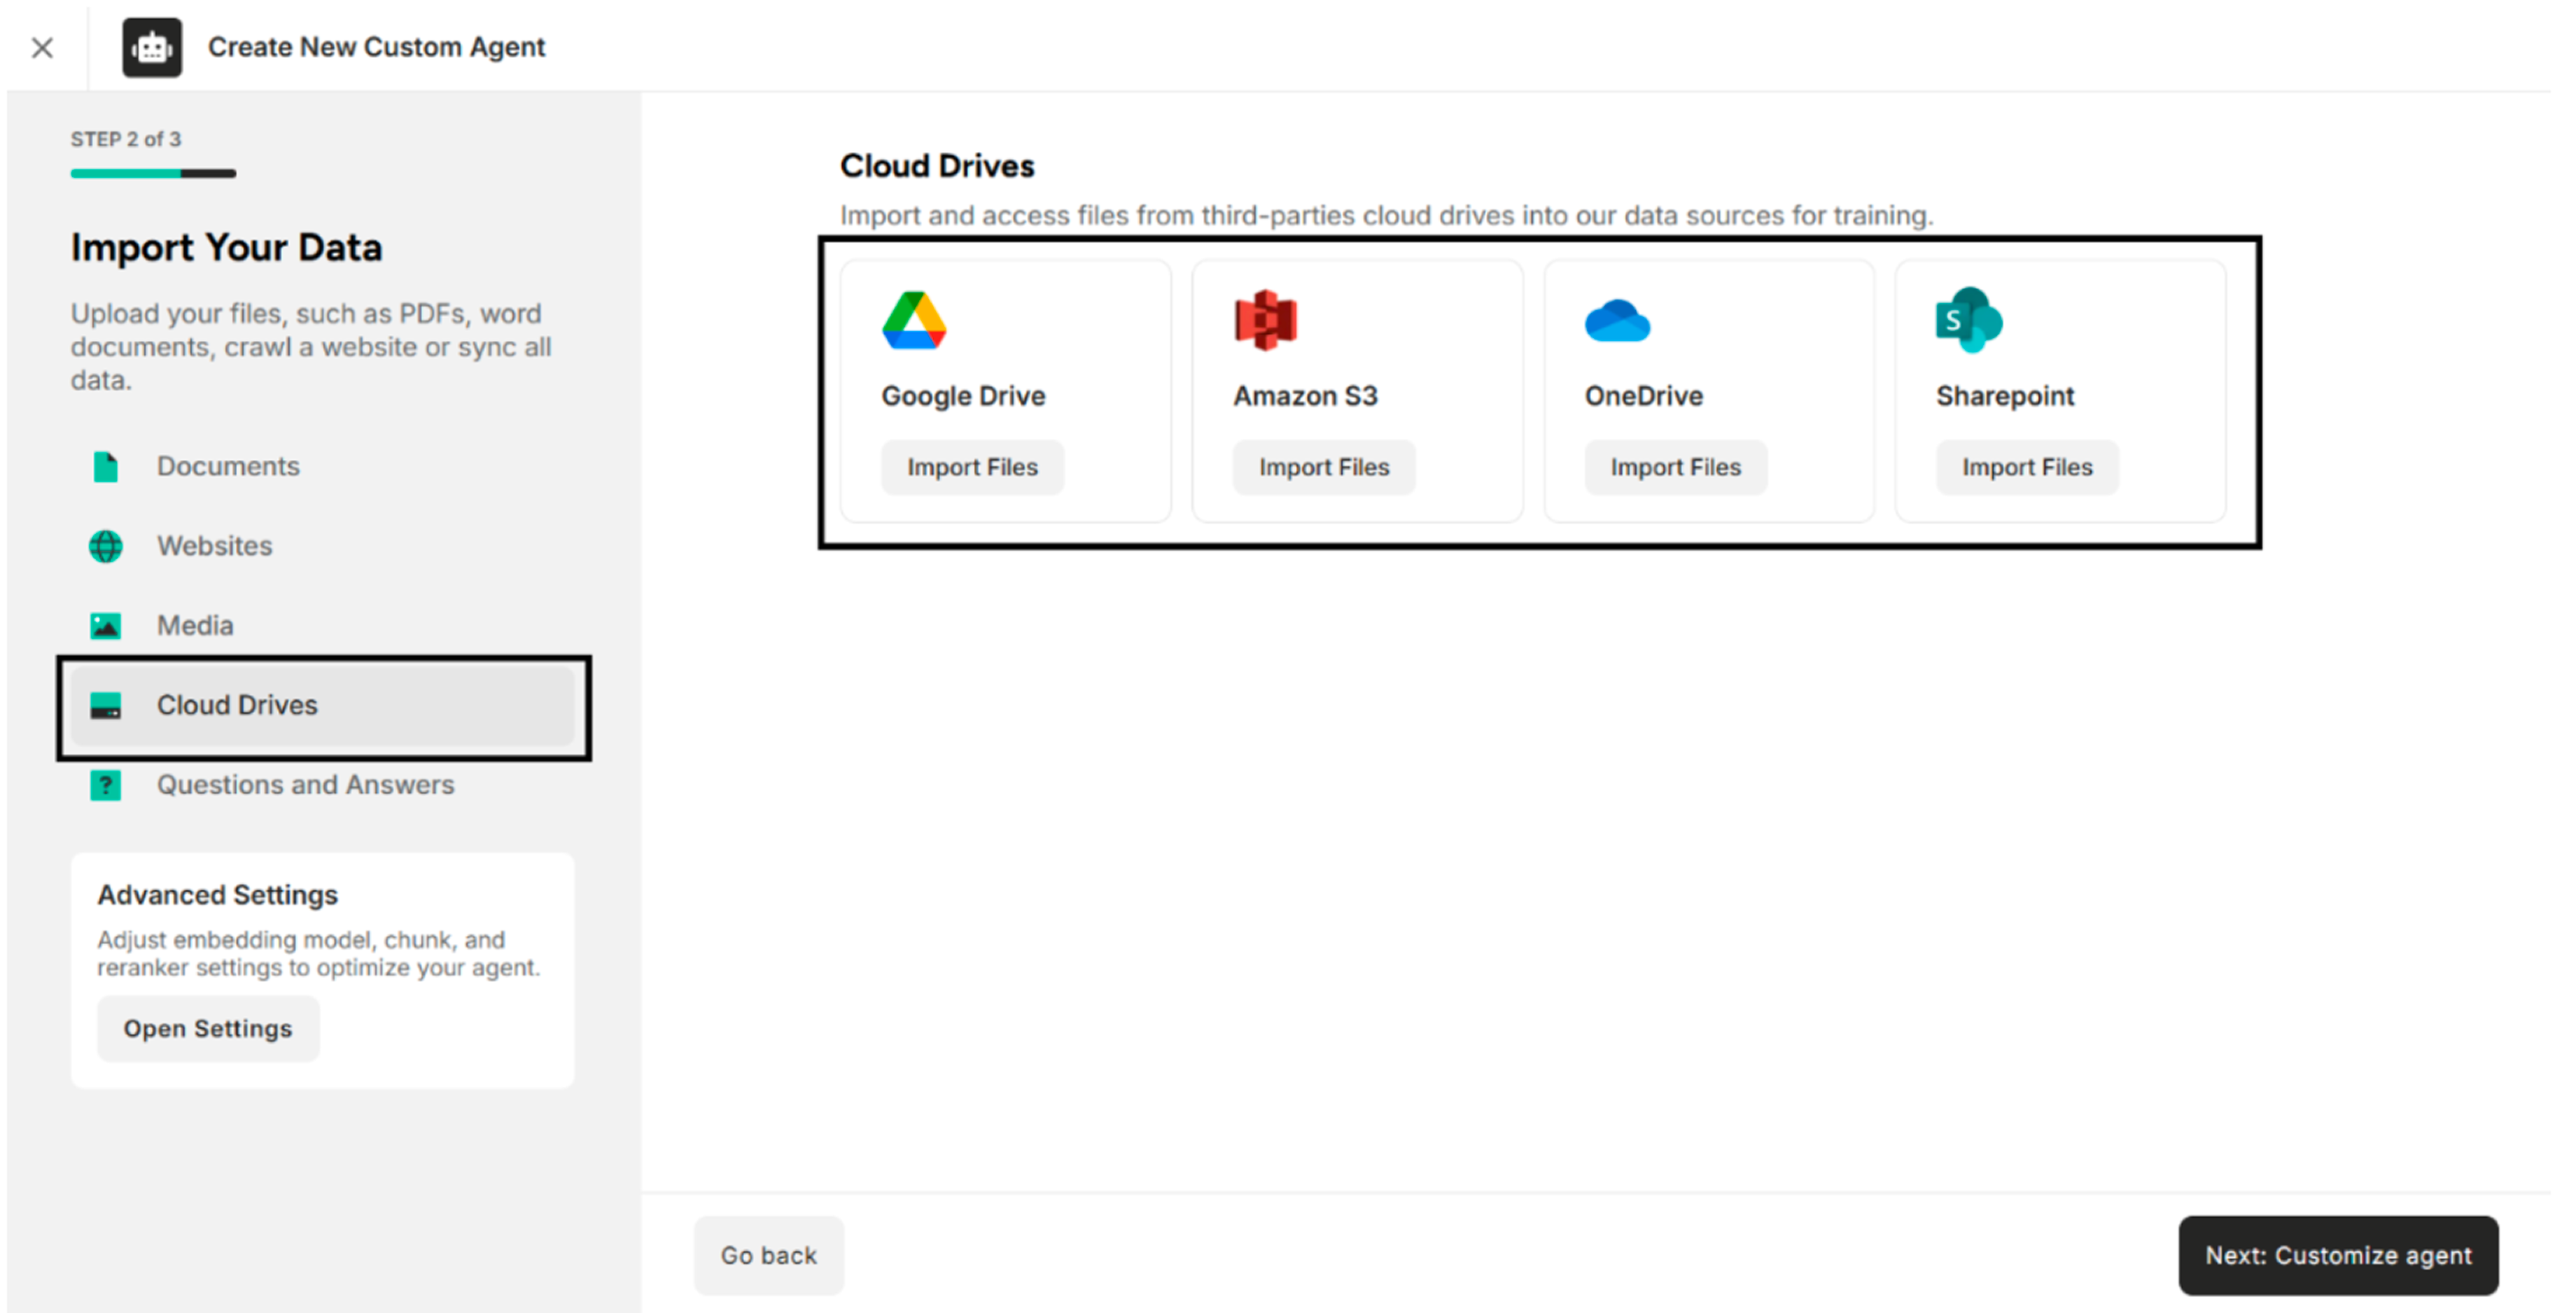
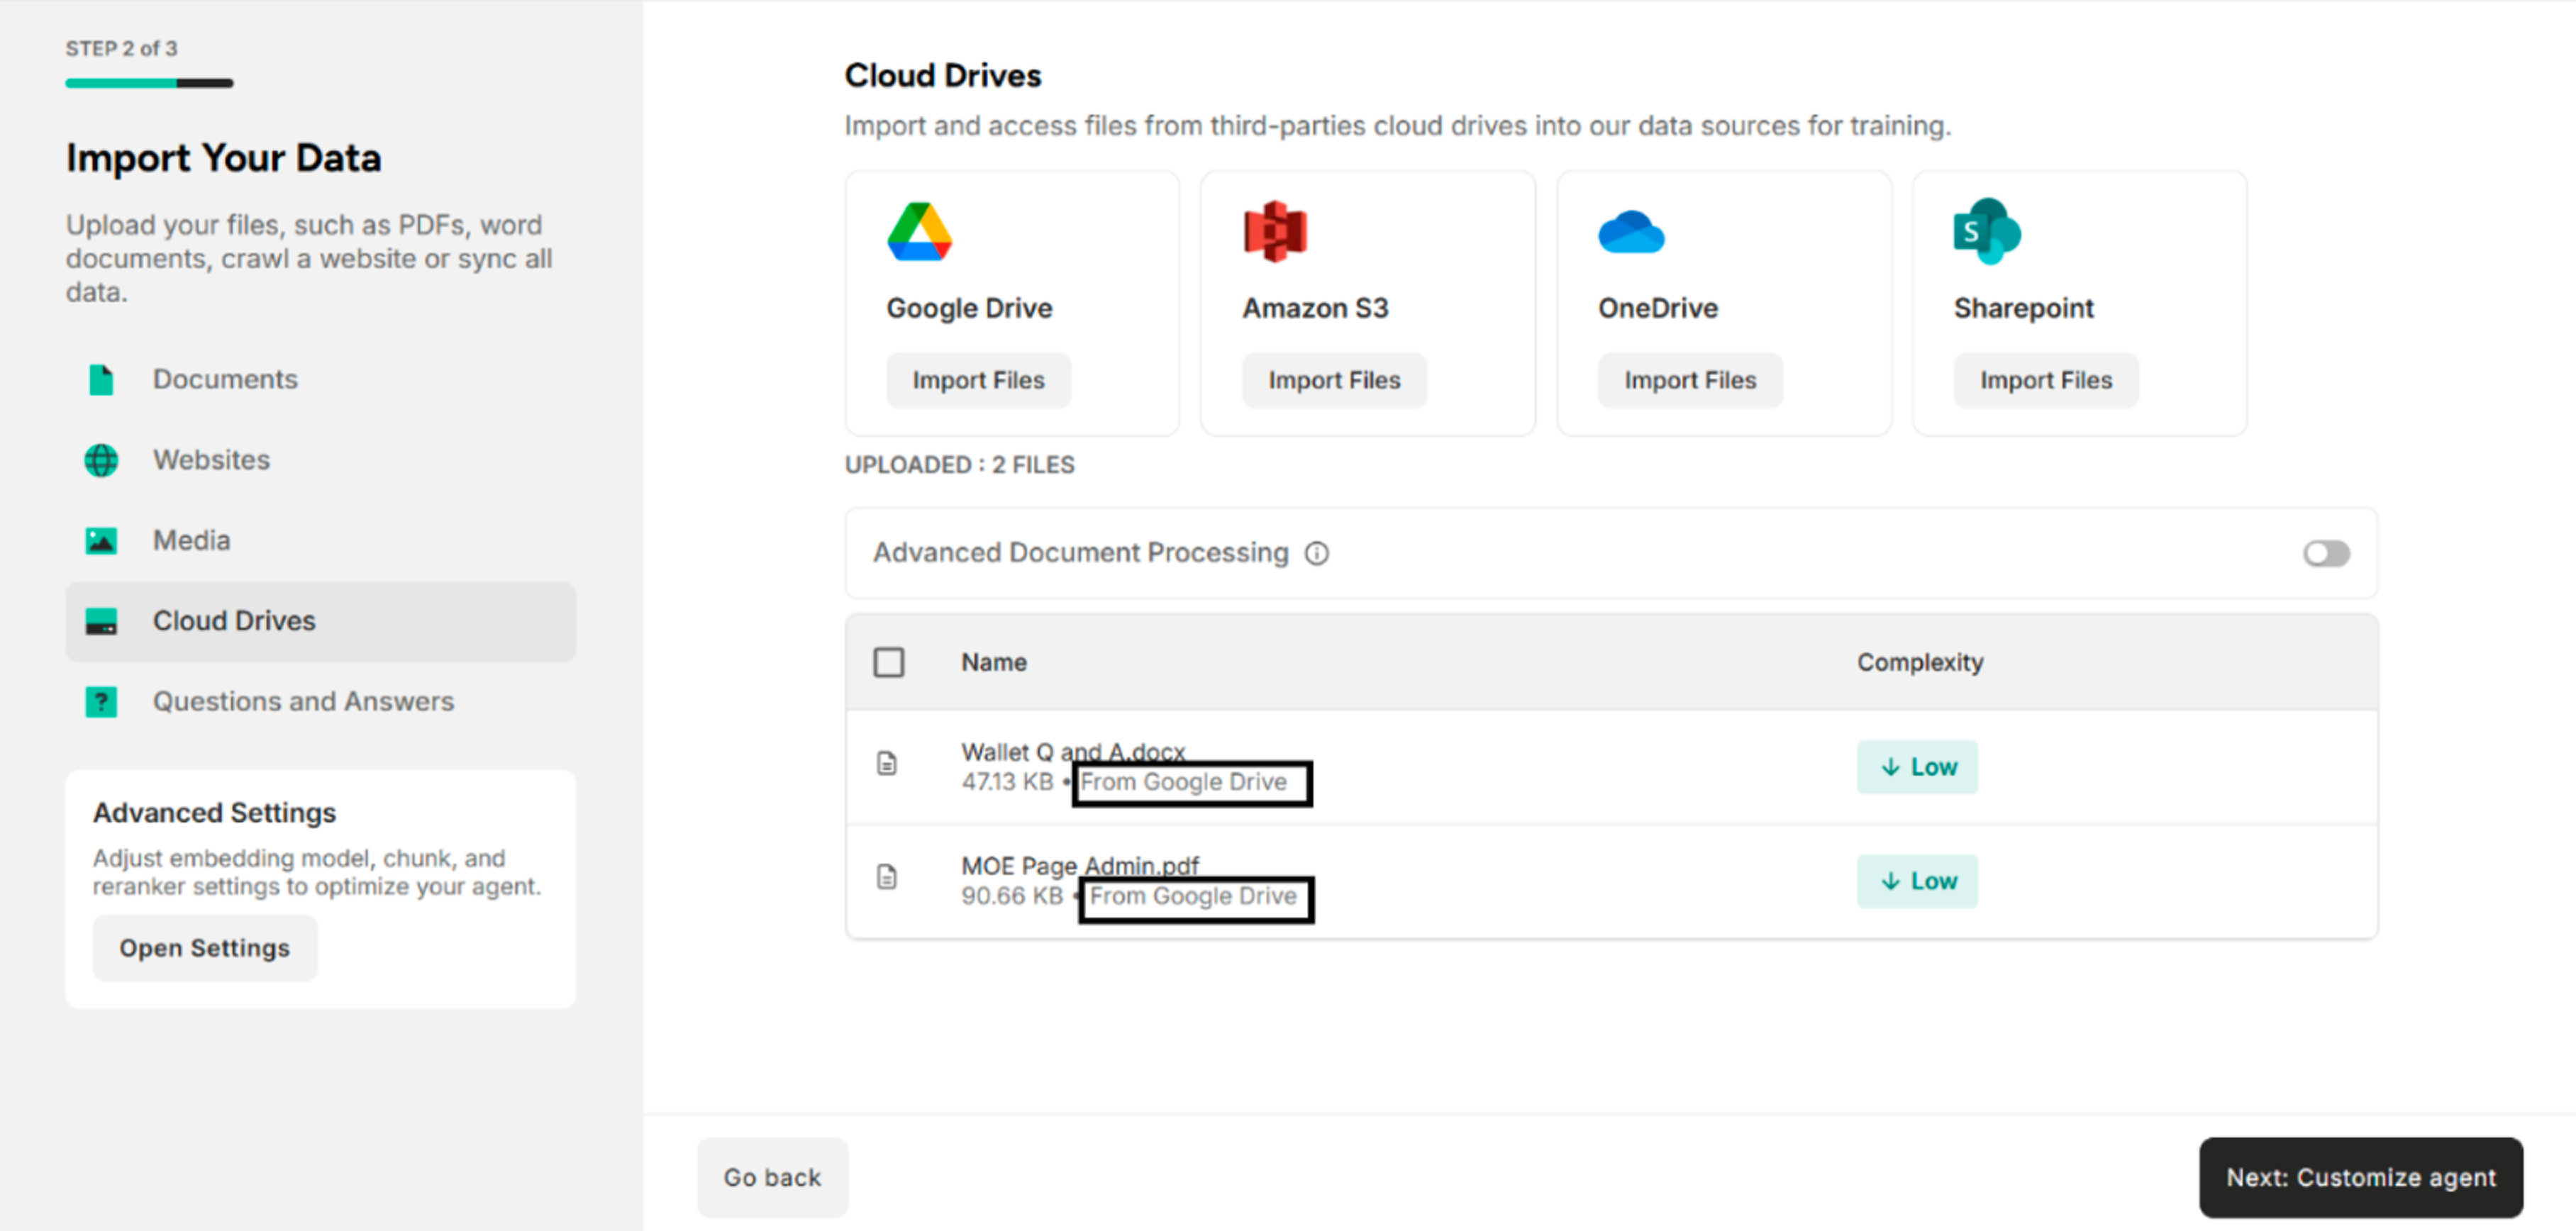
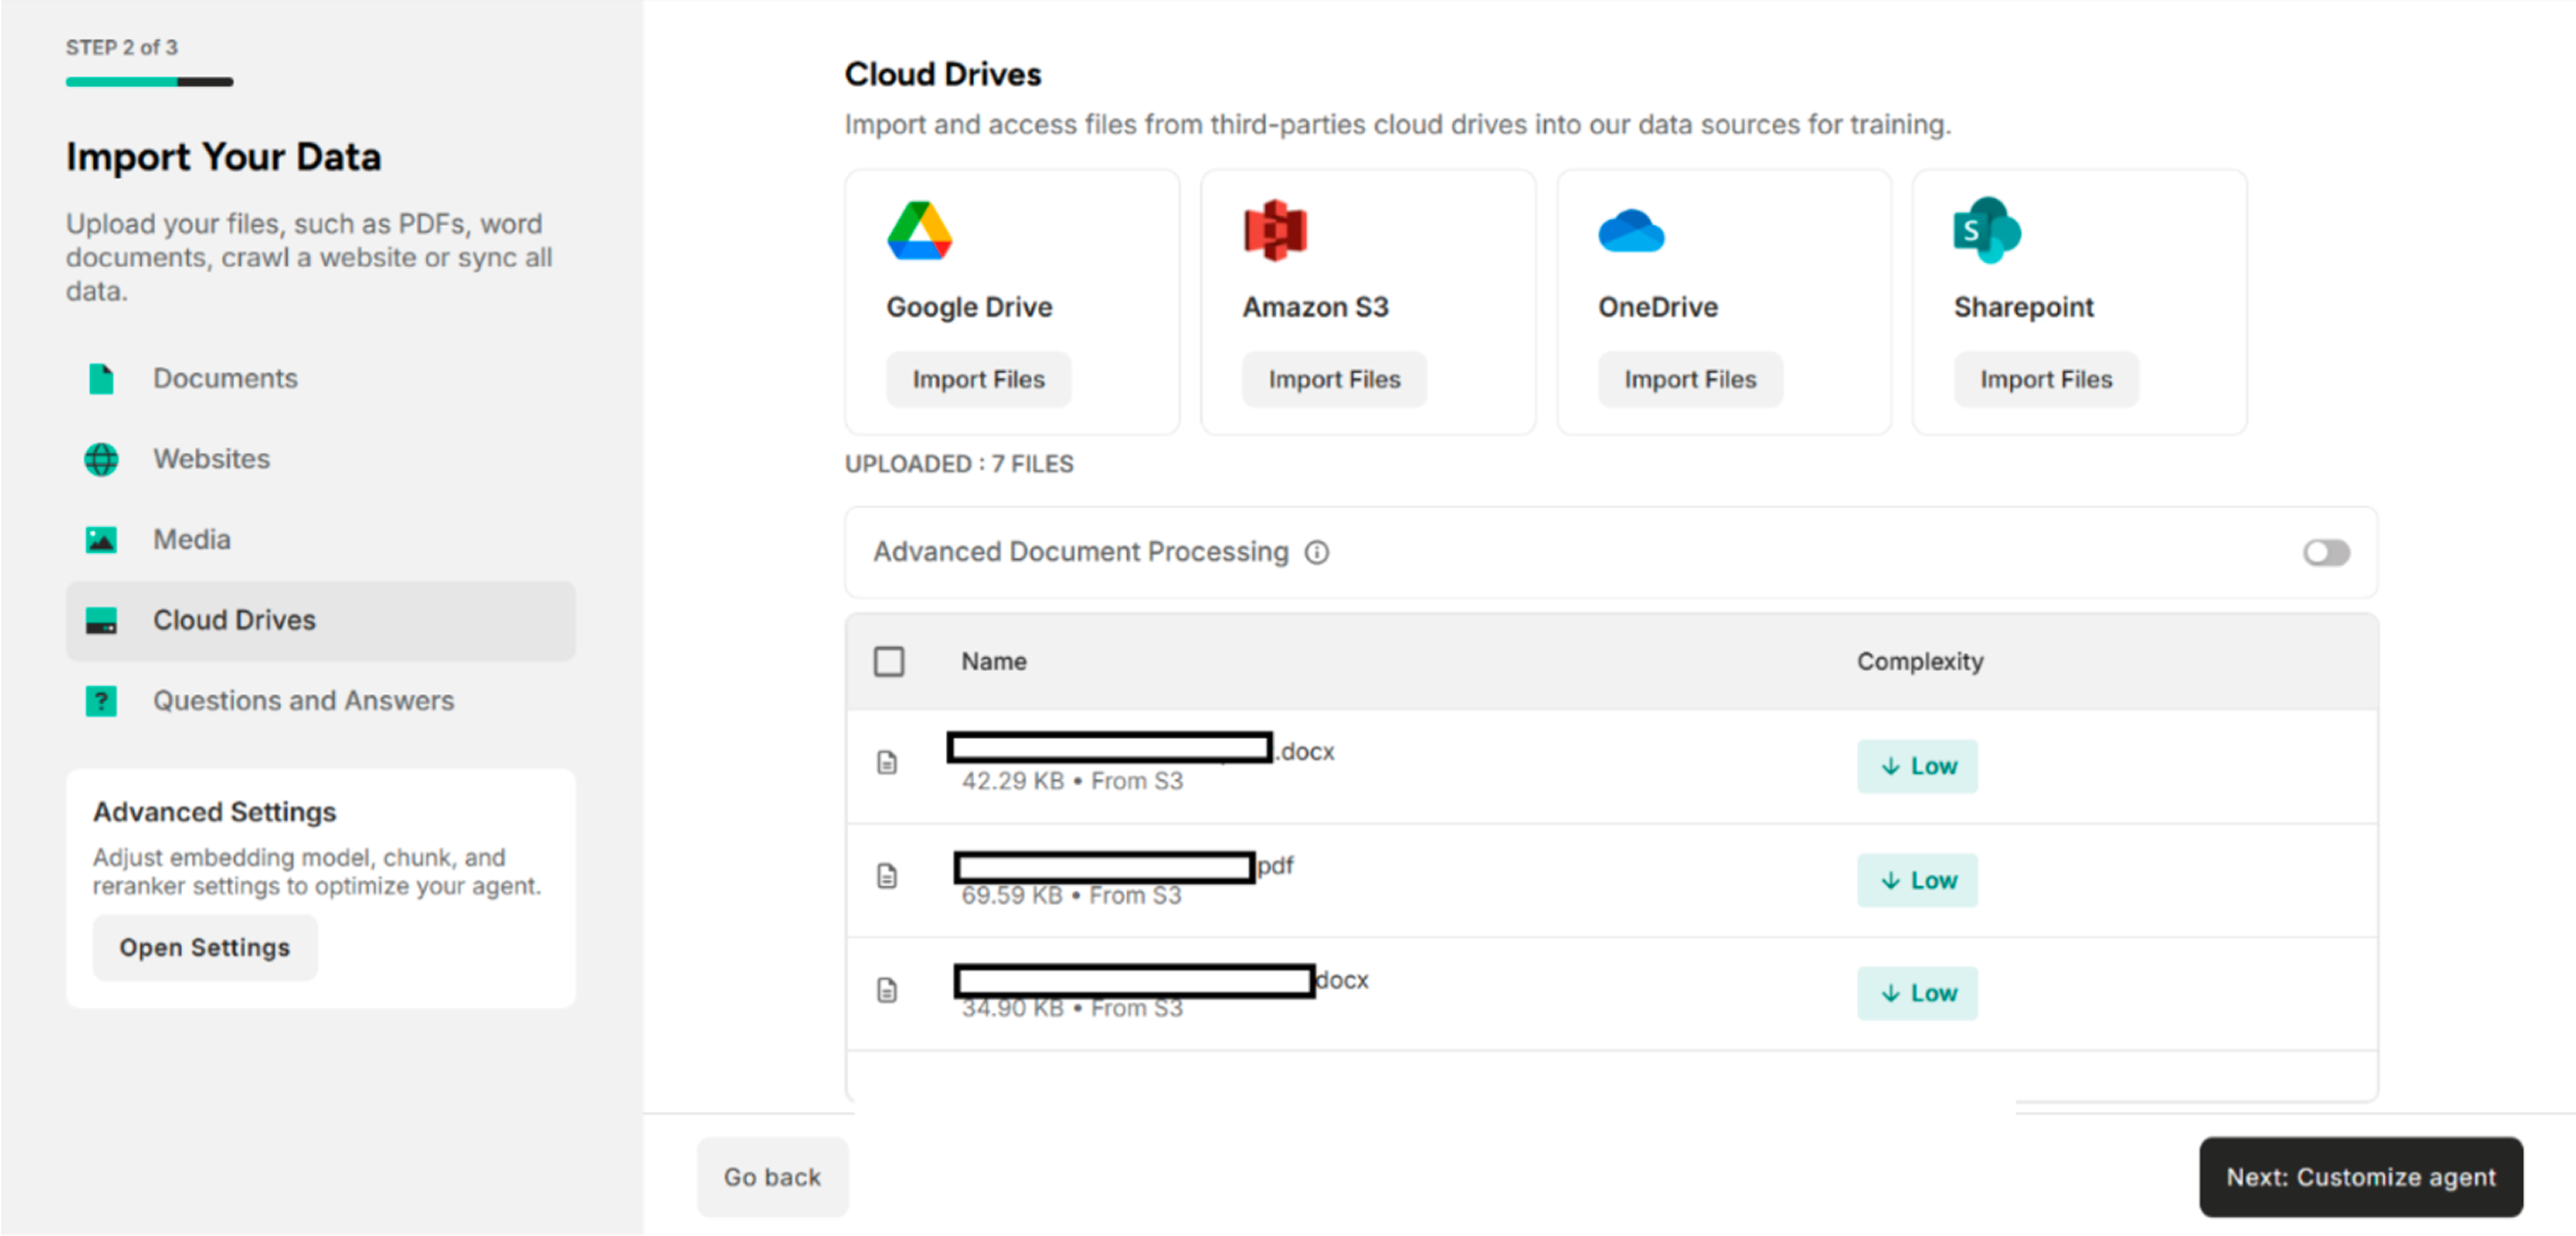
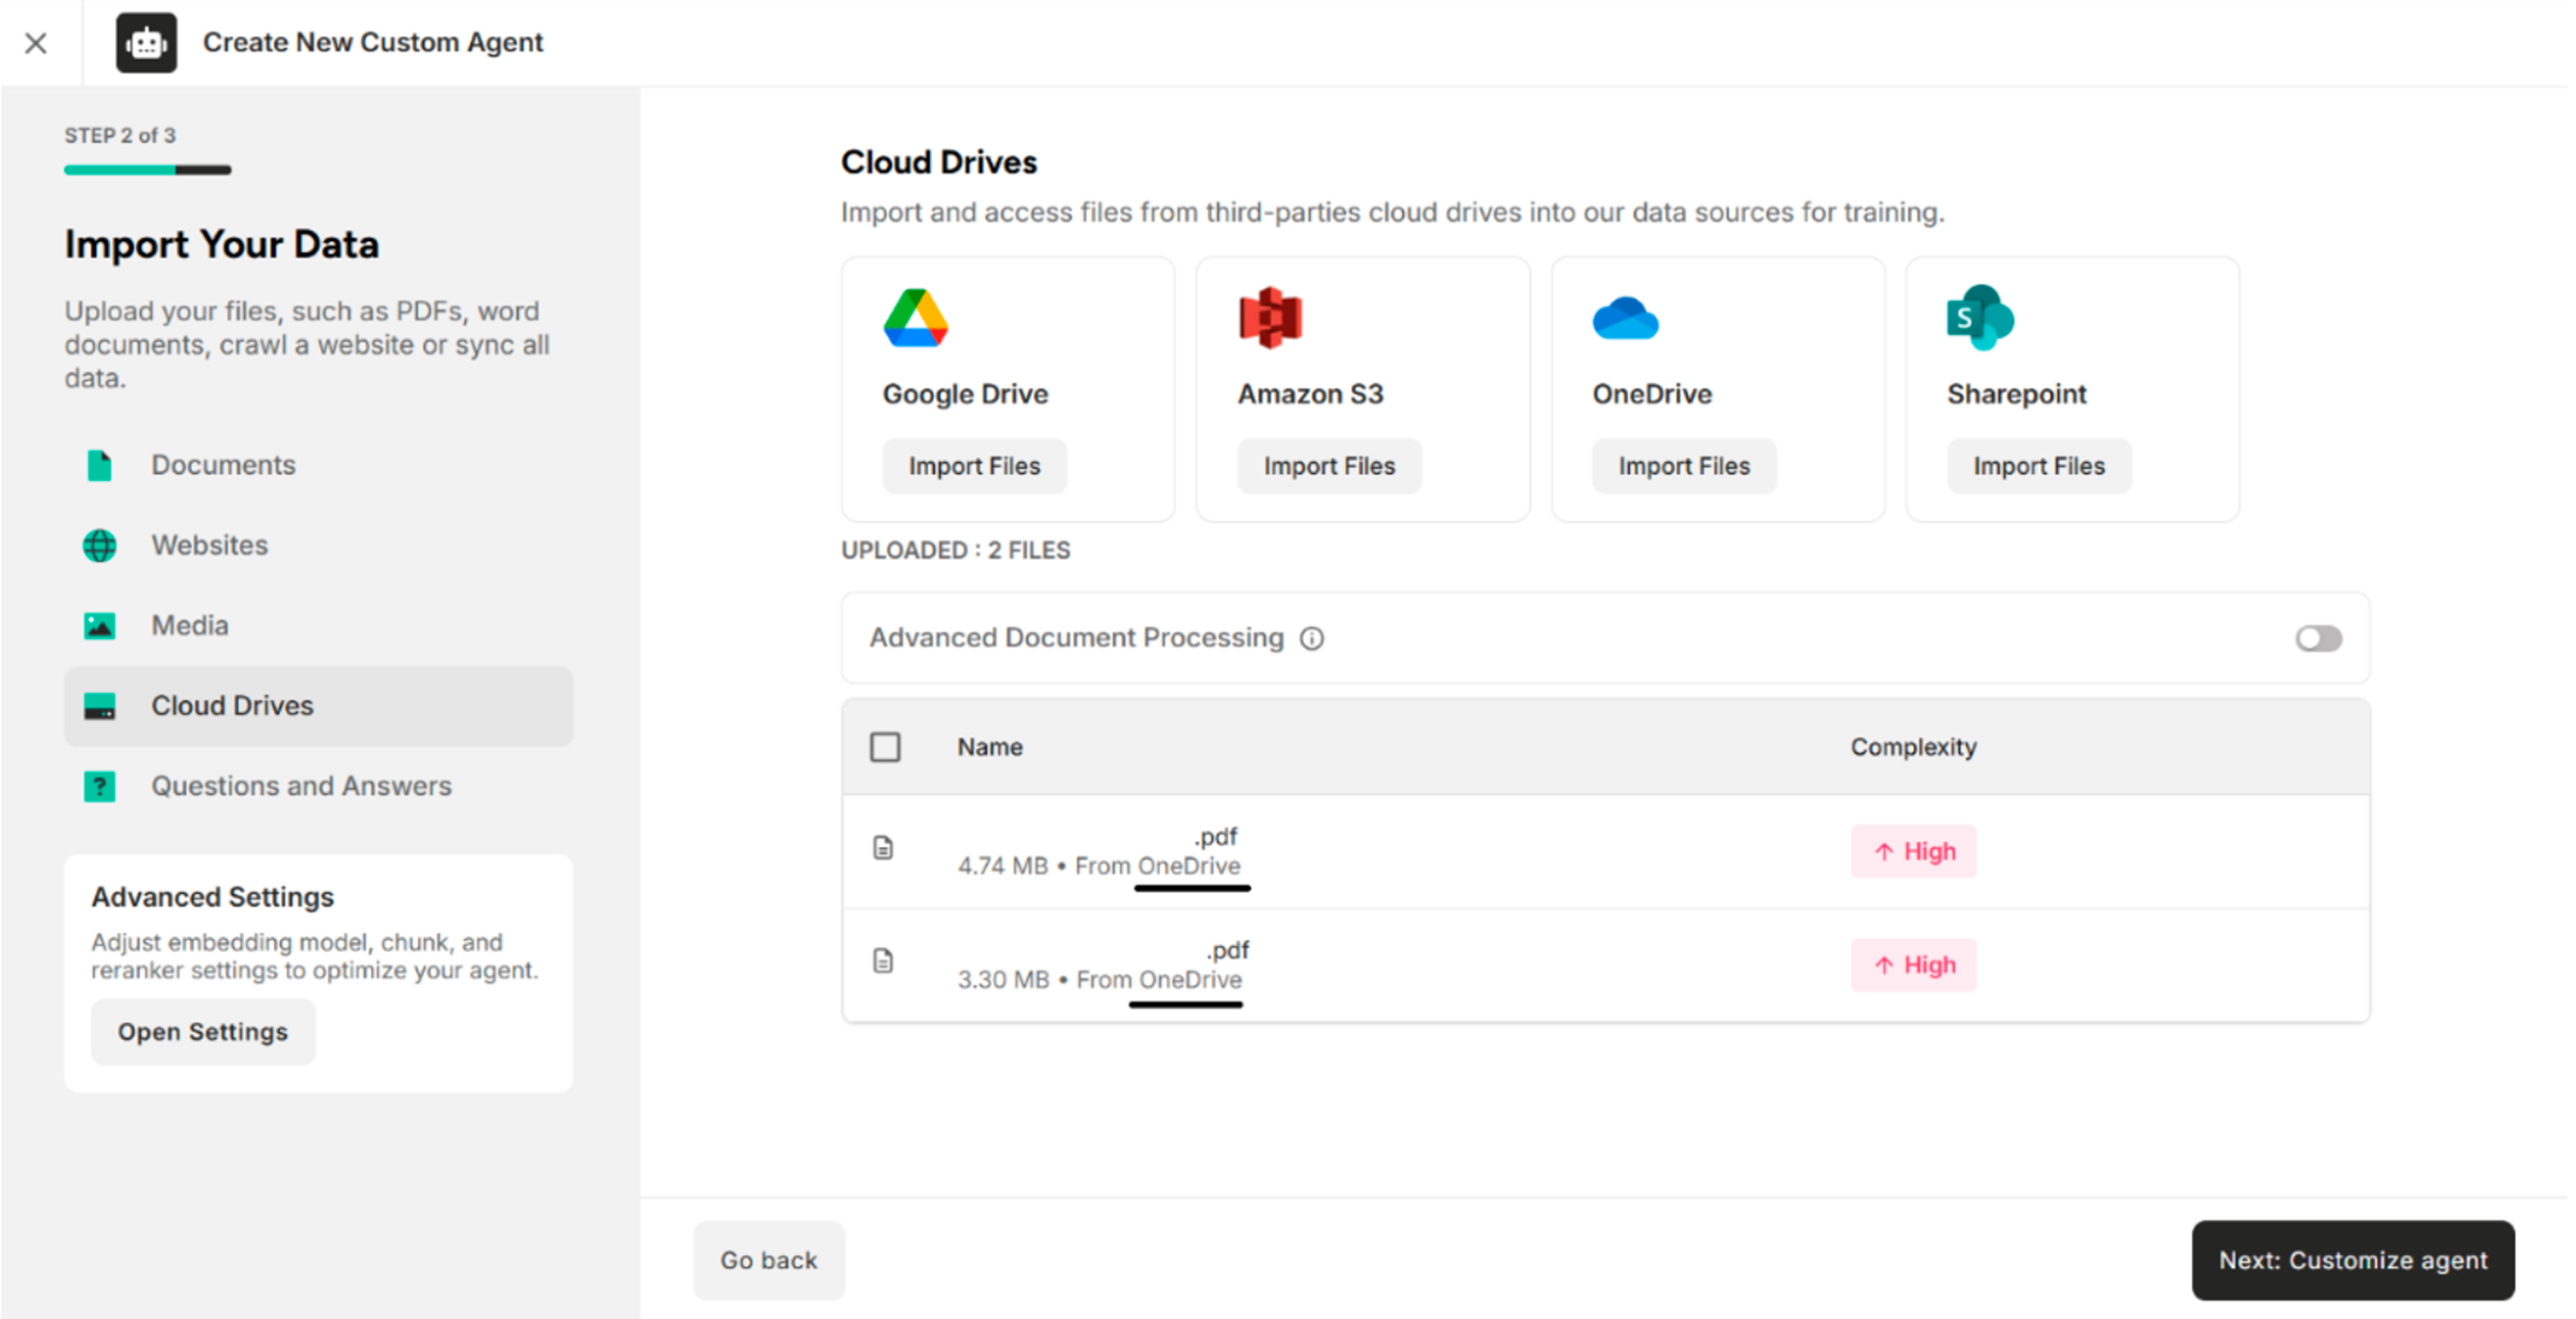
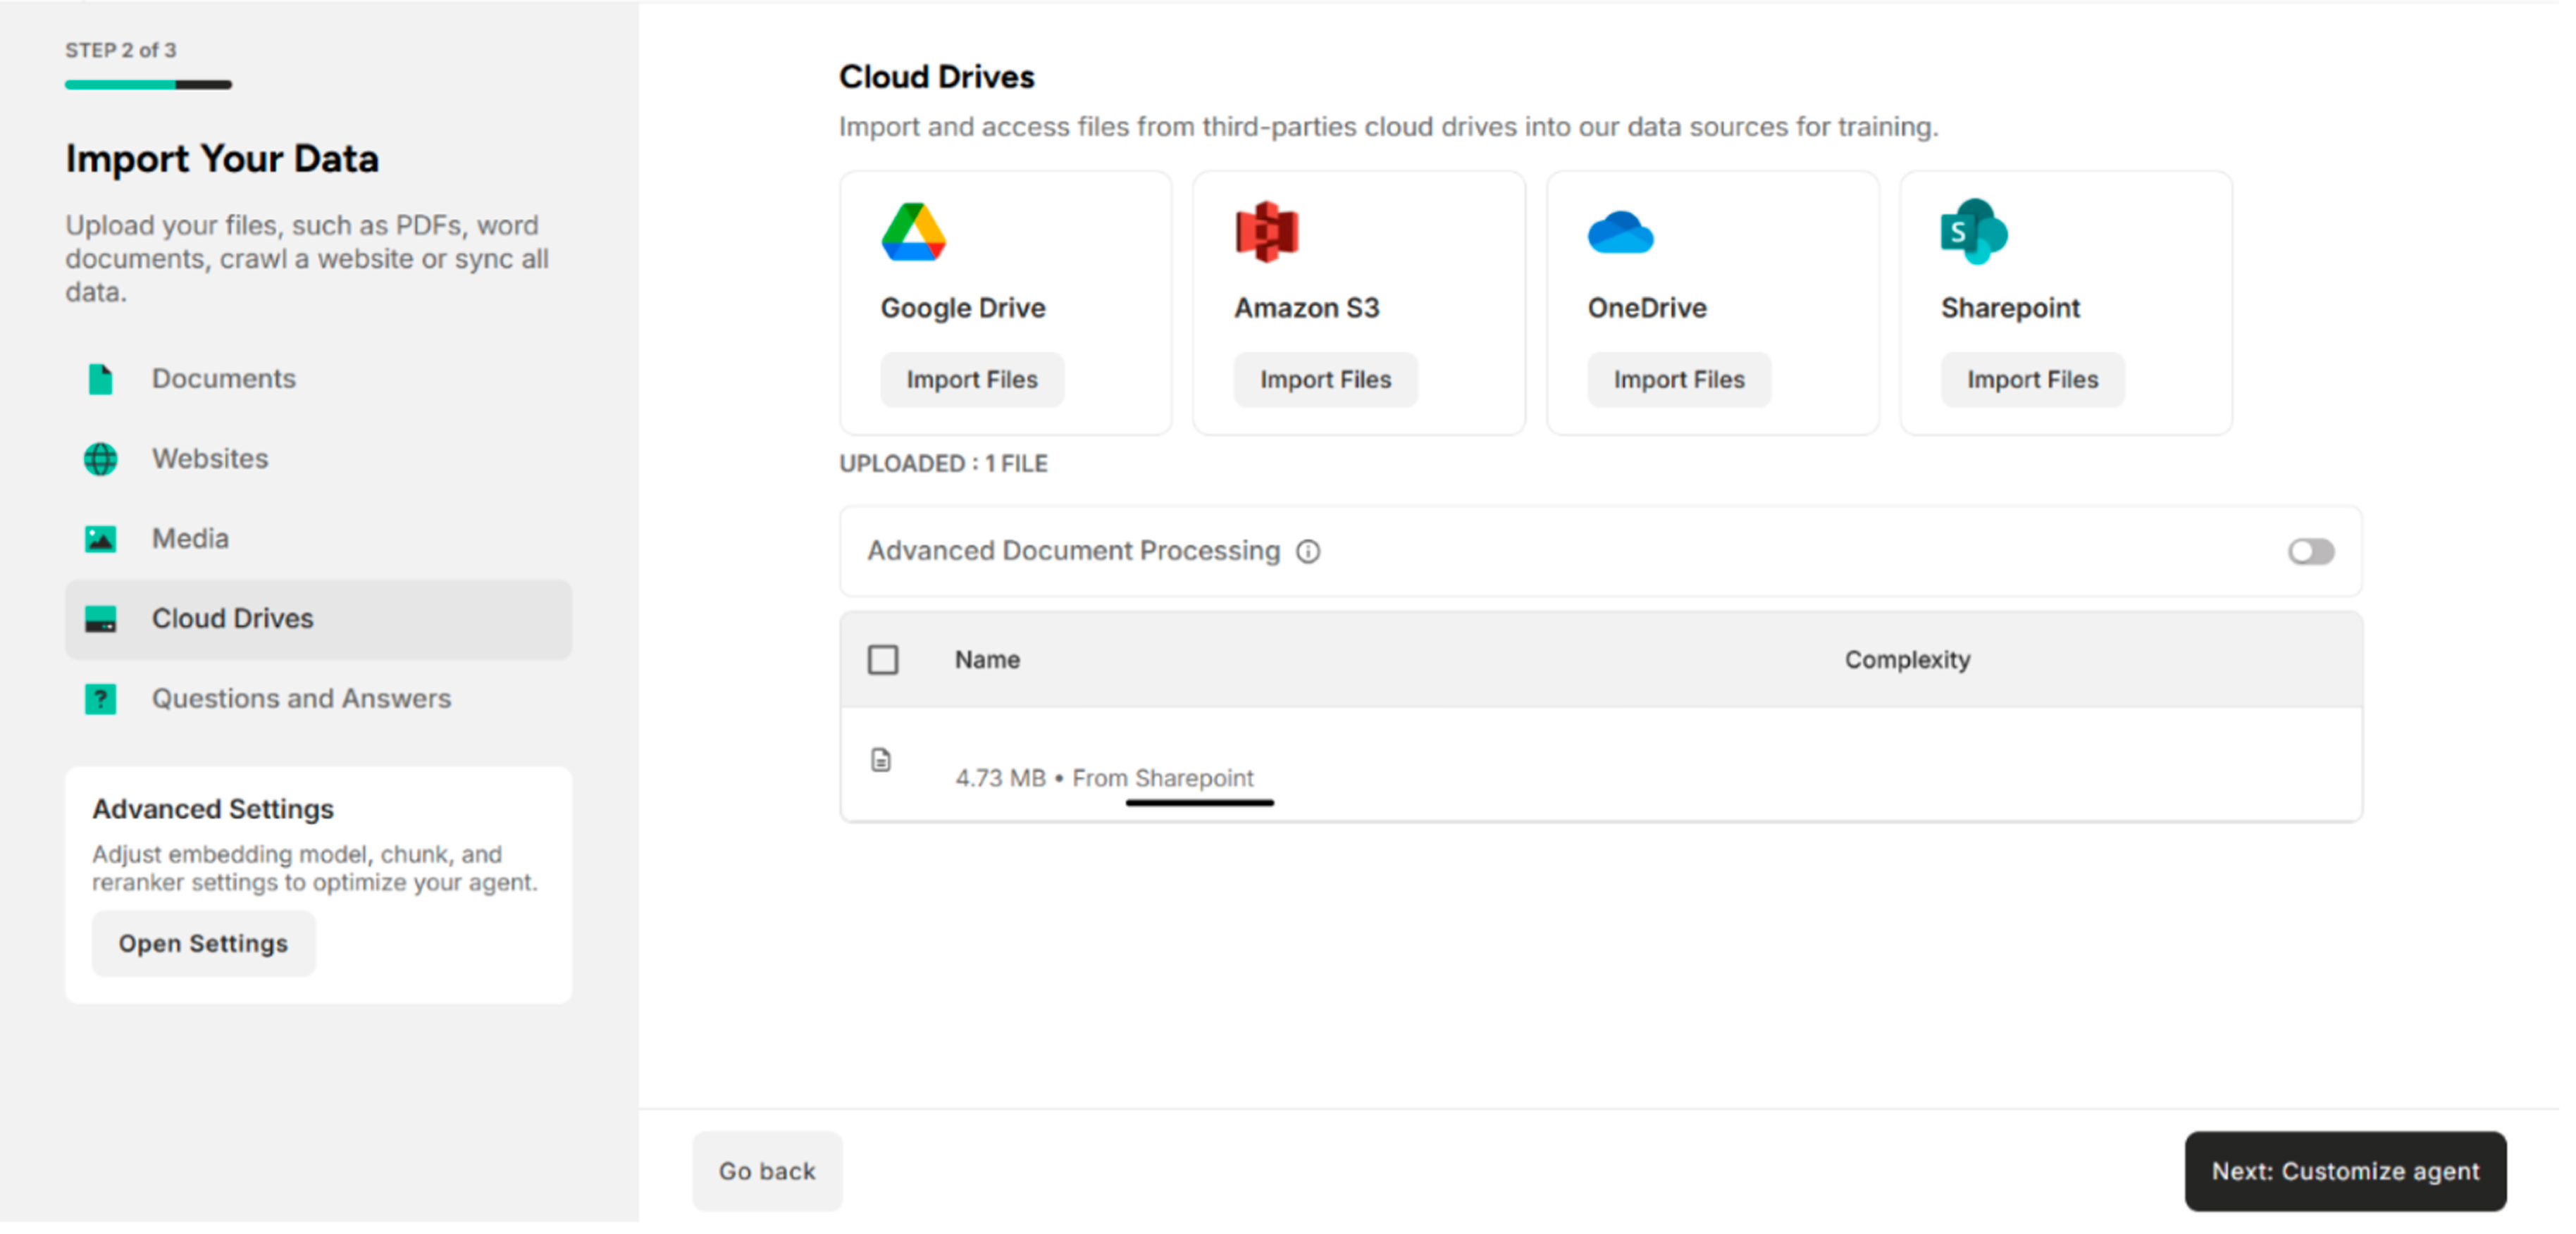
4. Import Data from Cloud Drives
| Cloud Drives | Description |
|---|---|
| Google Drive | Allows the user to upload files from Google Drive other than Documents, Websites, and Media. |
| Amazon S3 | Allows the user to upload files from Amazon S3 Buckets other than Documents, Websites, and Media. |
| OneDrive | Allows the user to upload files from OneDrive other than Documents, Websites, and Media. |
| SharePoint | Allows the user to upload files from SharePoint other than Documents, Websites, and Media. |
4.1. Import Data from Google Drive
Step 1. Click Import Files on Google Drive The system will show the Gmail accounts that are logged in the browser.
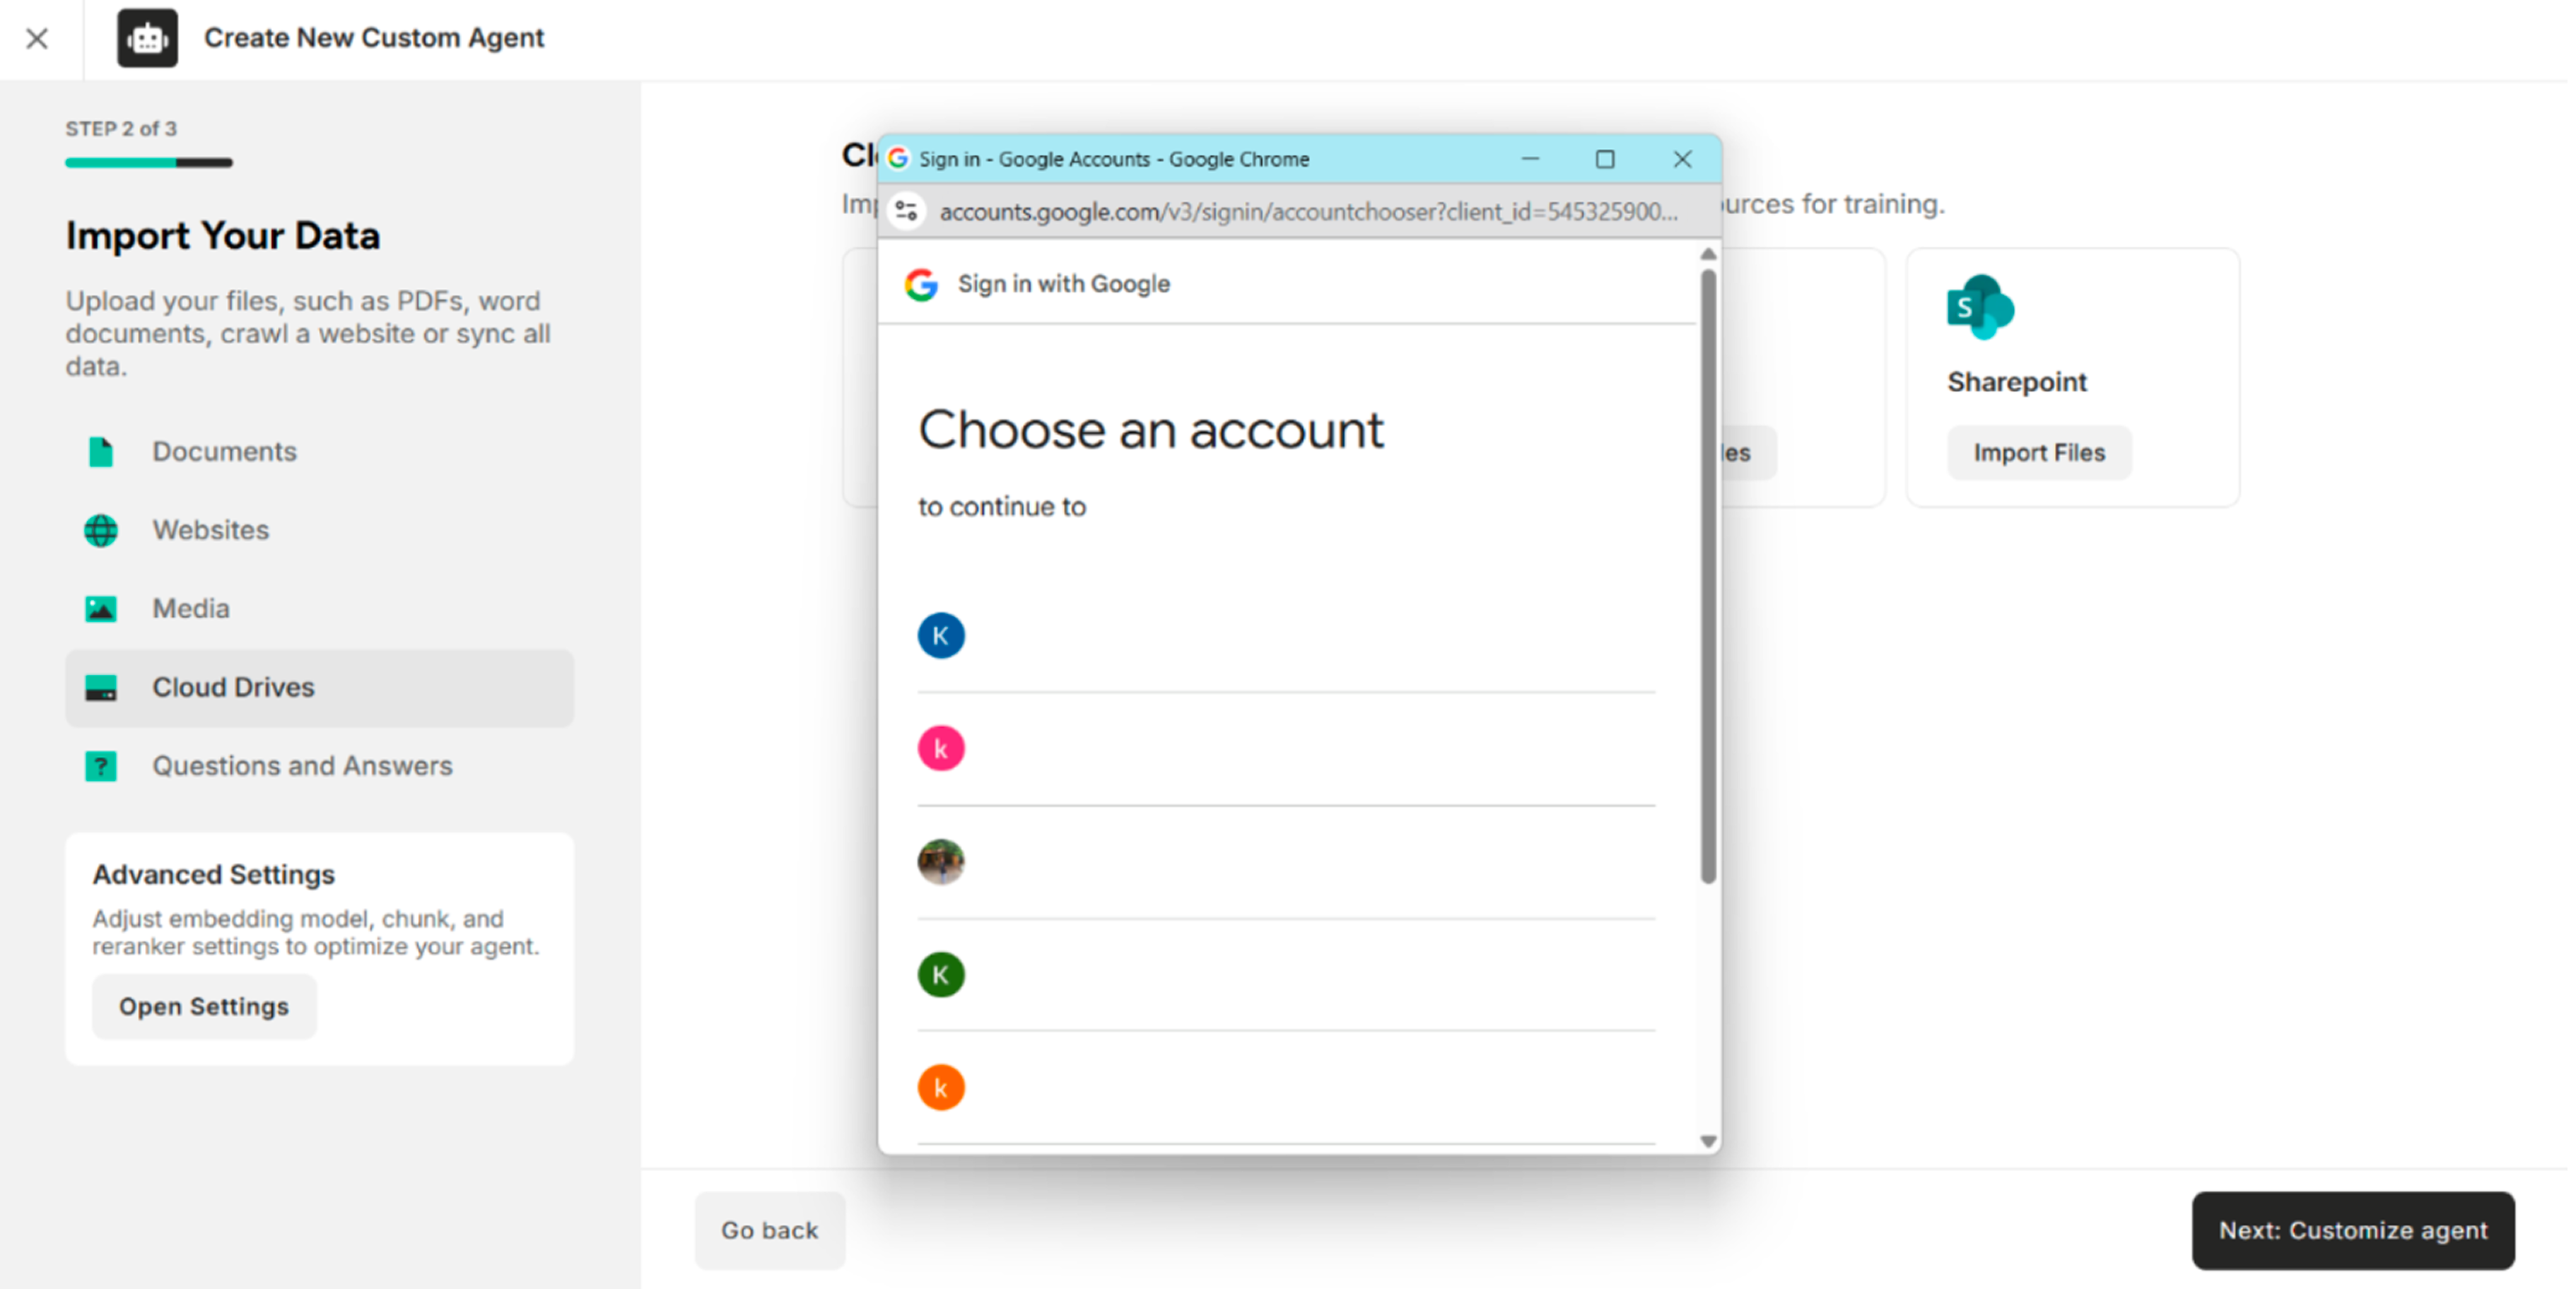
Step 2. Select the preferred Gmail account The system will show the uploaded files in the Google Drive account.
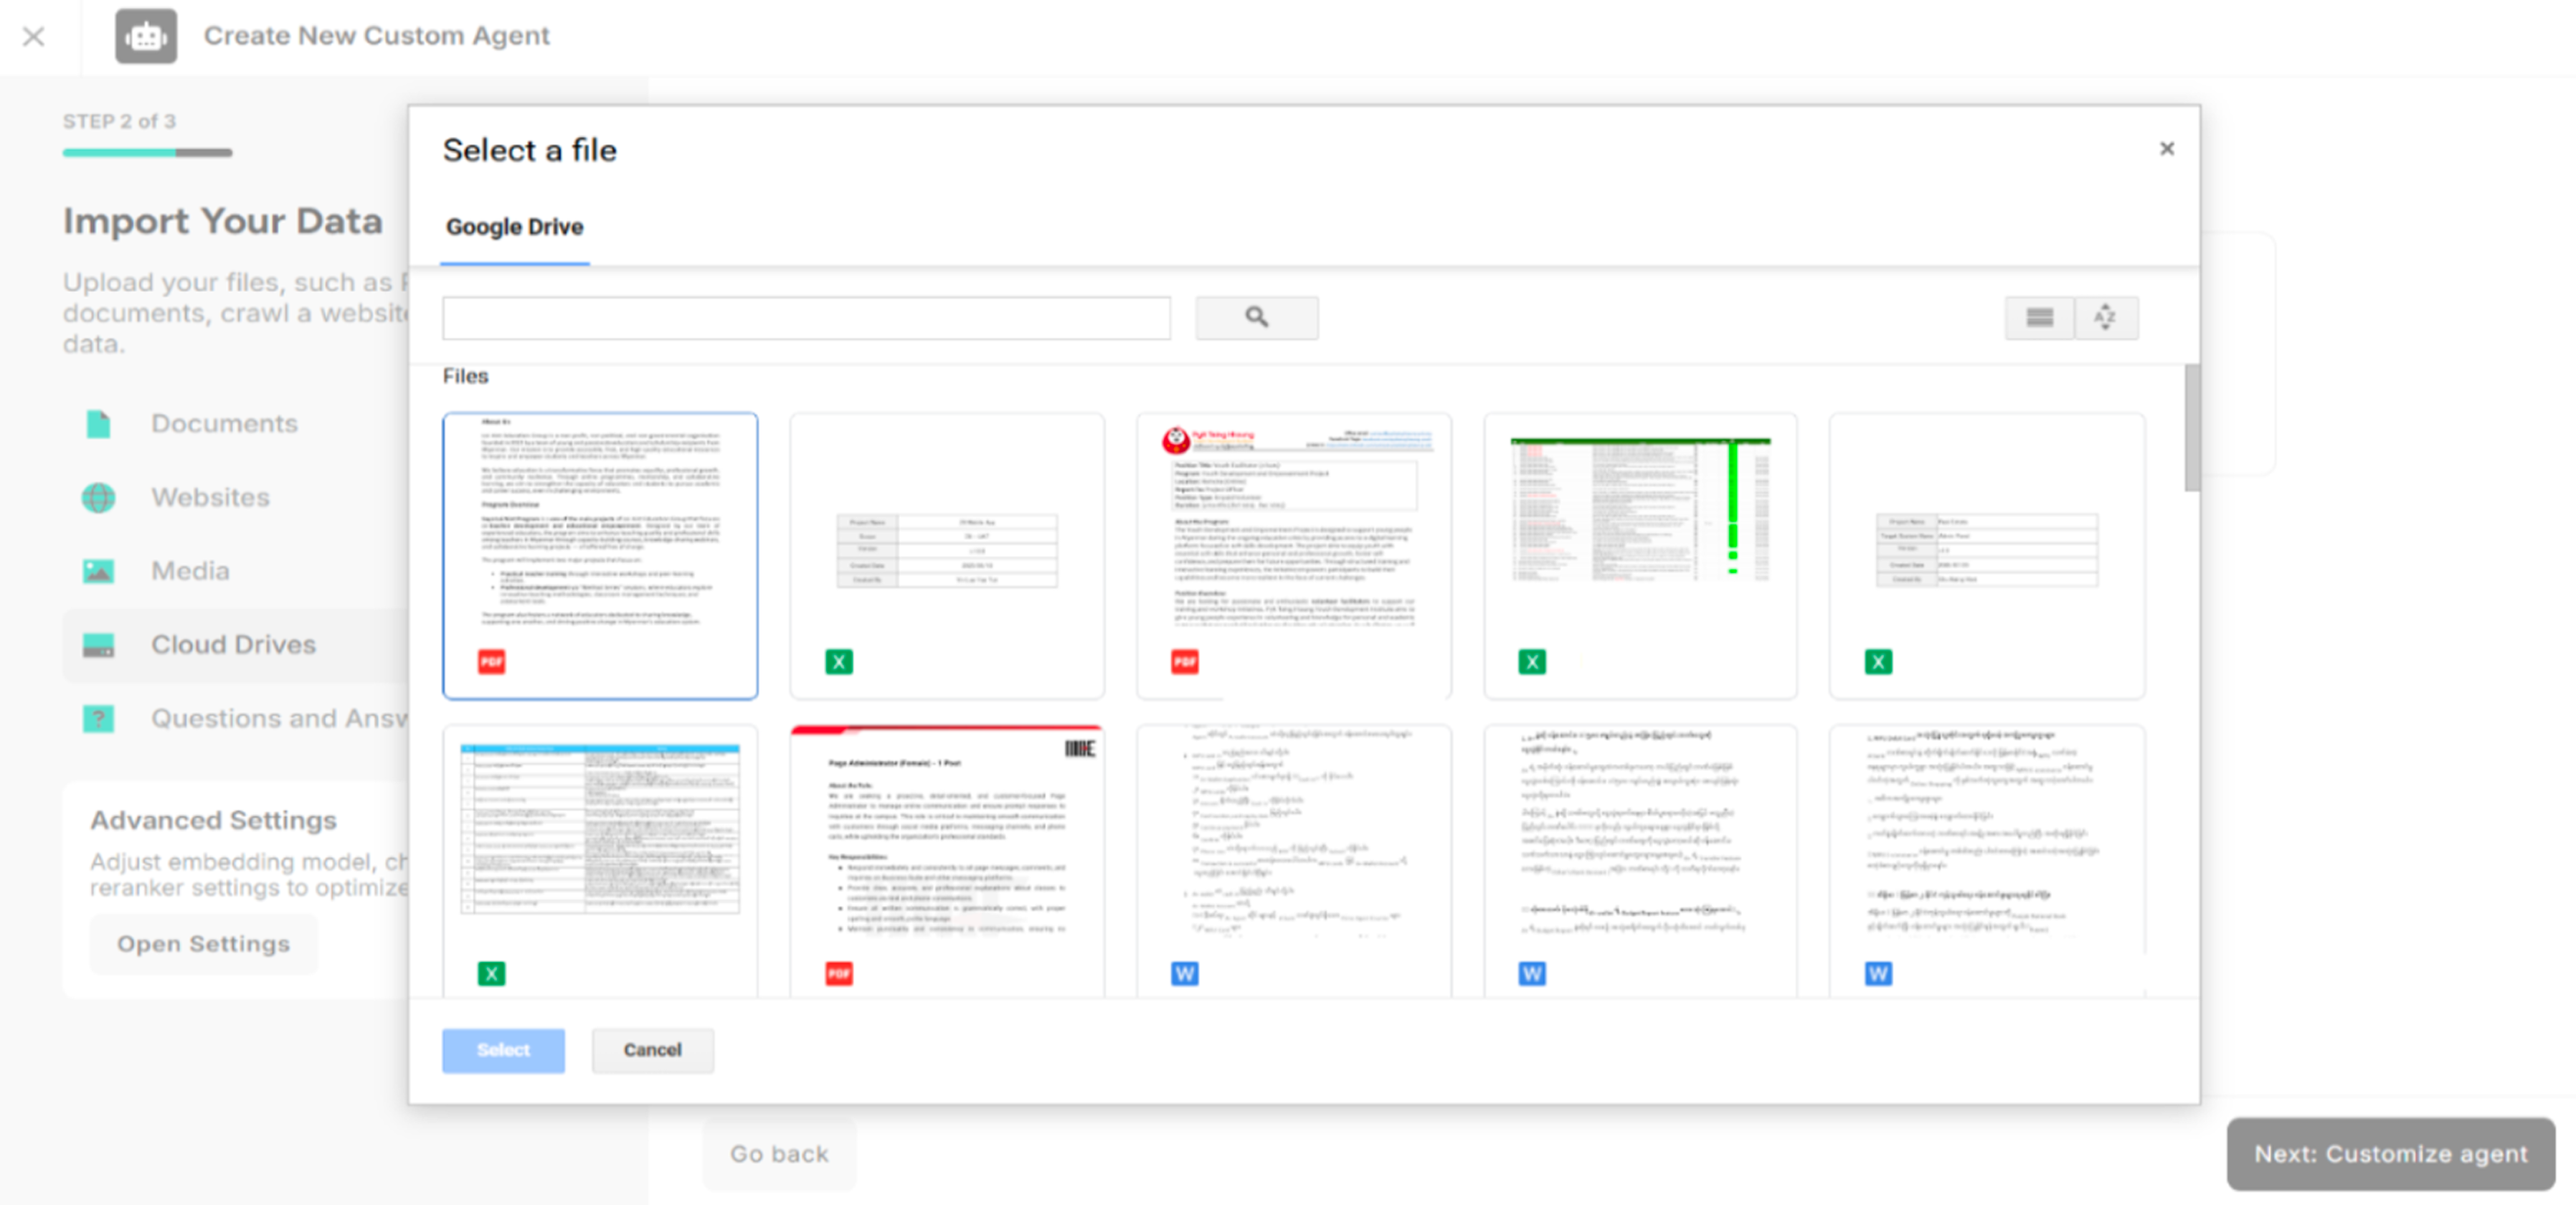
Step 3. Select the files from Google Drive and click Select The system will show the selected files from Google Drive.
4.2. Import Data from Amazon S3 Buckets
Step 1. Click Import Files on Amazon S3 Buckets The system will show the Amazon S3 Bucket credentials pop up.
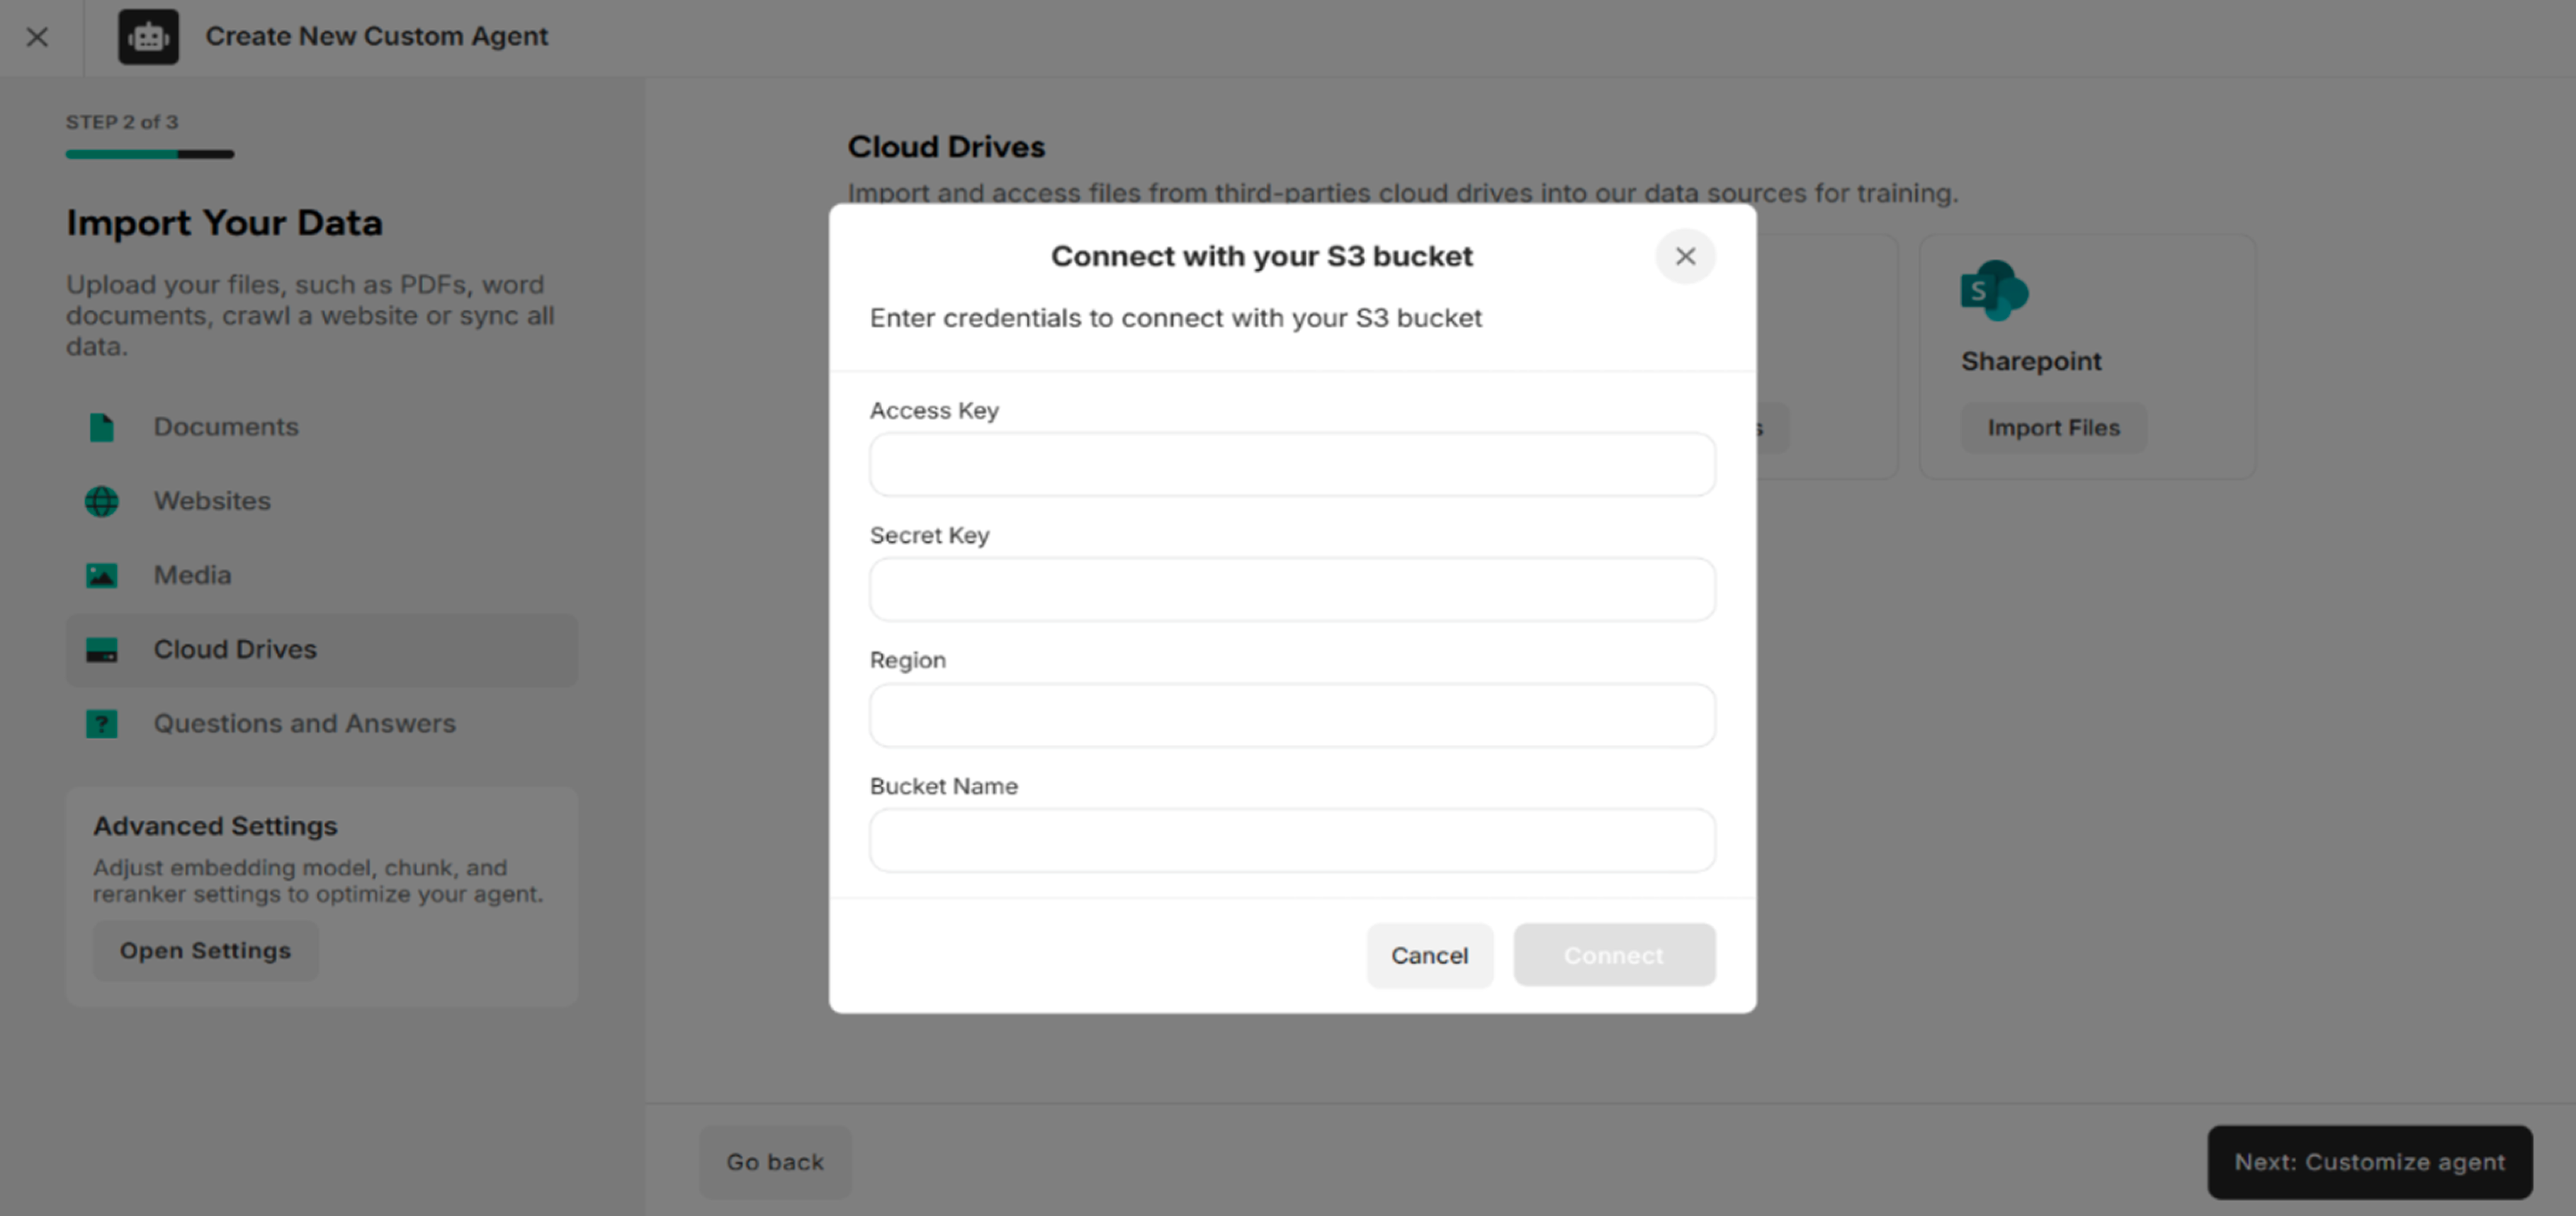
Step 2. Fill the Amazon S3 Buckets Credentials The system will connect to the Amazon S3 Buckets.
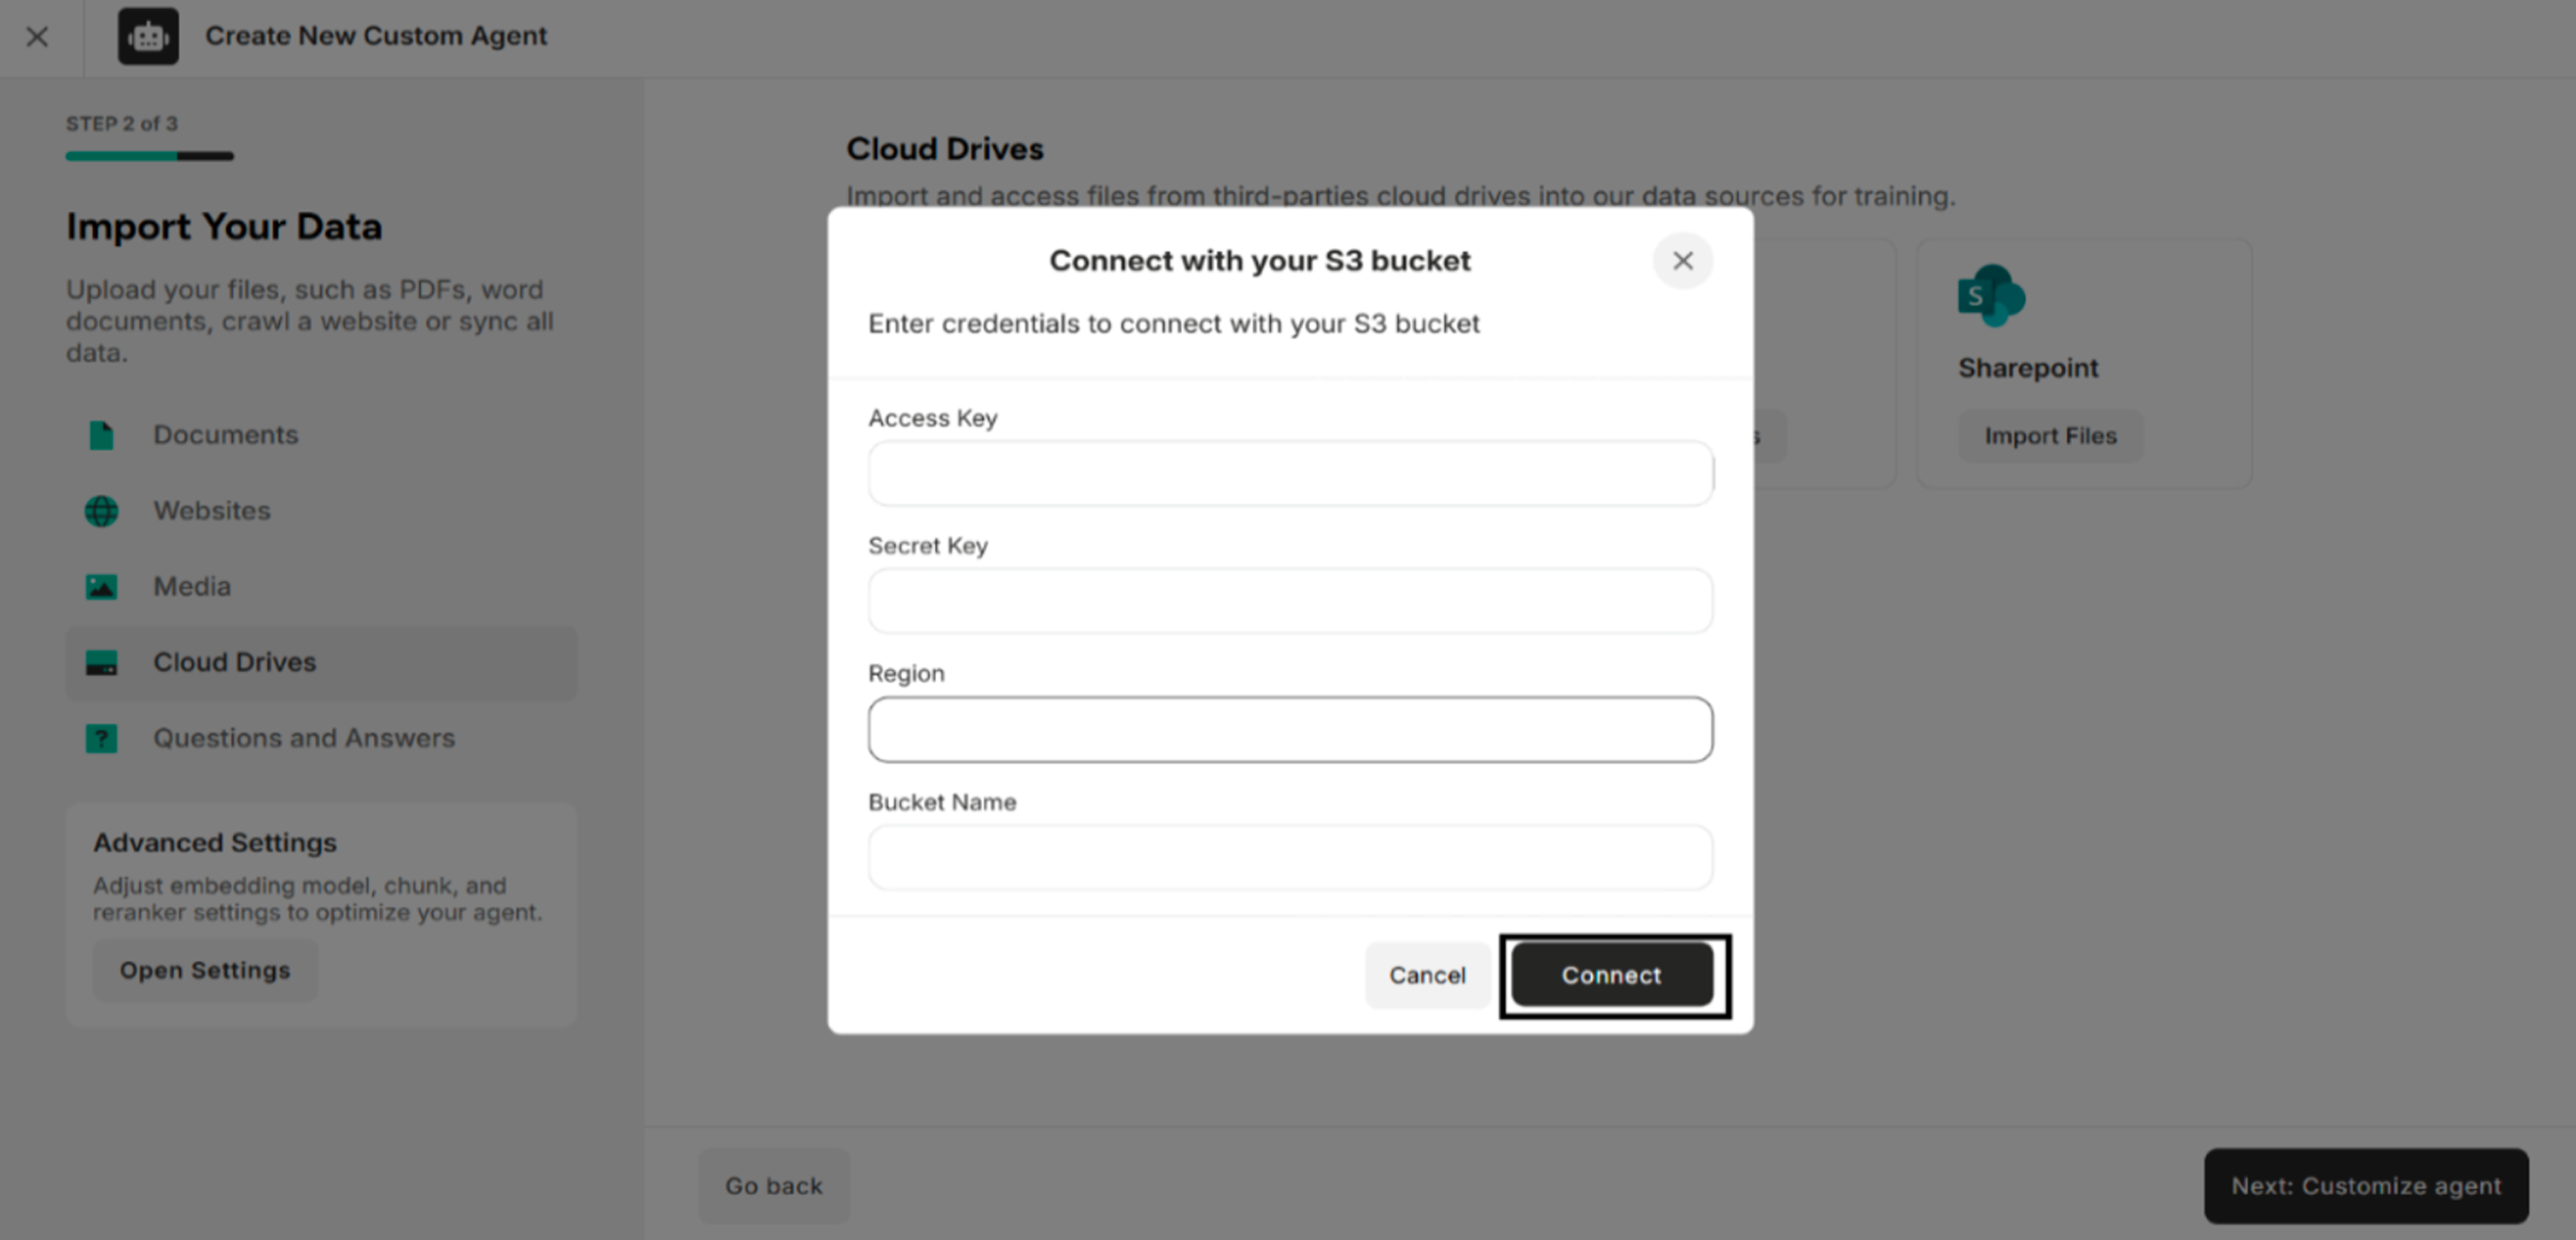
Step 3. Connect to the Amazon S3 Buckets The system will show the uploaded files in the Amazon S3 Buckets.

Step 4. Select the files from Amazon S3 Buckets and click Select The system will show the selected files from S3.
4.3. Import Data from OneDrive
Step 1. Click Import Files on OneDrive The system will show the OneDrive sign in page.
Step 2. Sign in with OneDrive Account and Password The system will successfully log in and display the "Select Files" Interface.

Step 3. Select the files from One Drive and click Select The system will show the selected files from OneDrive.
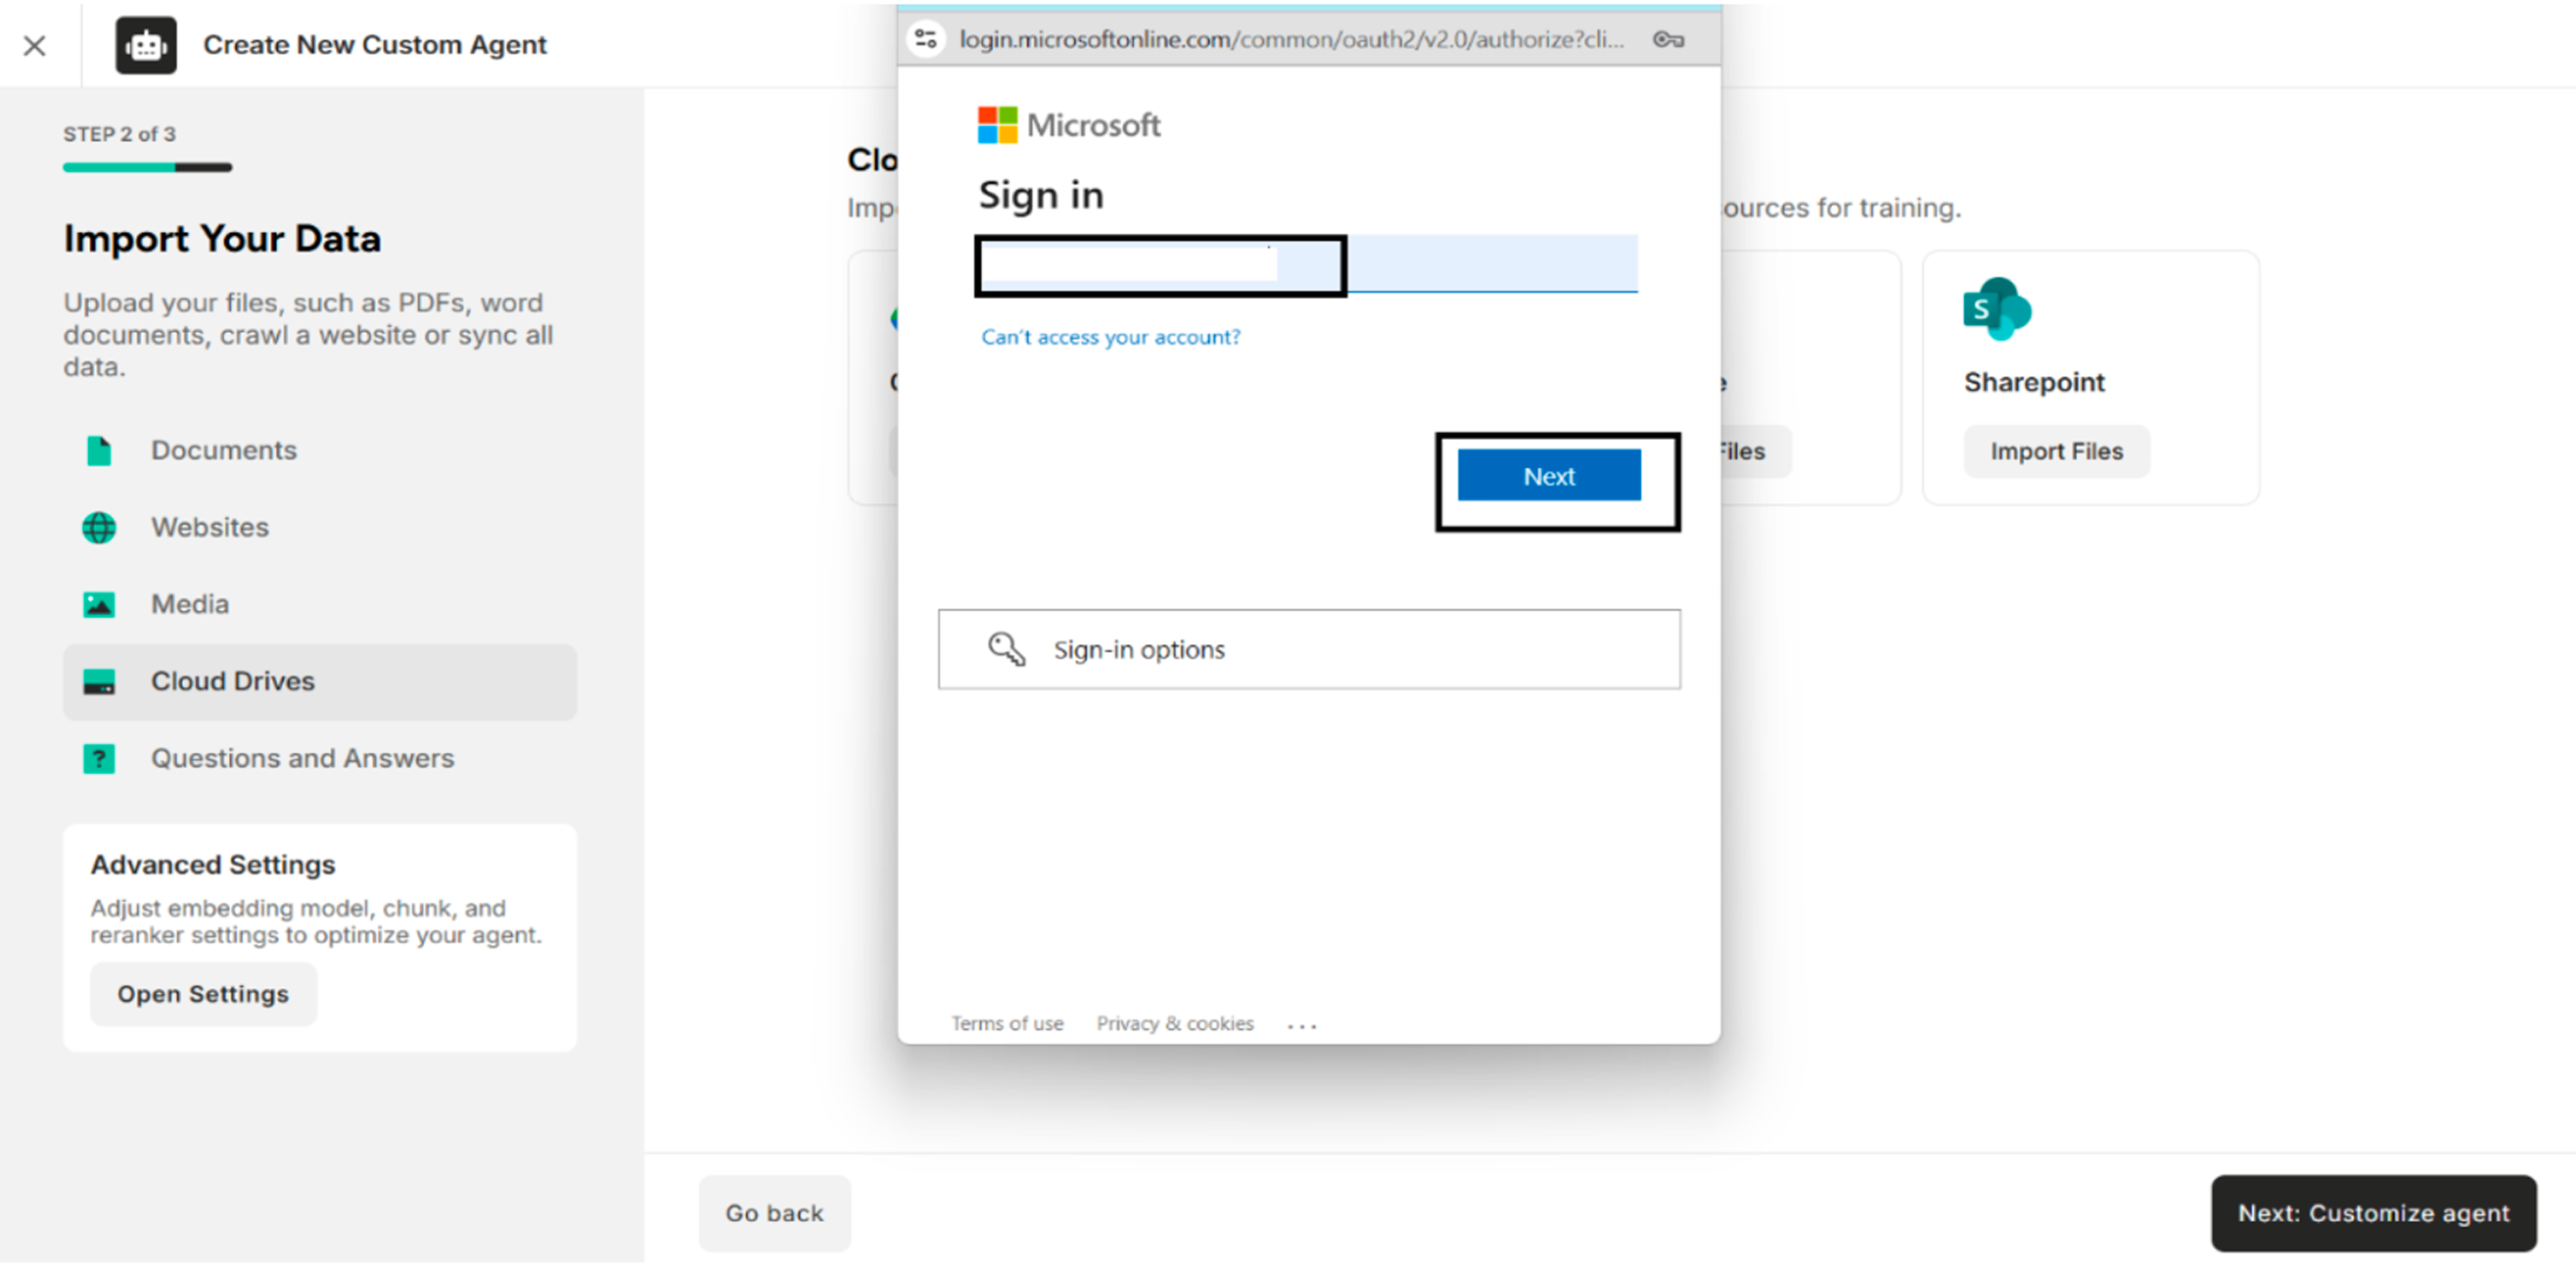
4.4. Import Data from SharePoint
There are two import methods in SharePoint.
| Method | Description |
|---|---|
| ALL | Choose to import files from all your SharePoints |
| Custom | Choose to import files by specifying a custom SharePoint site name. |
Step 1. Click Import Files on SharePoint The system will display Import SharePoint Files Interface.
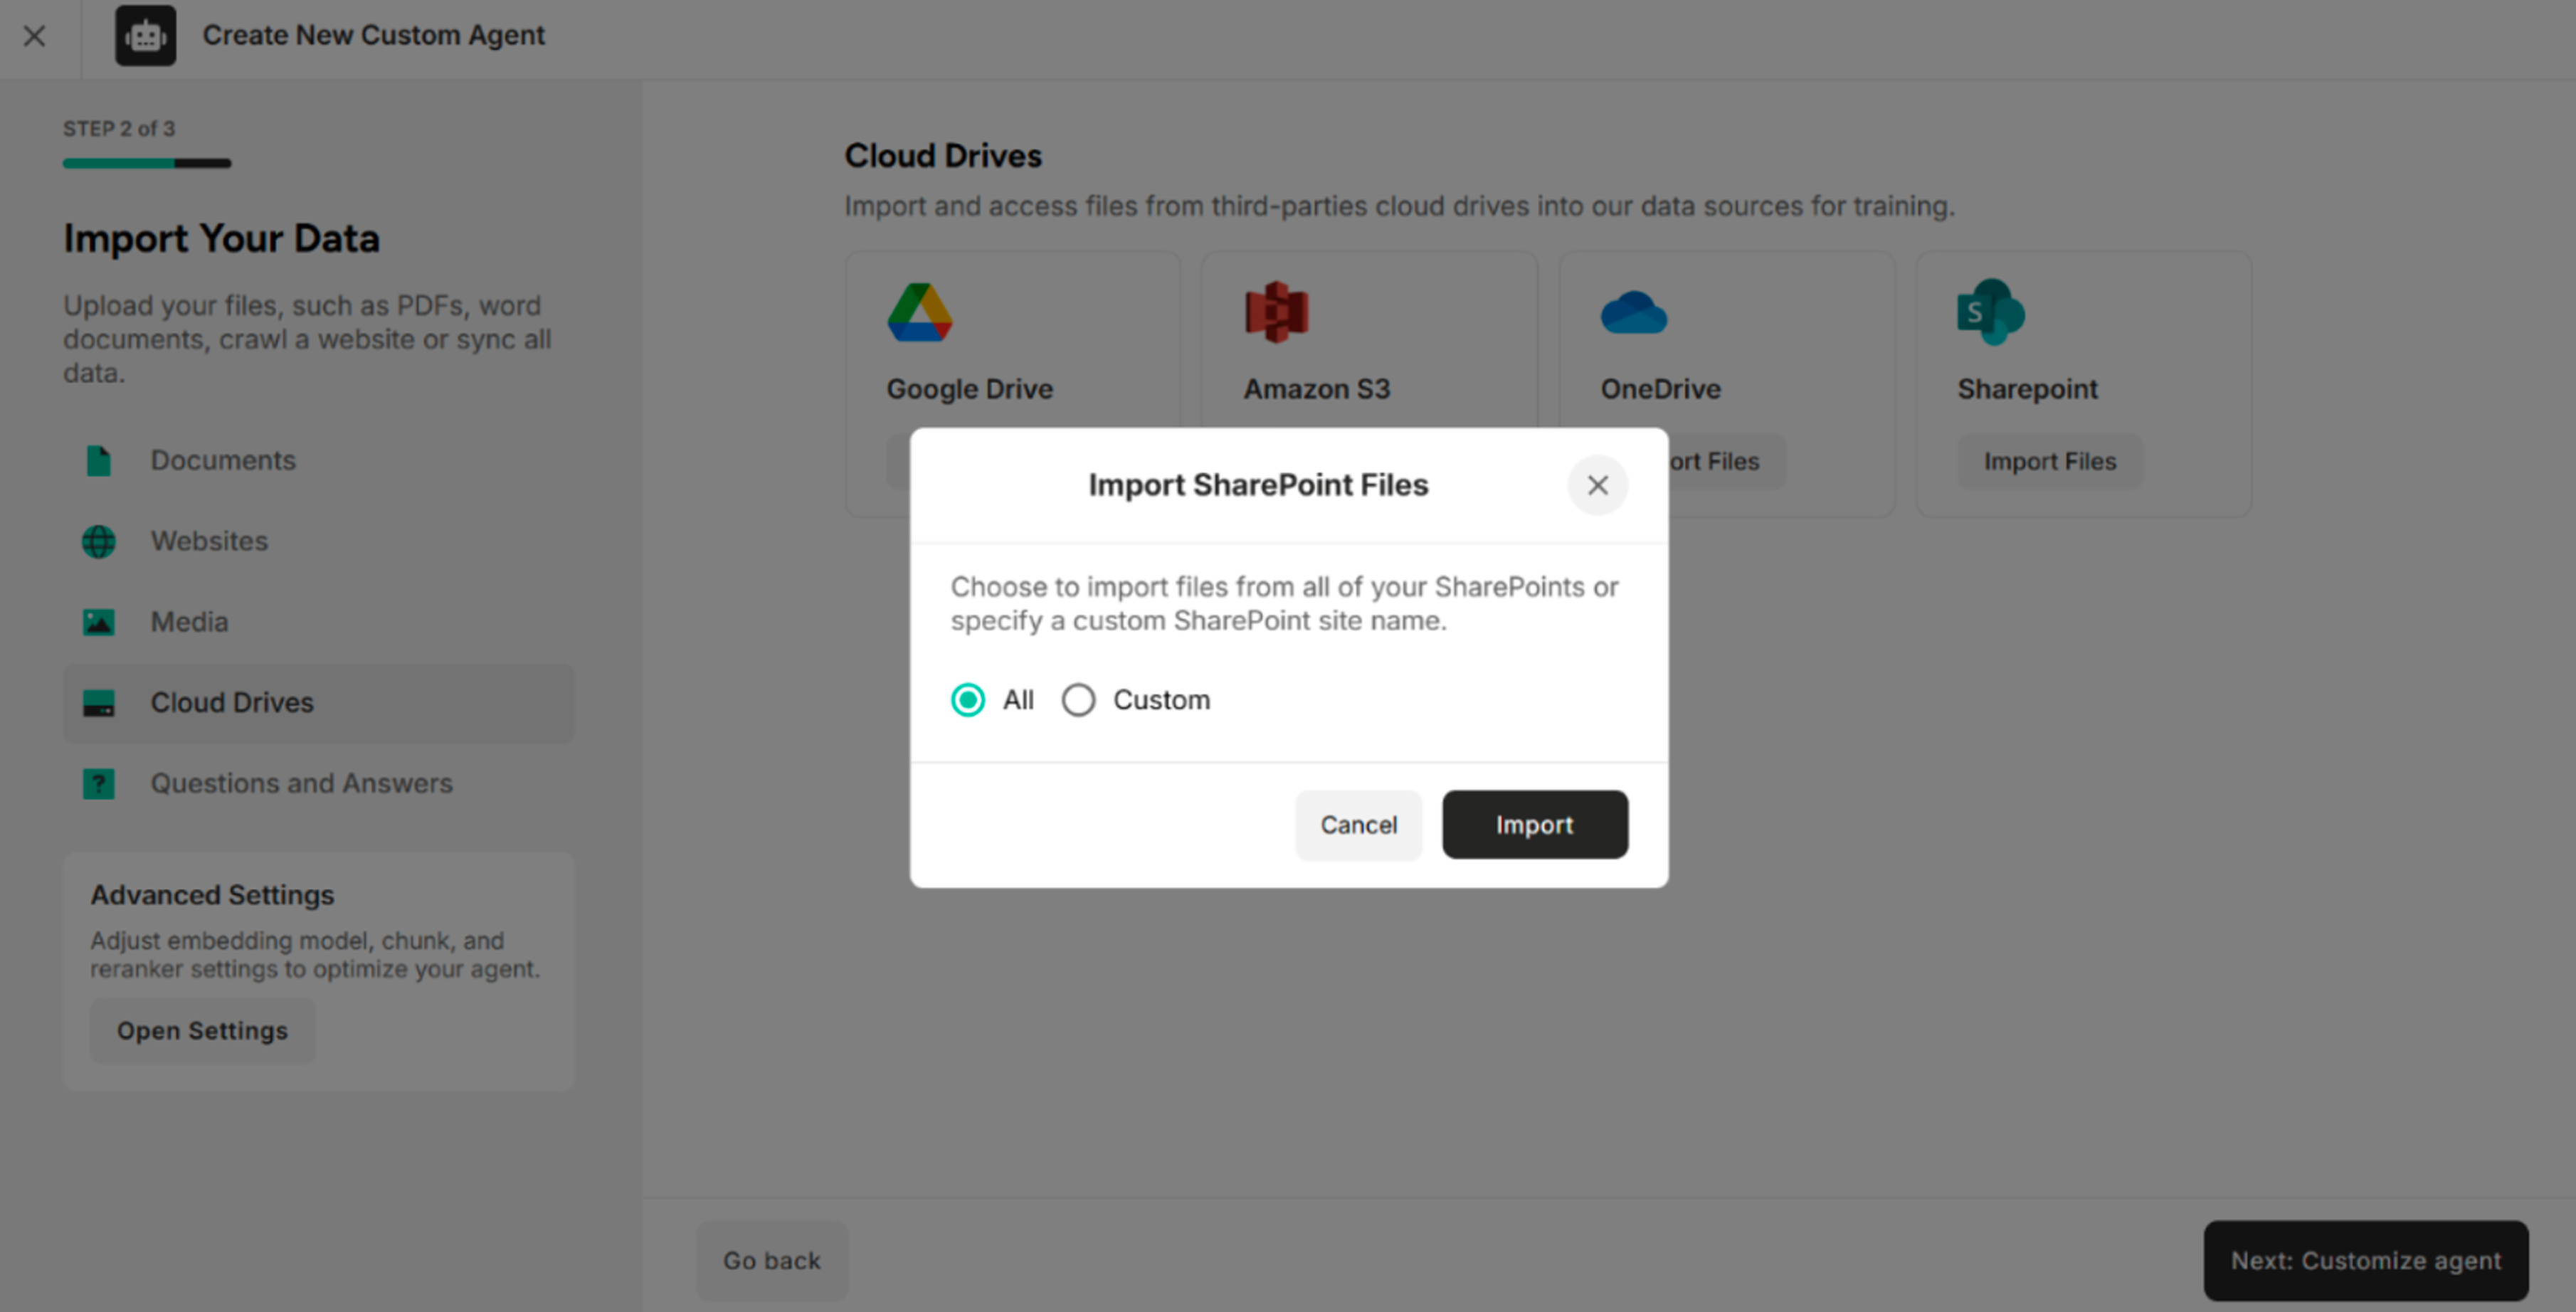
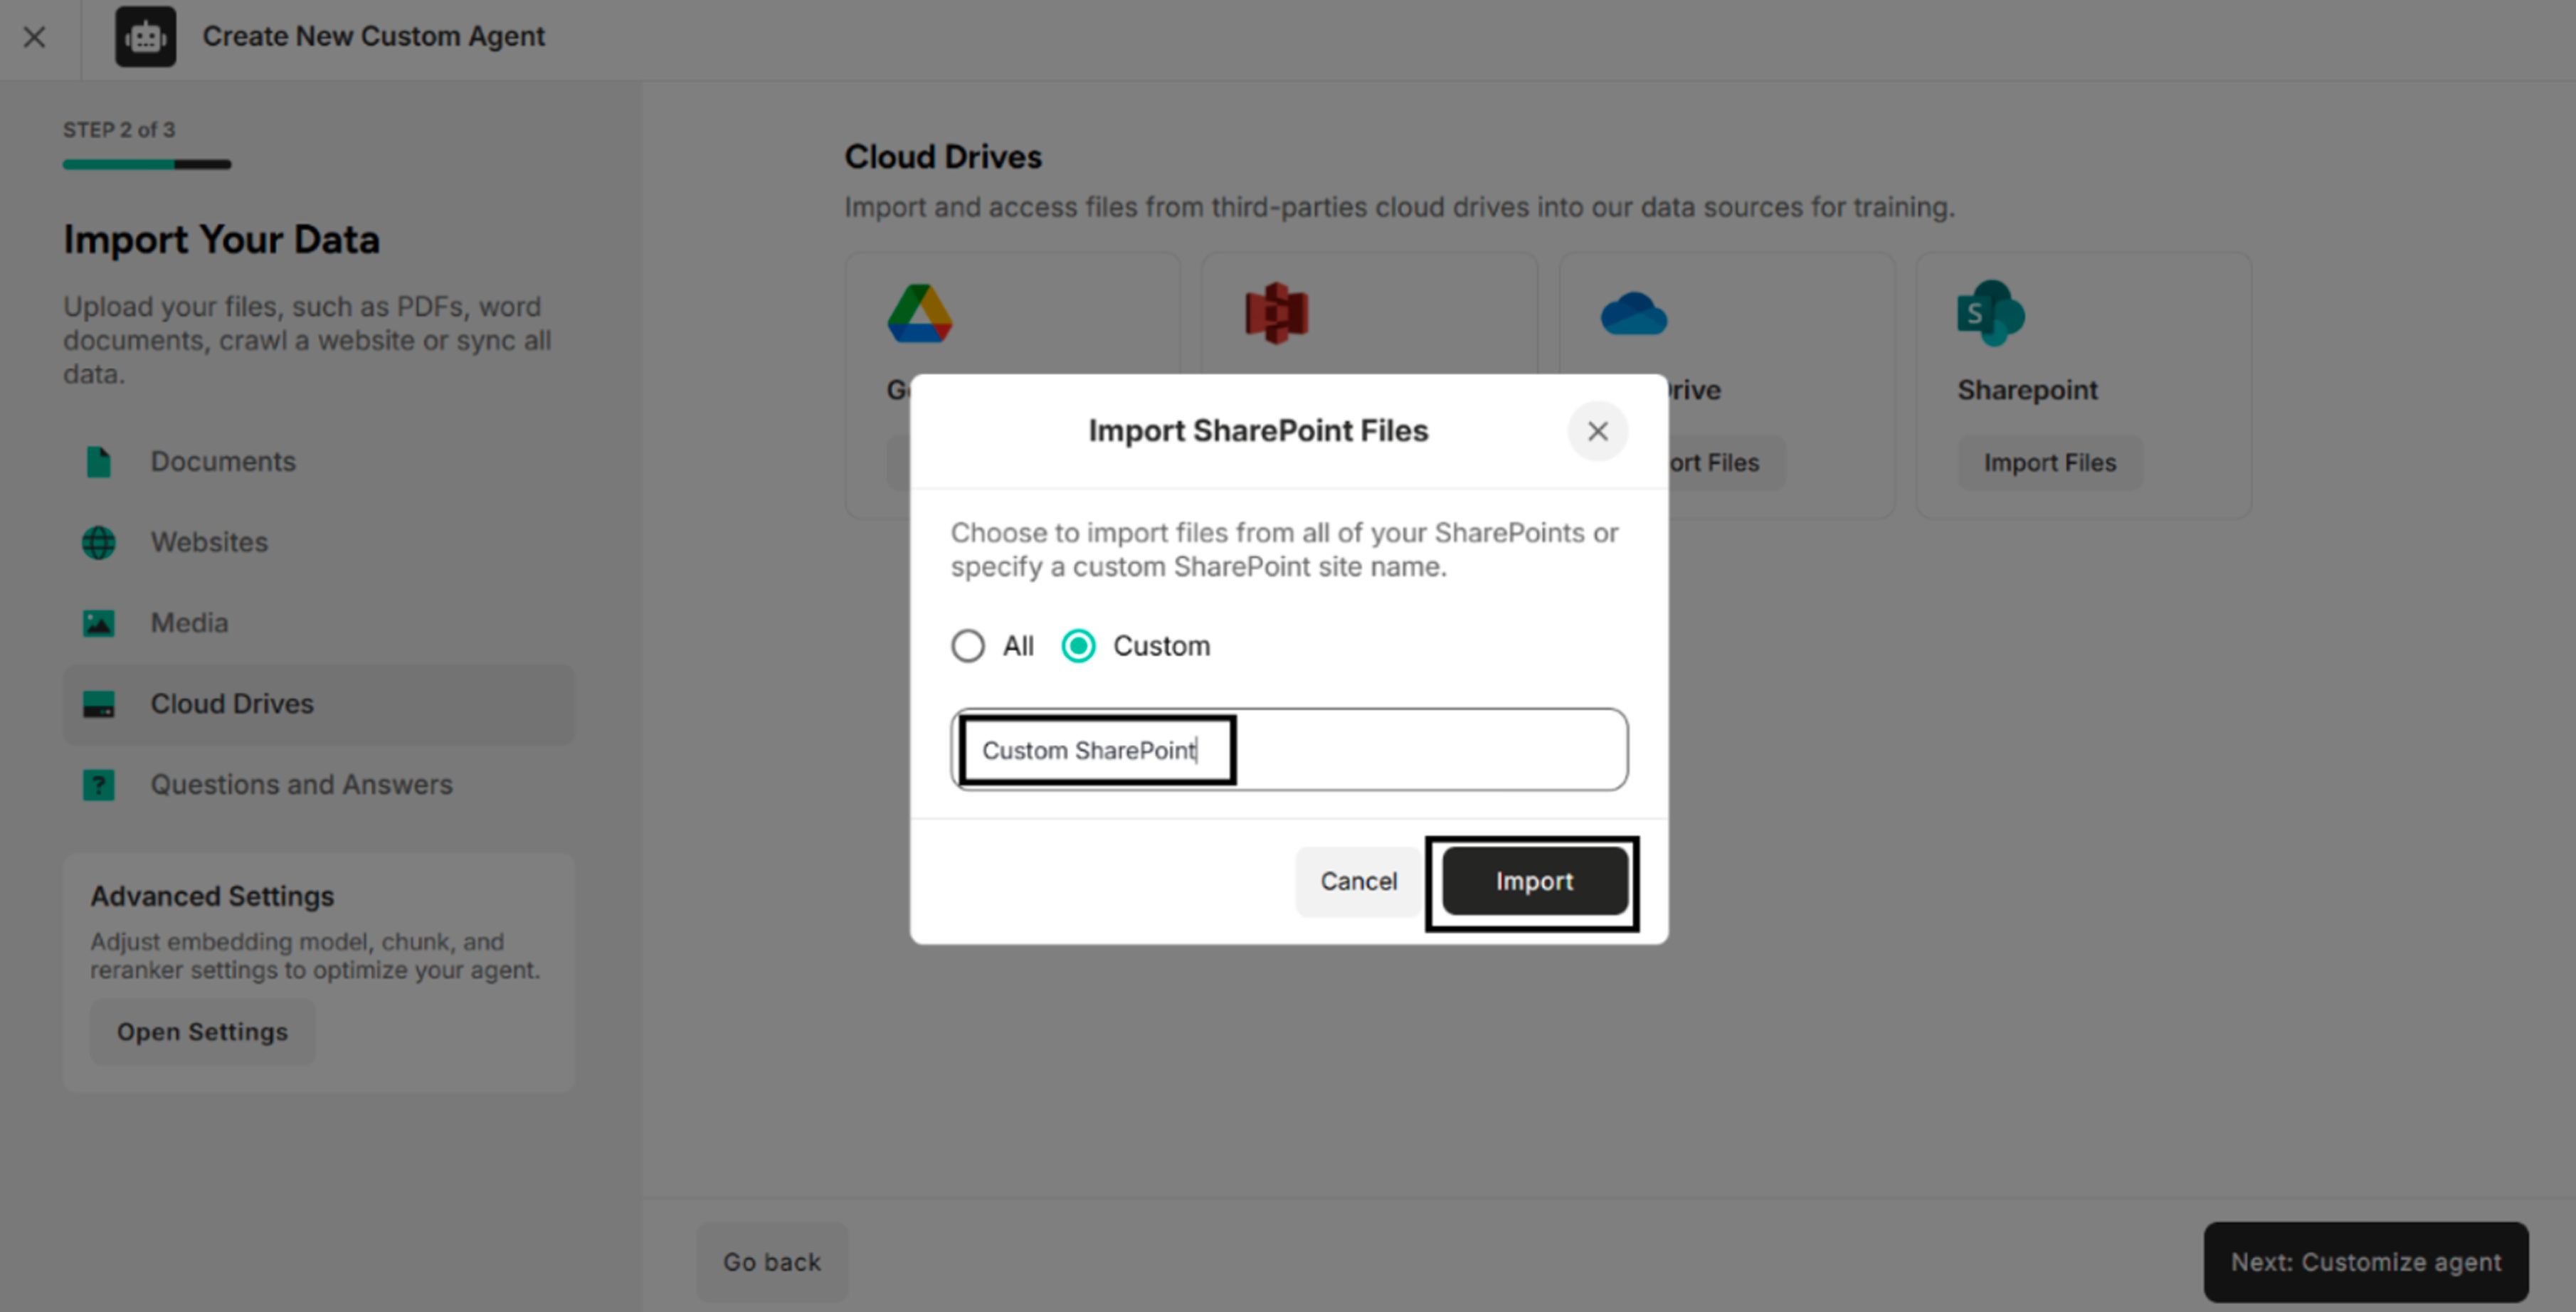
Step 2. Choose "All" and click "Import" or Choose "Custom", add Custom SharePoint Name and click "Import" The system will display the account Sign in Page.
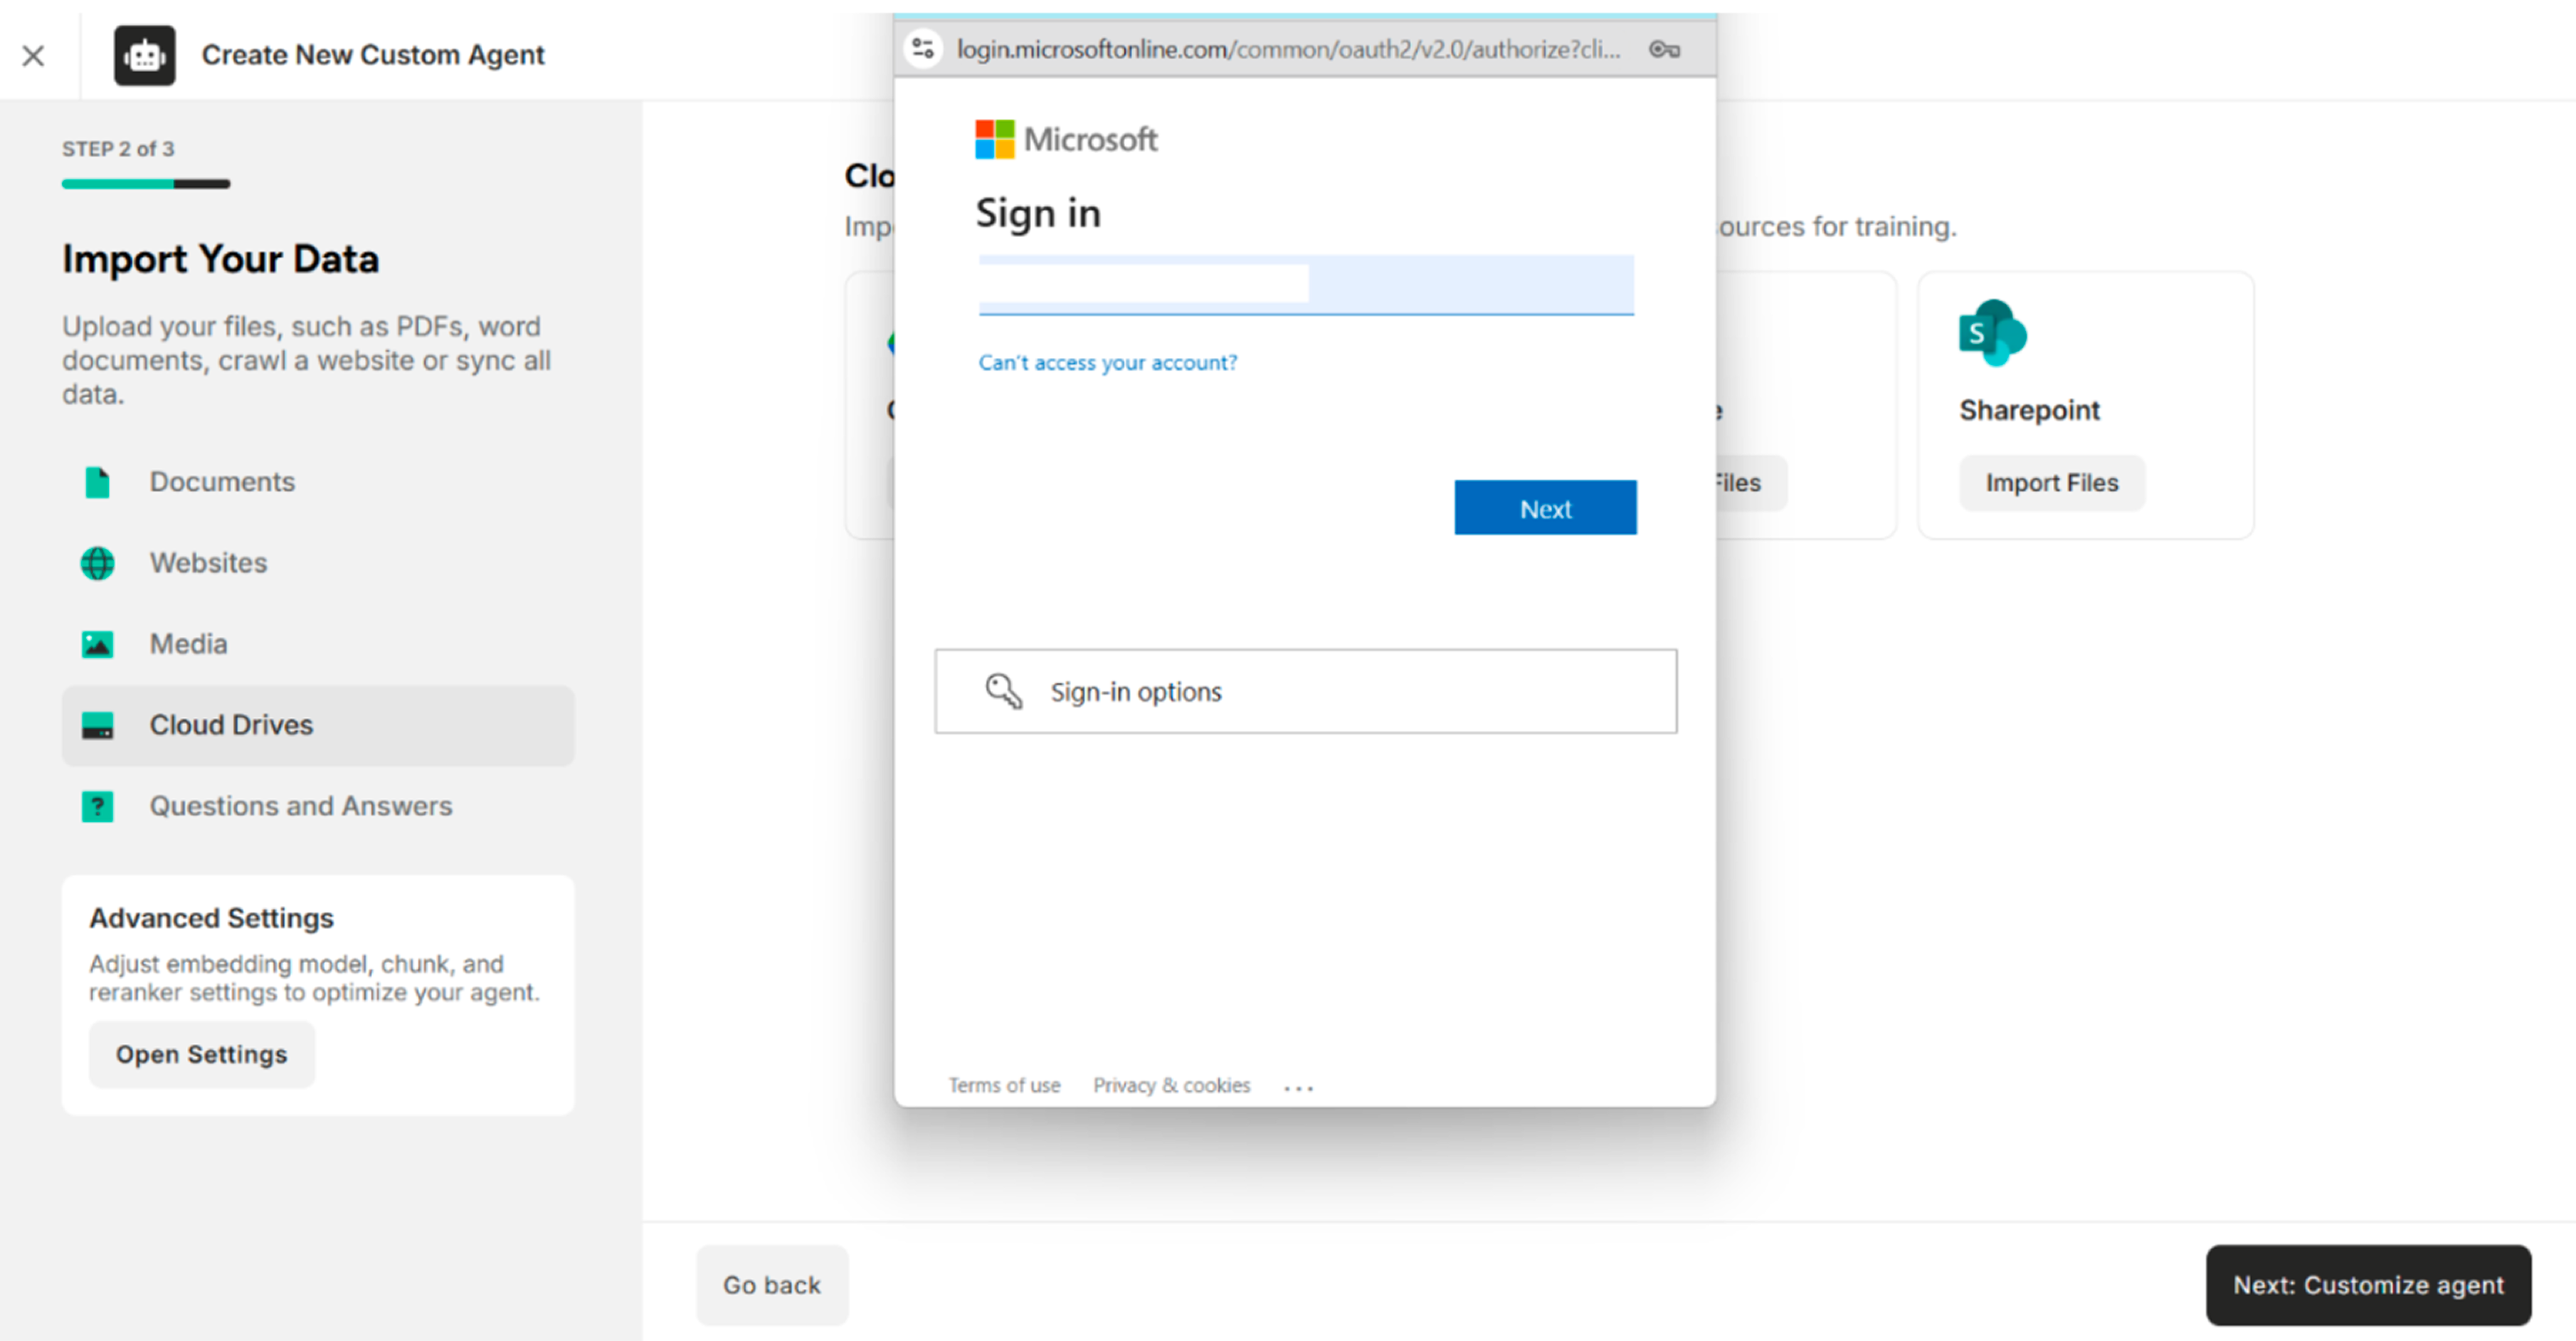
Step 3. Sign in with Microsoft Account (OneDrive) and Password The system will successfully log in and display the "Select Files" Interface.
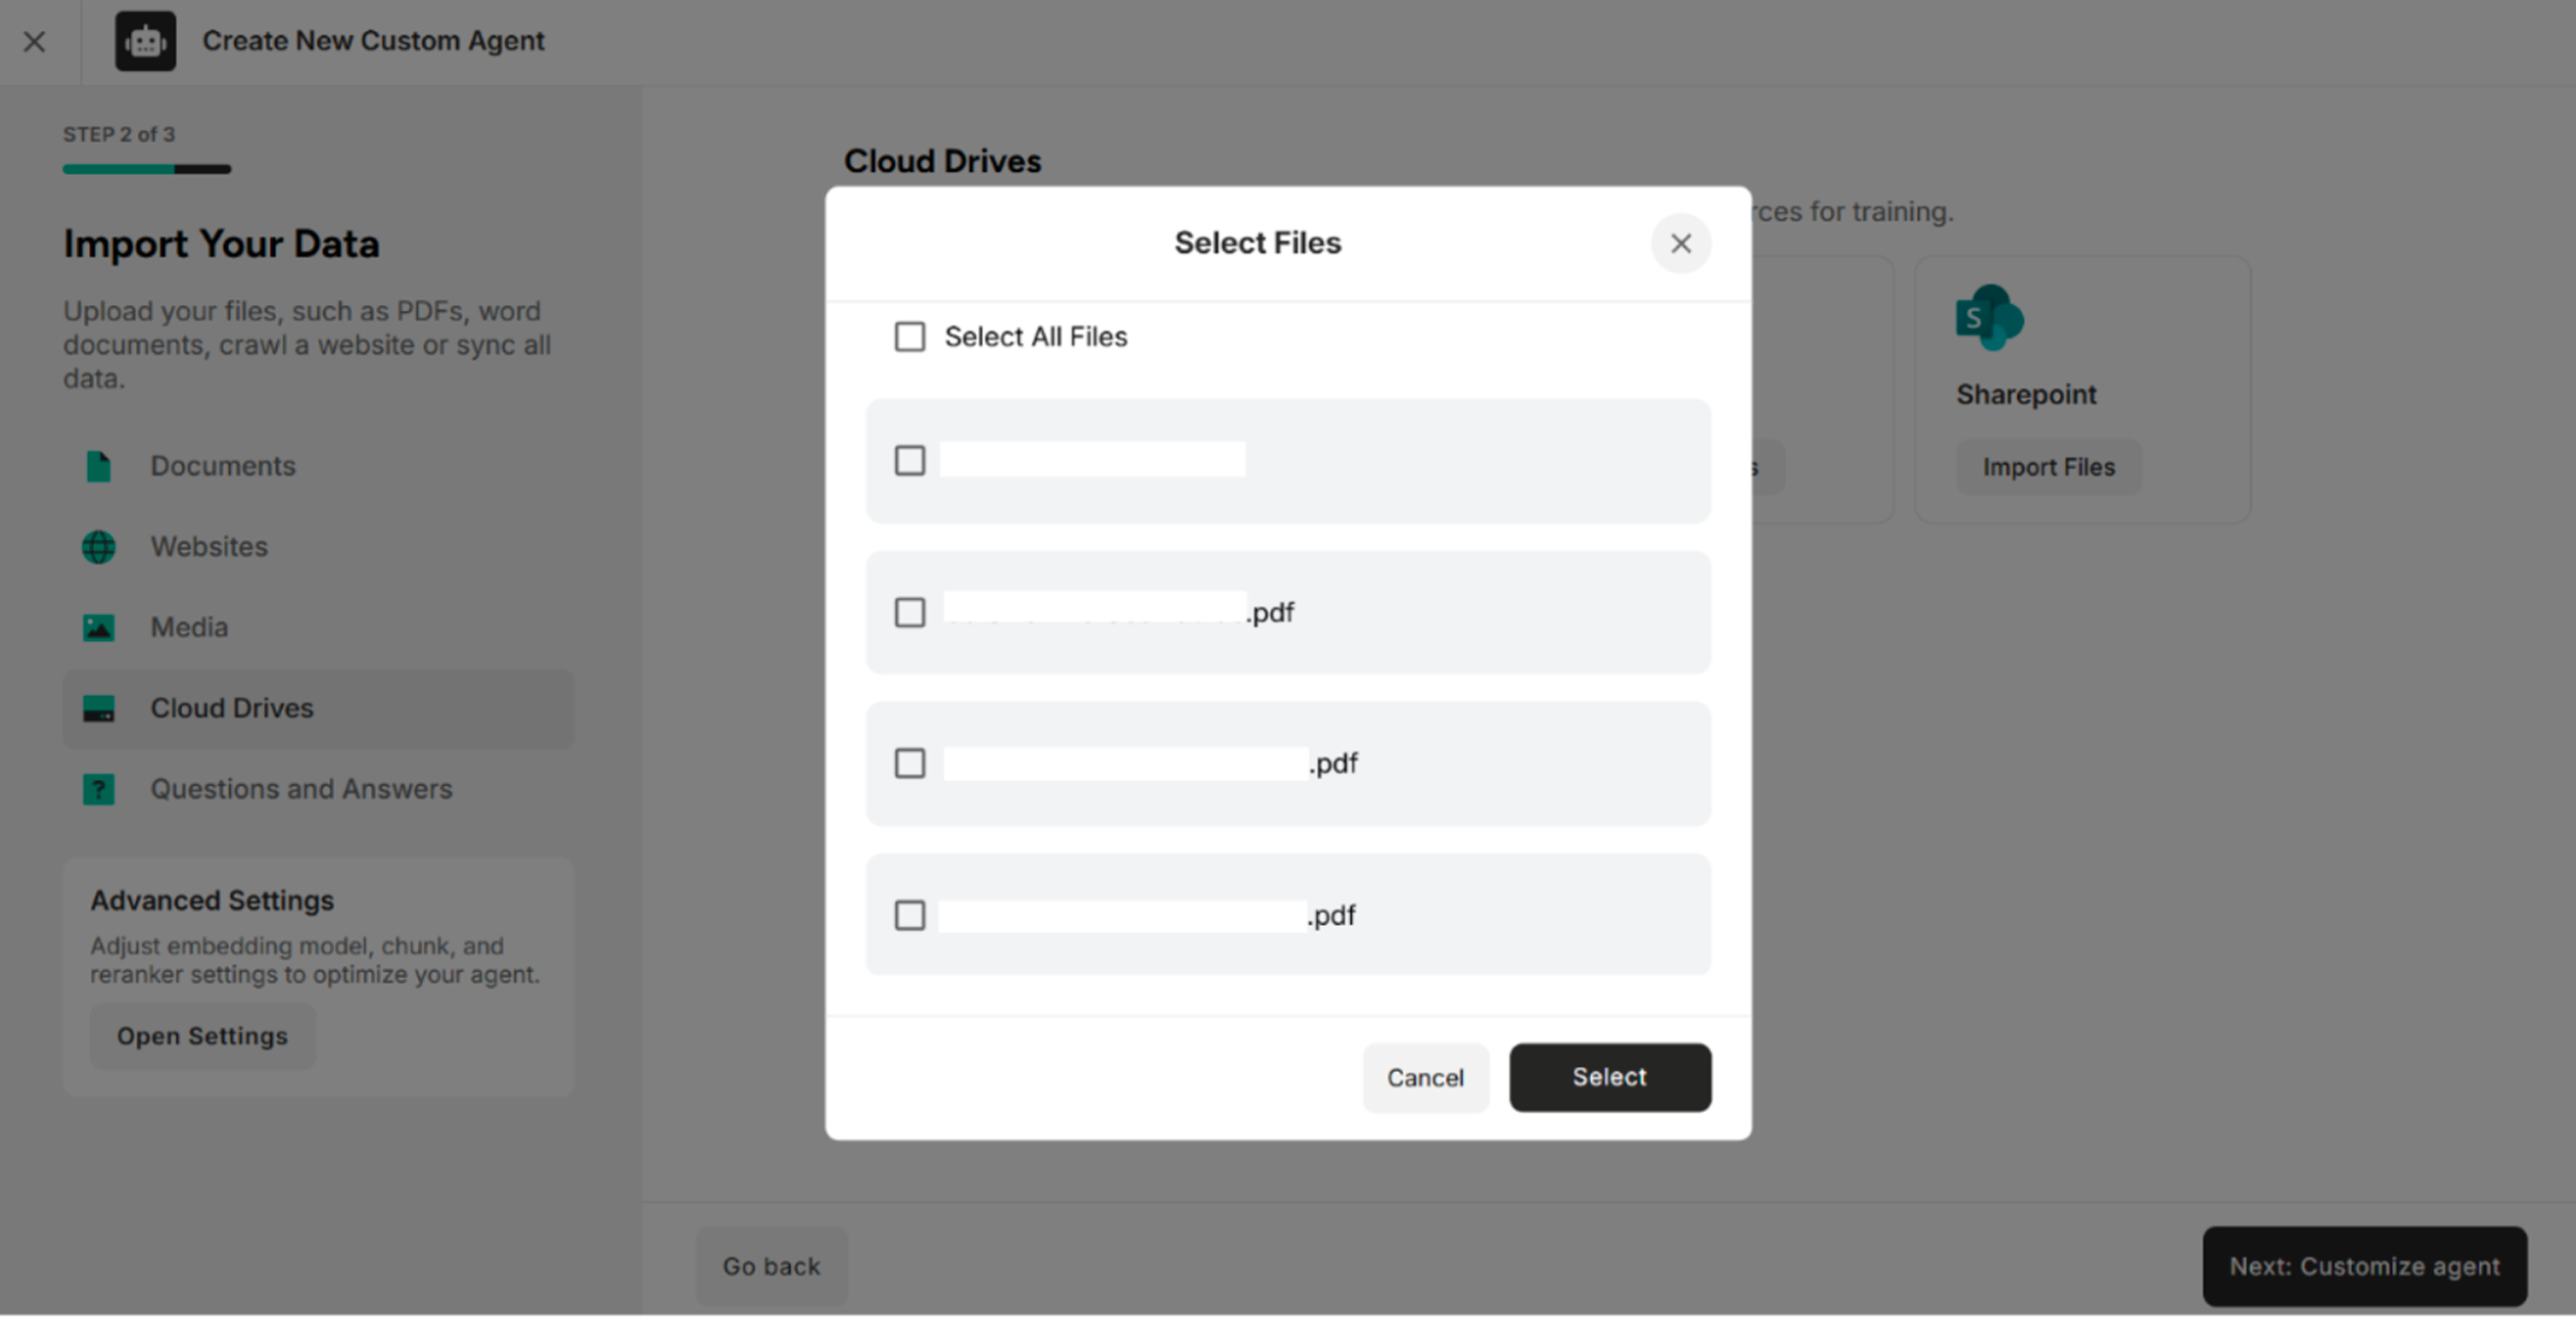
Step 3. Select the files from SharePoint and click Select The system will show the selected files from SharePoint.
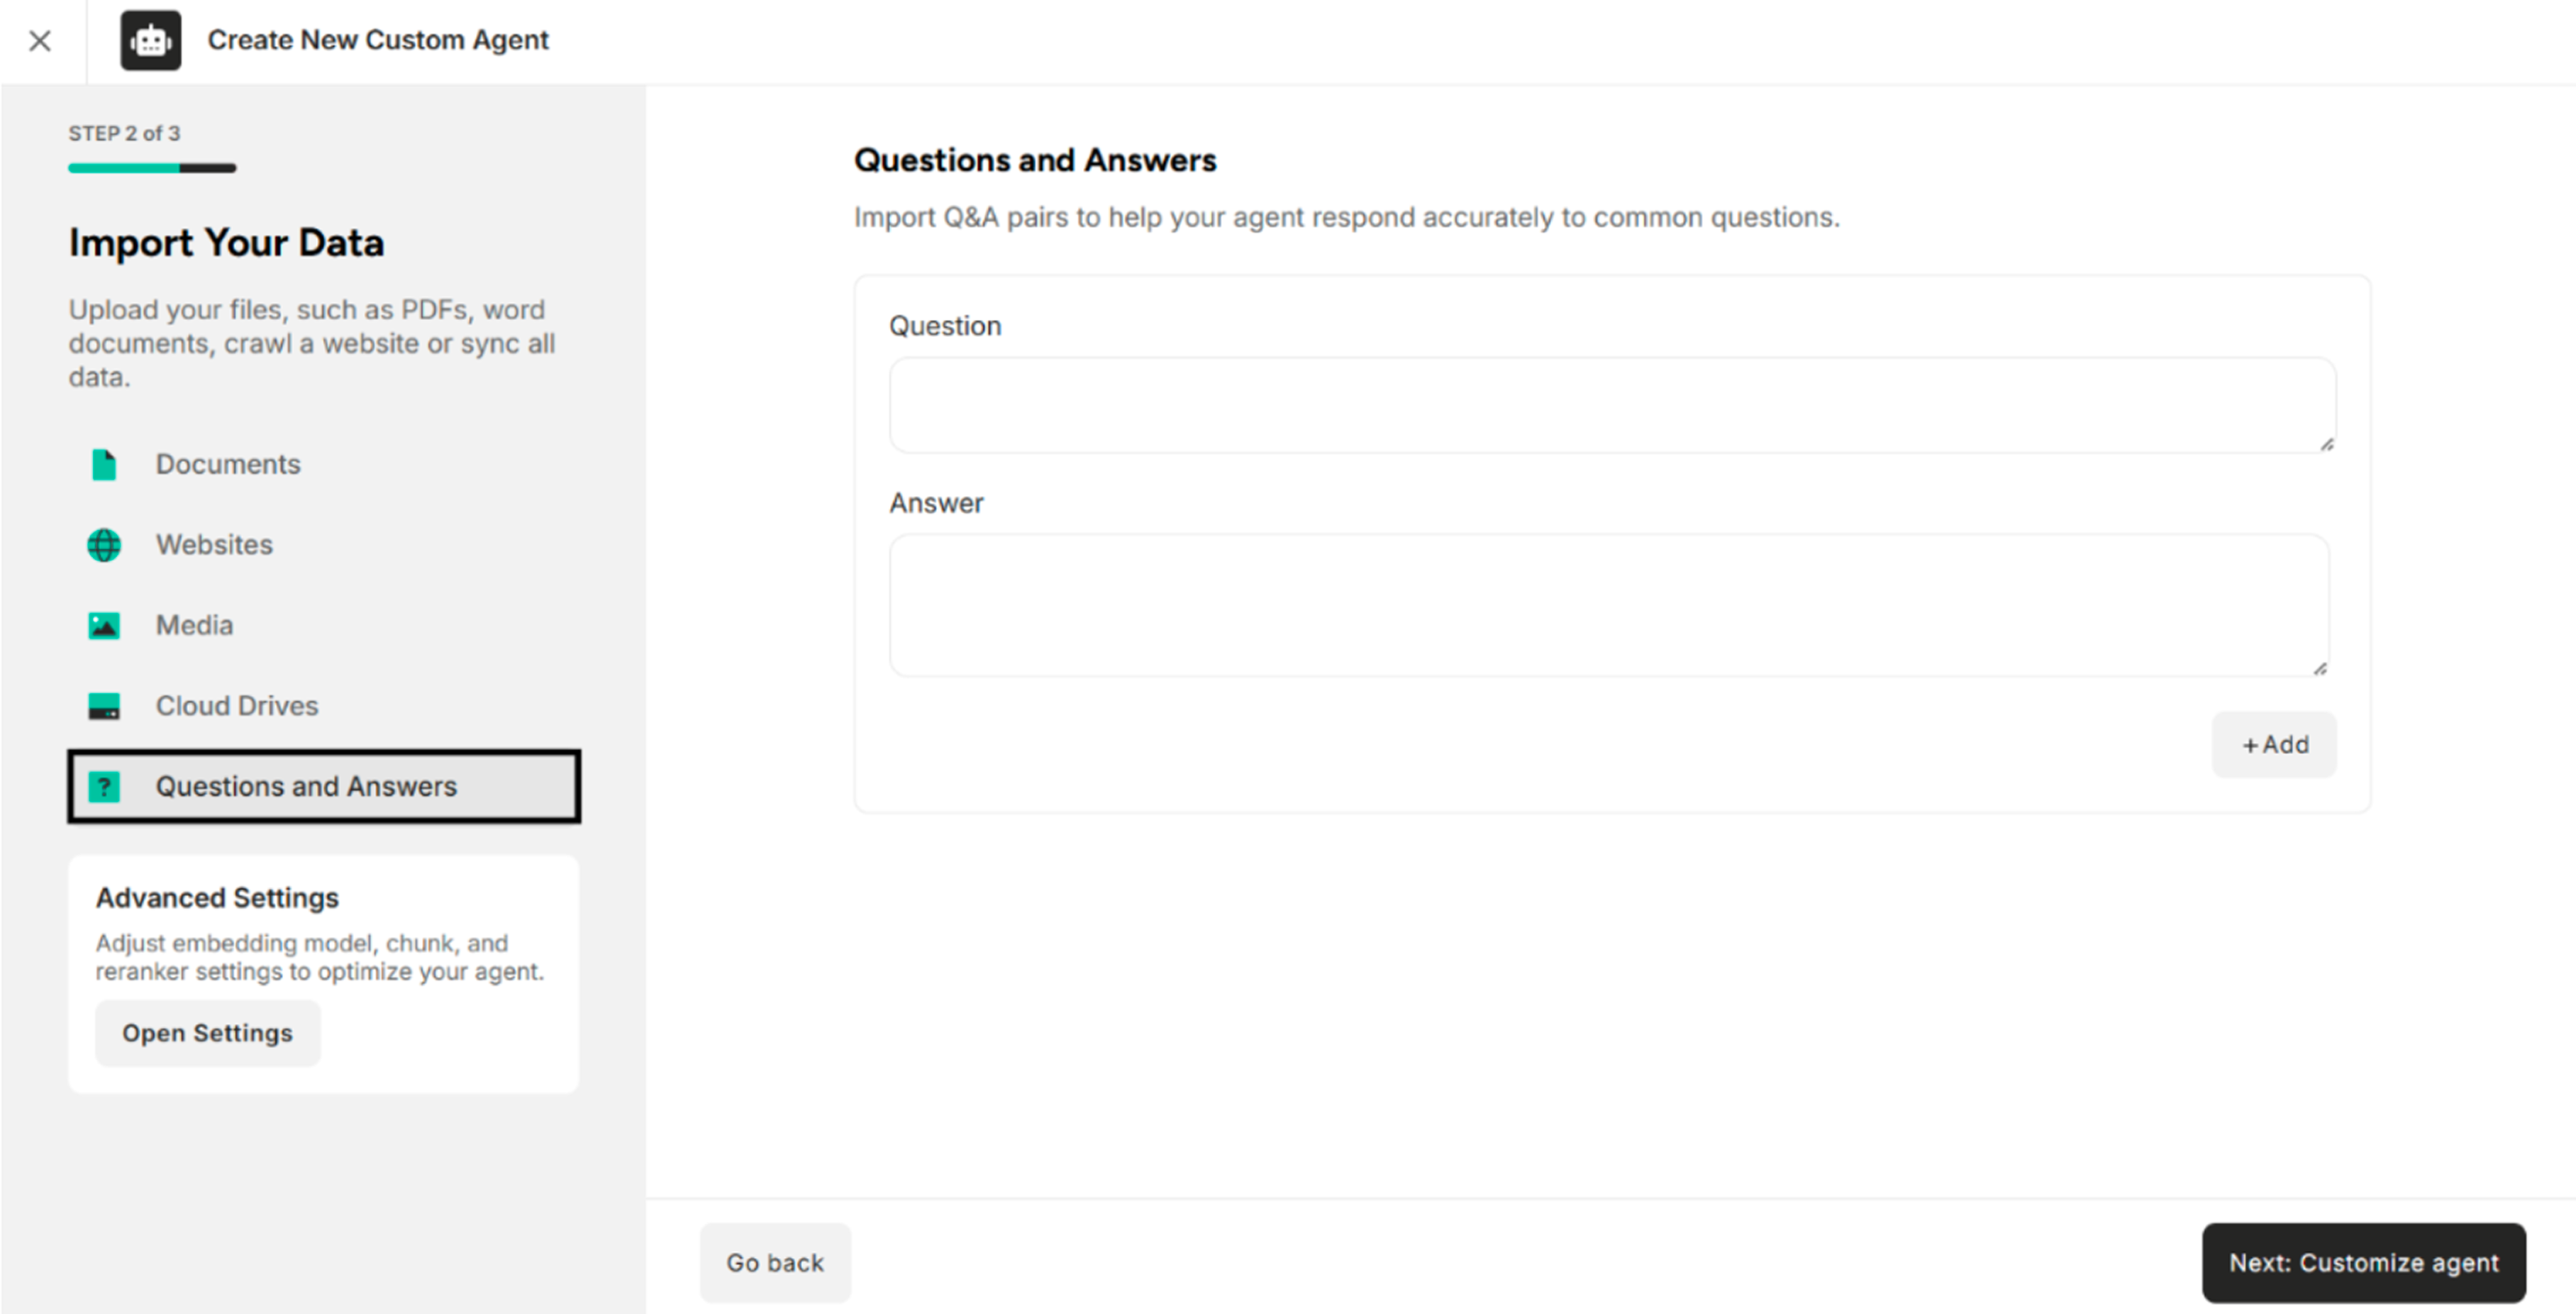
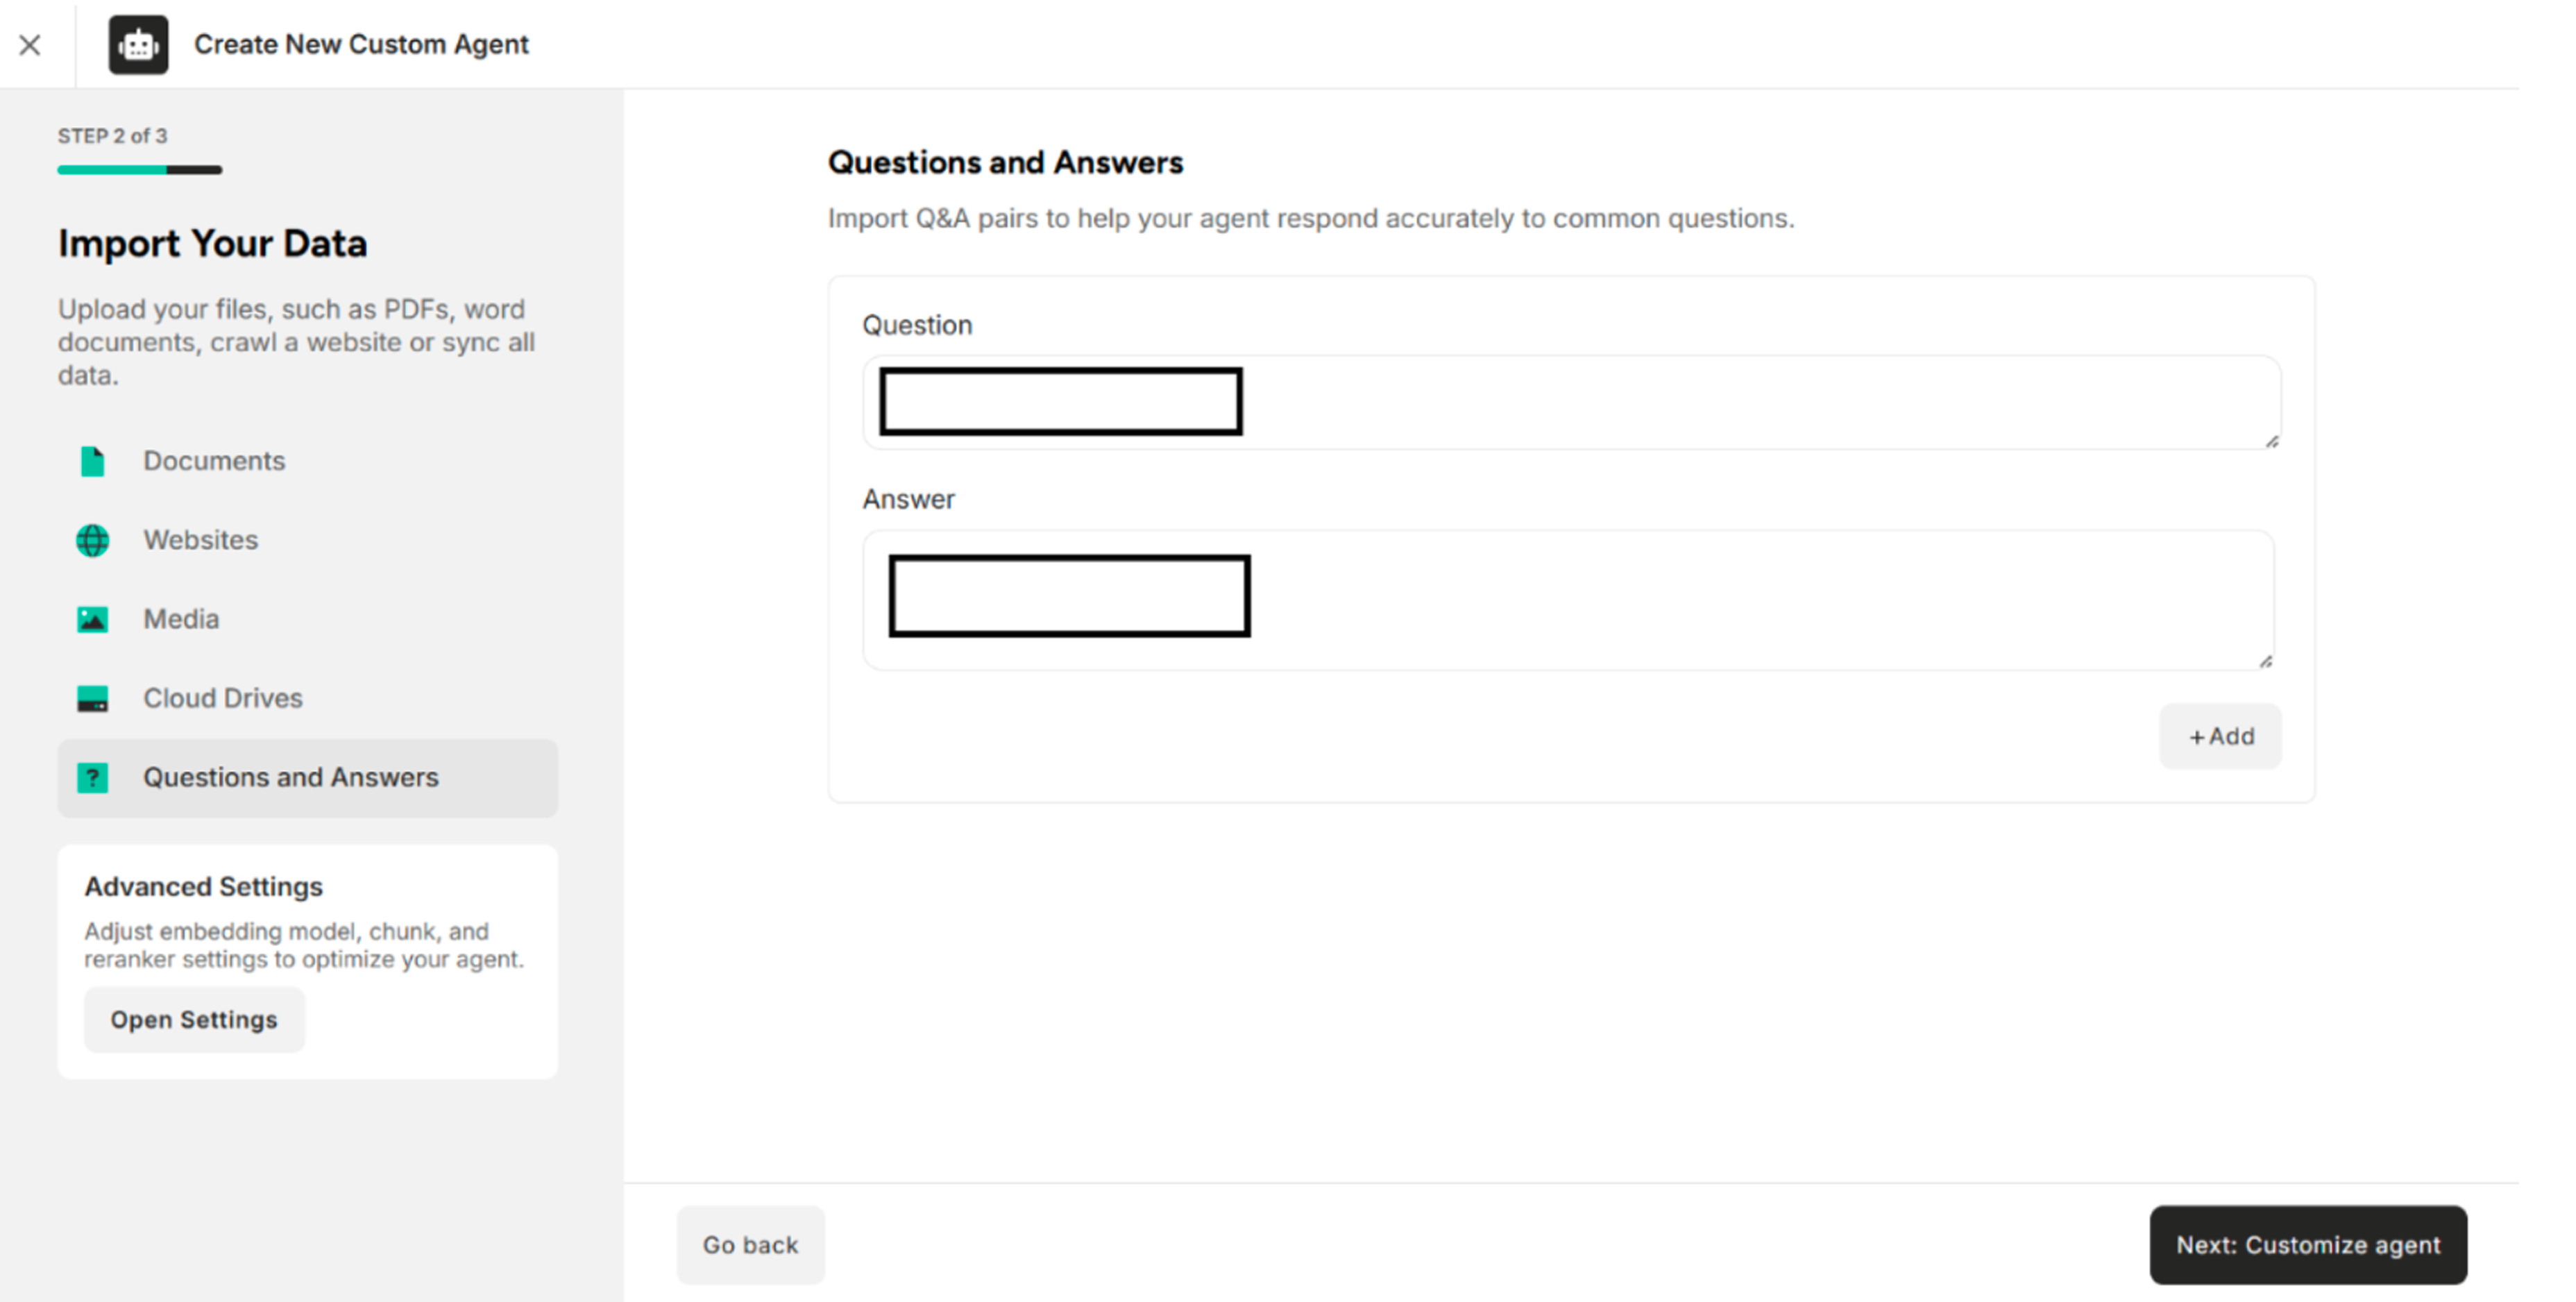
5. Import Q&A Pairs from Questions and Answers
| Field | Description |
|---|---|
| Questions and Answers | Import Q&A pairs to help the agent respond accurately to common questions. |
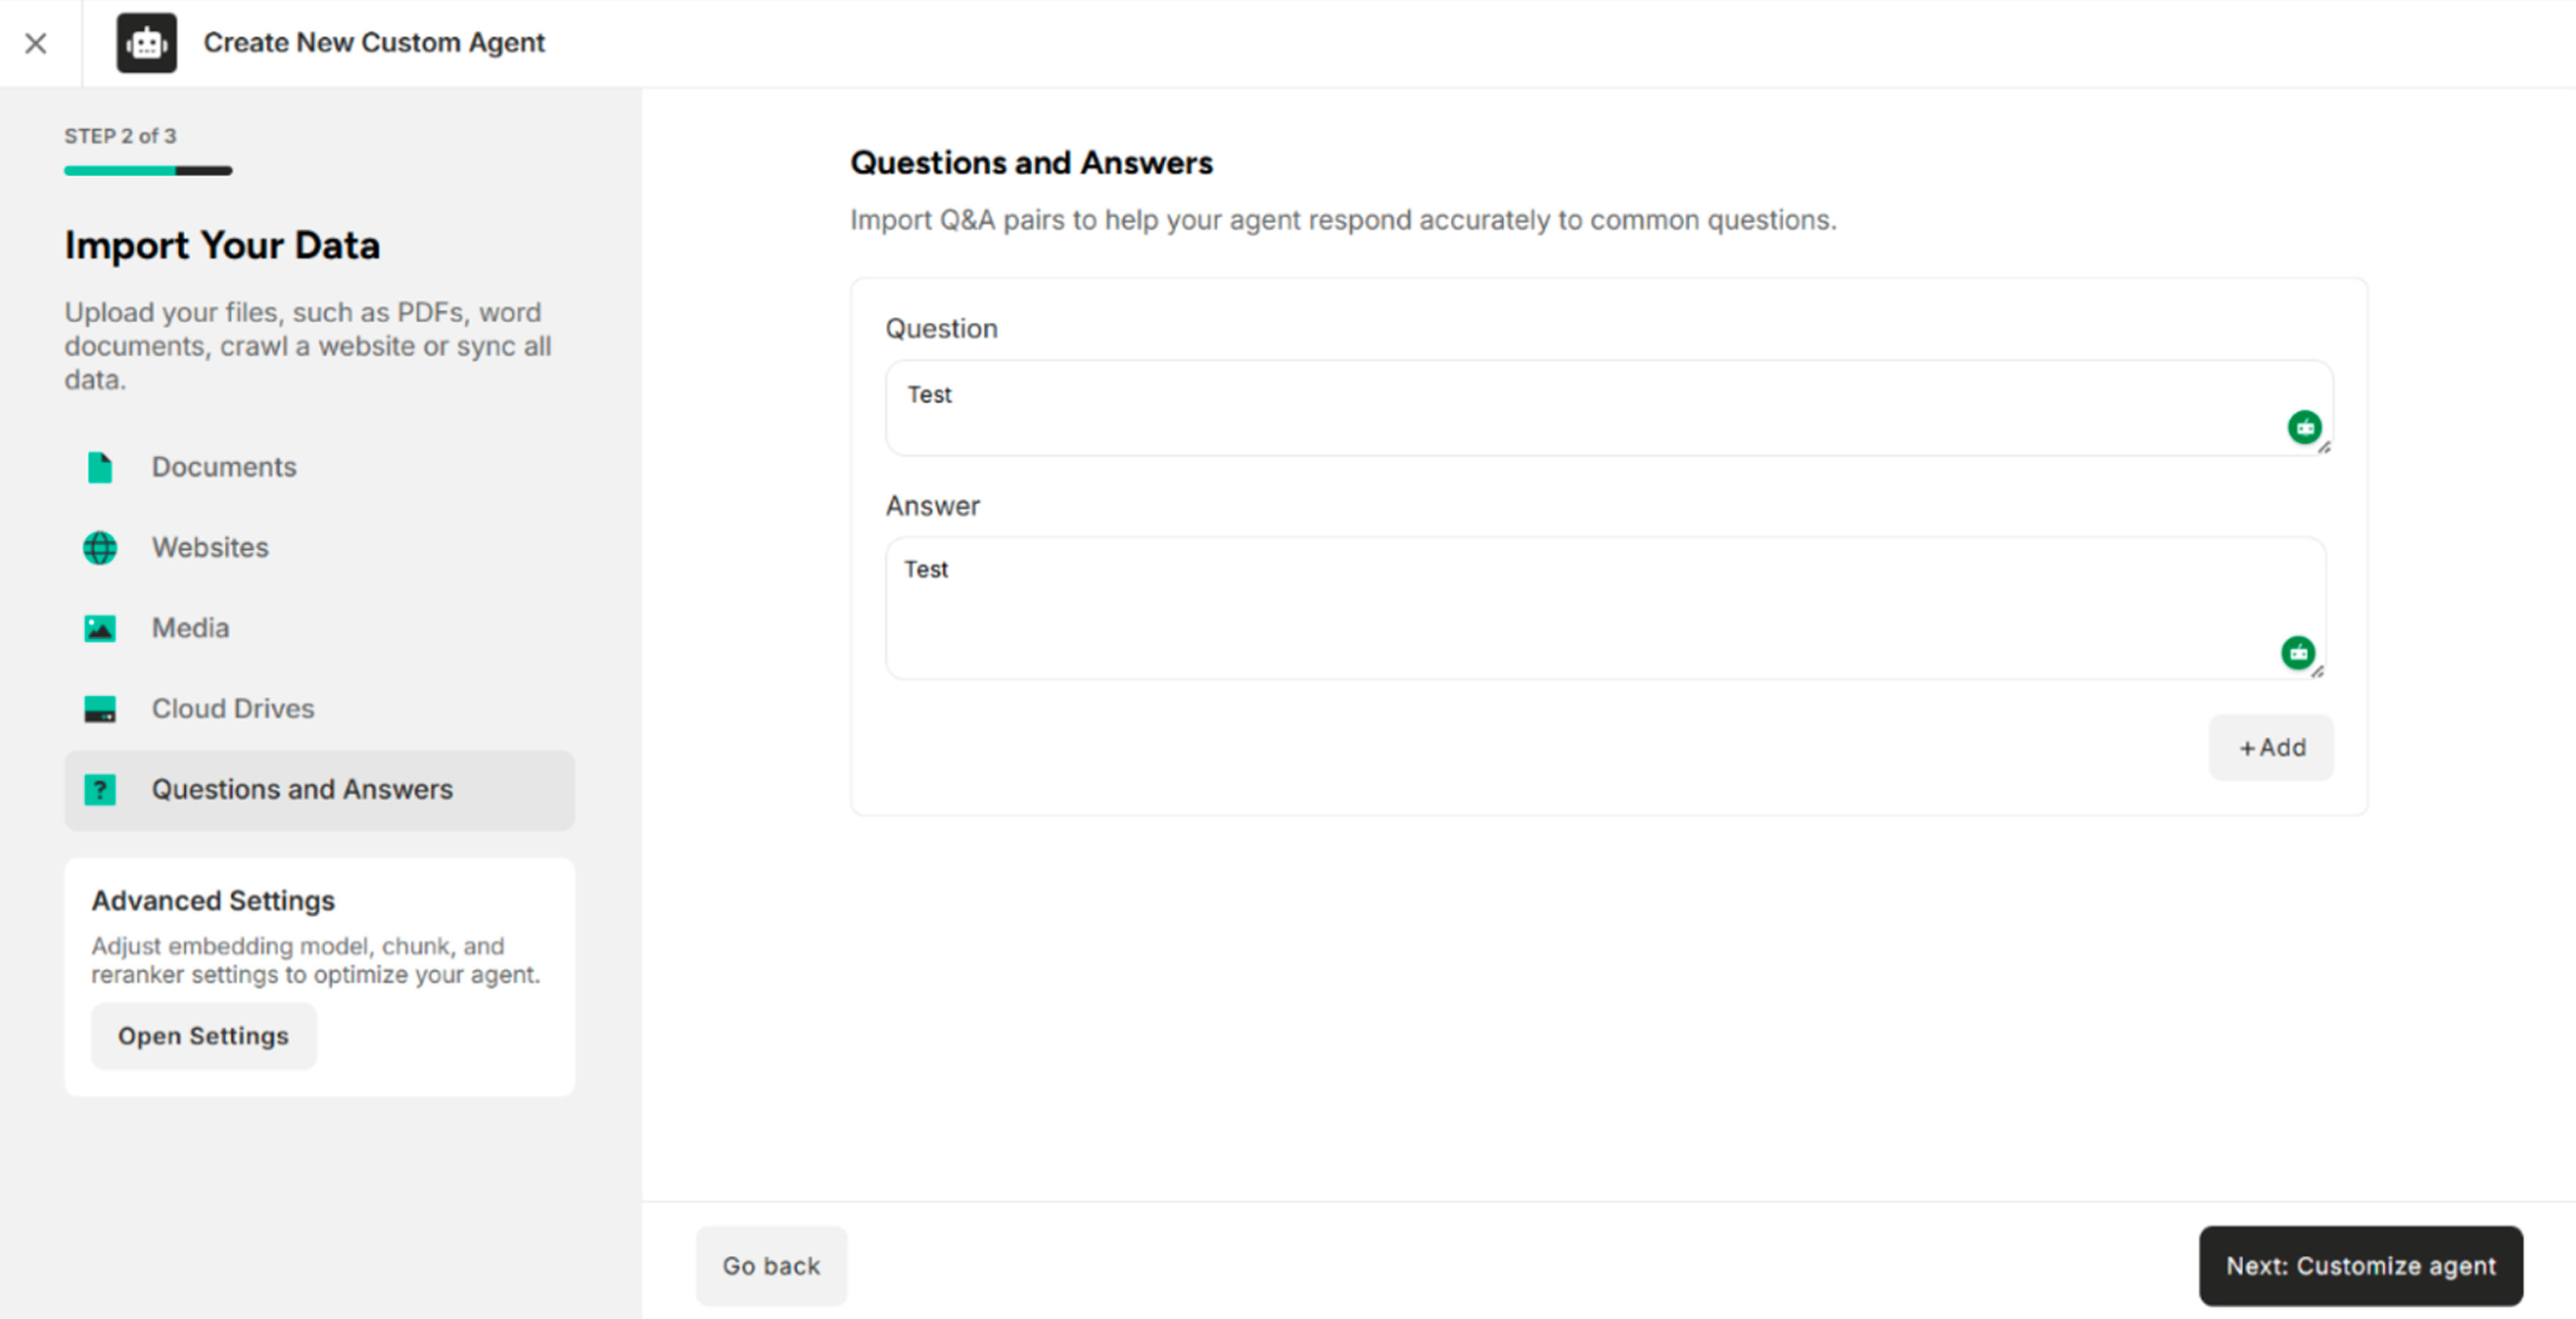
Step 1: Import or enter the Questions and Answers and click "Add" in the Q&A sections. The system will successfully add Questions and Answers and display the added Q&A pairs in the Questions and Answers Section.
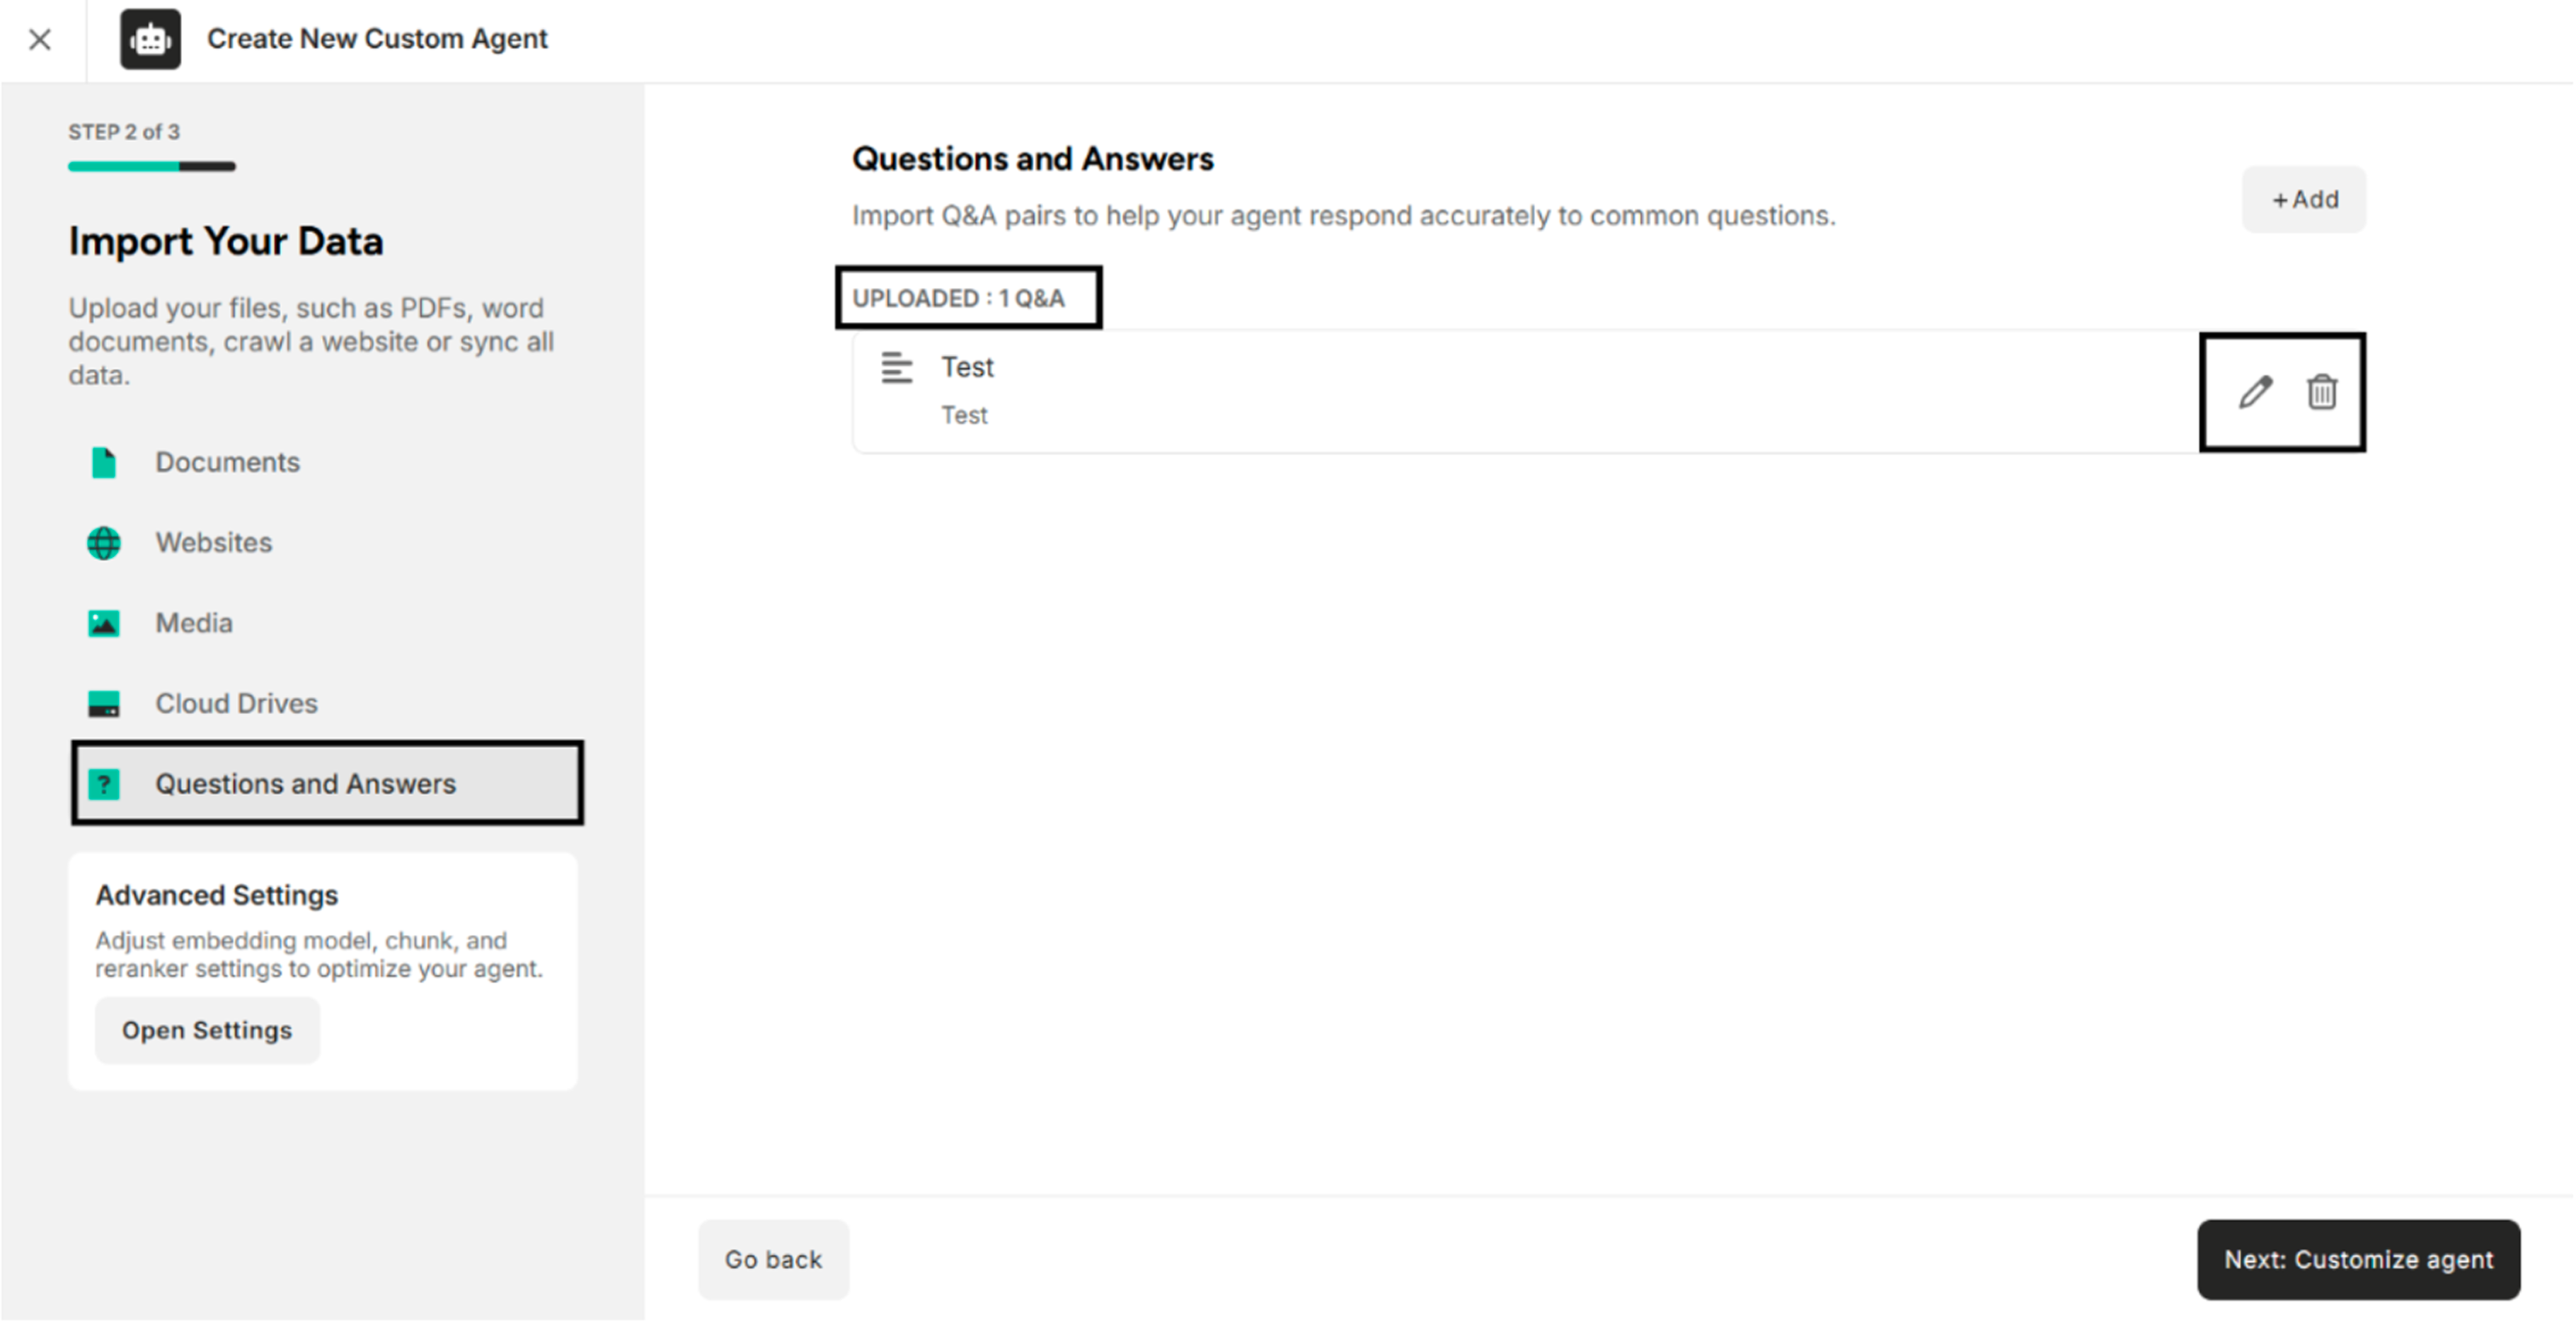
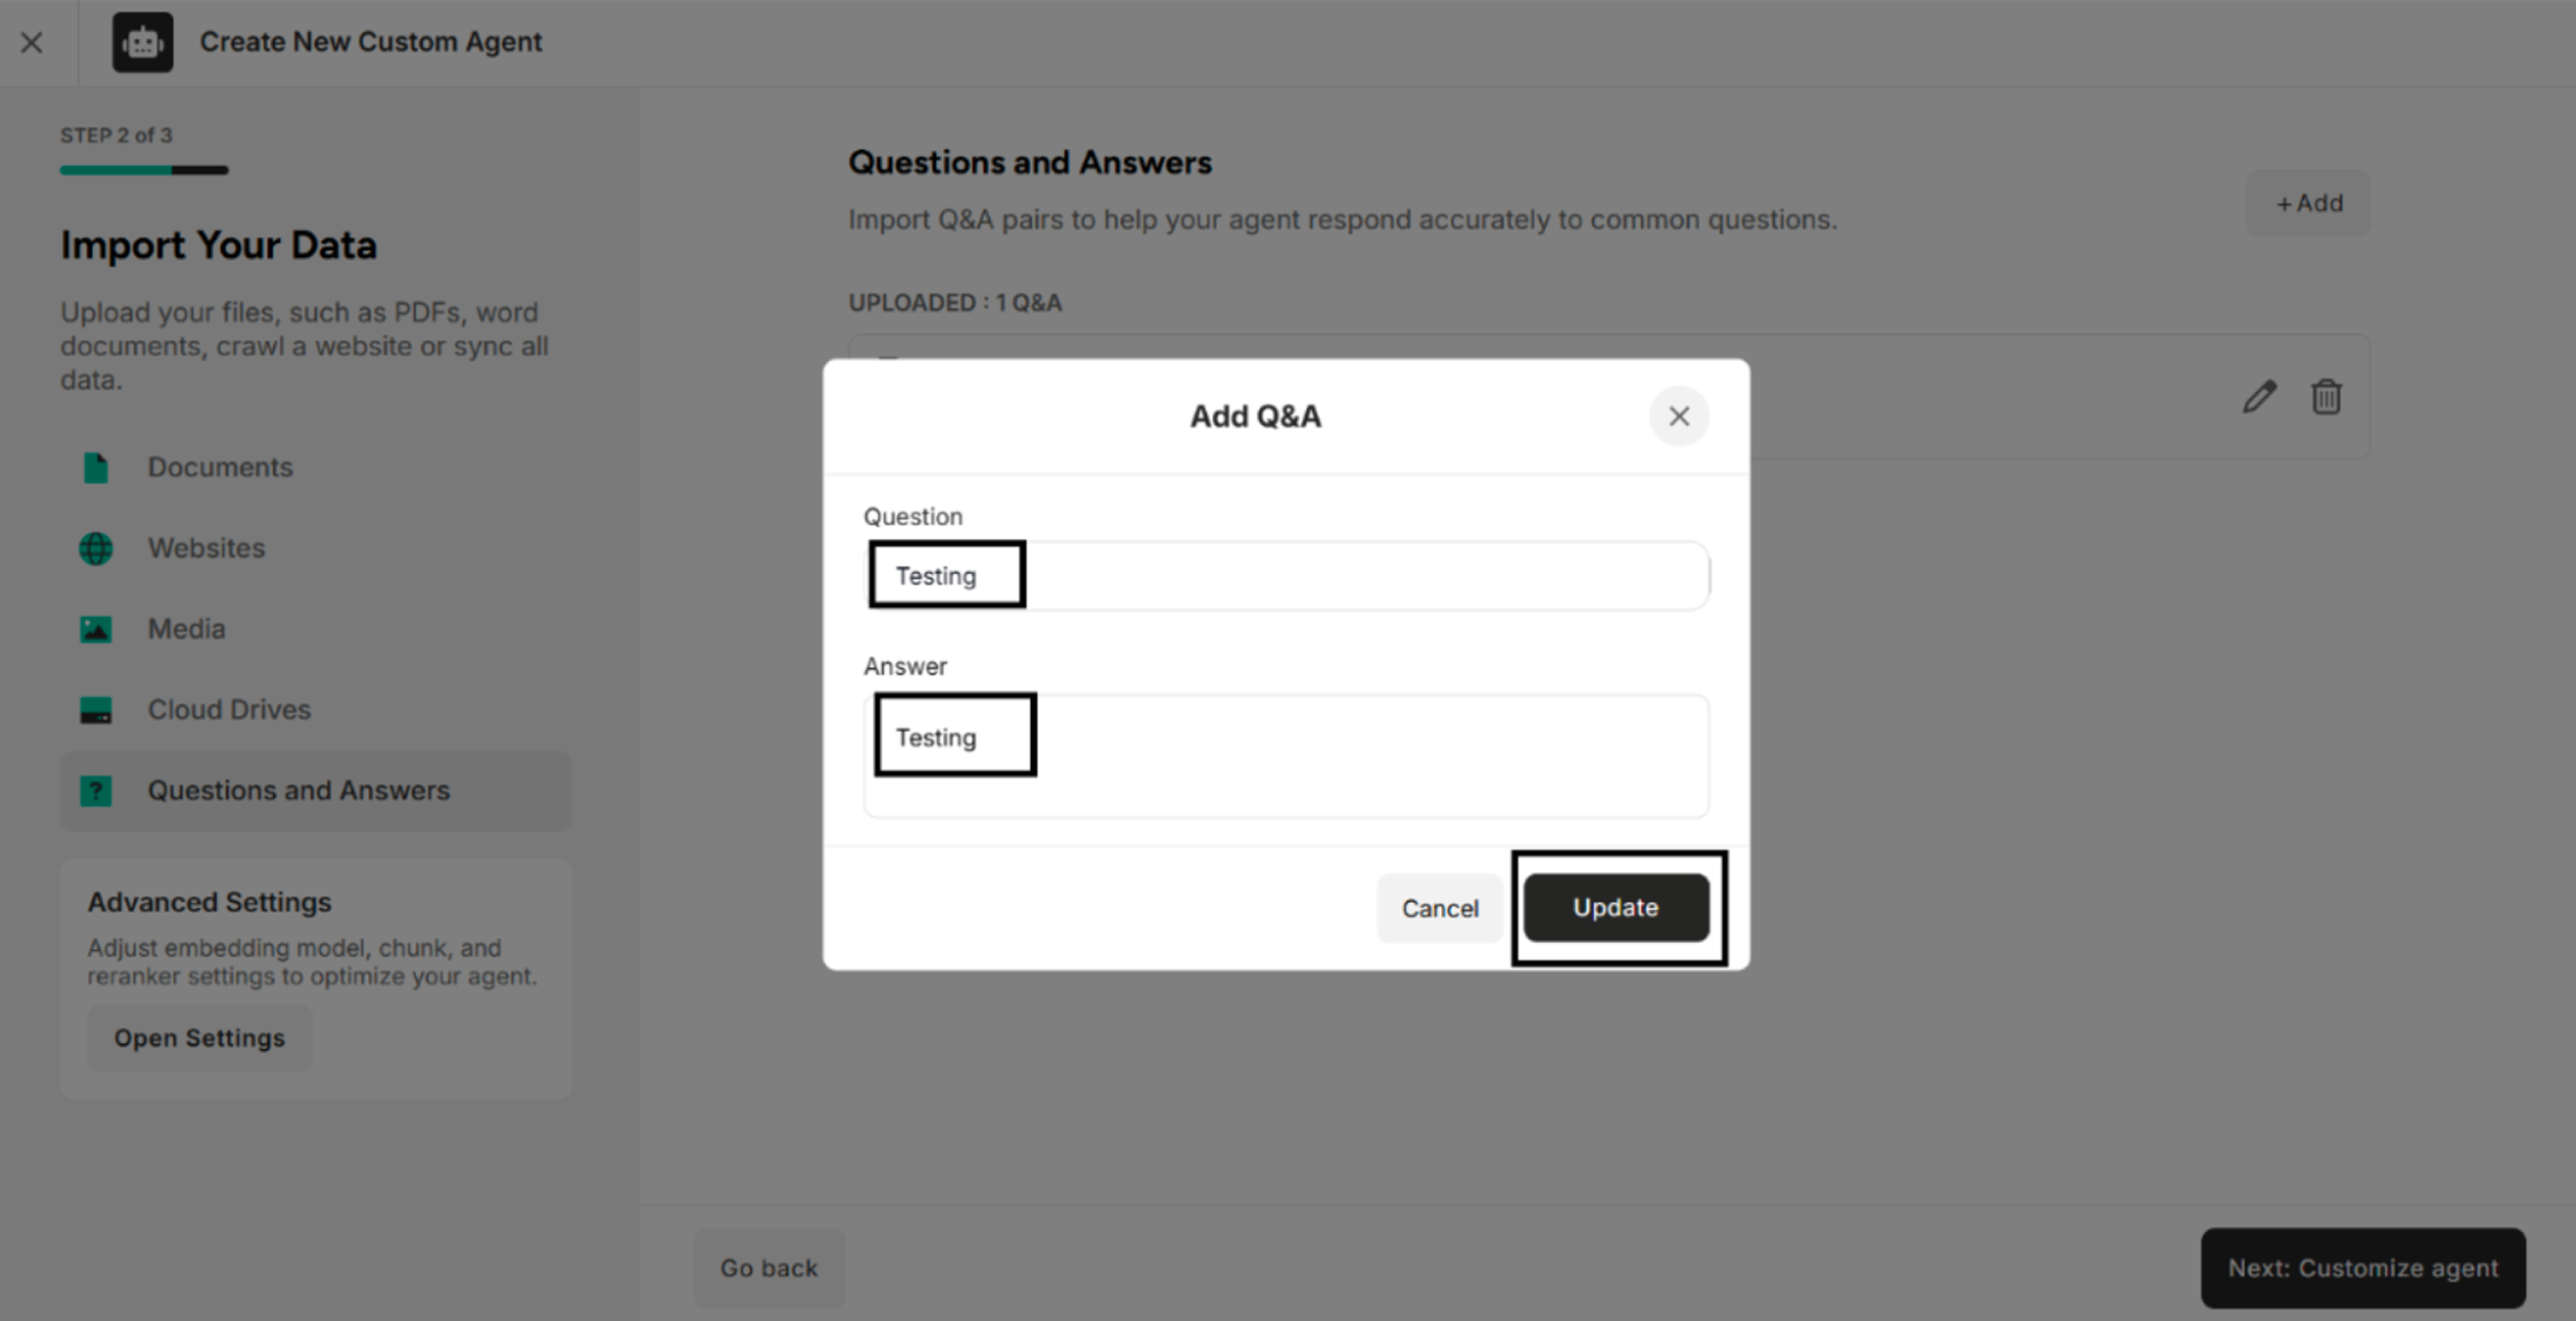
Step 2: Click the Edit icon and Update button to edit Questions and Answers in the Add Q&A popup. The system will successfully edit and update Q&A and display the updated Q&A pairs in the Questions and Answers section.
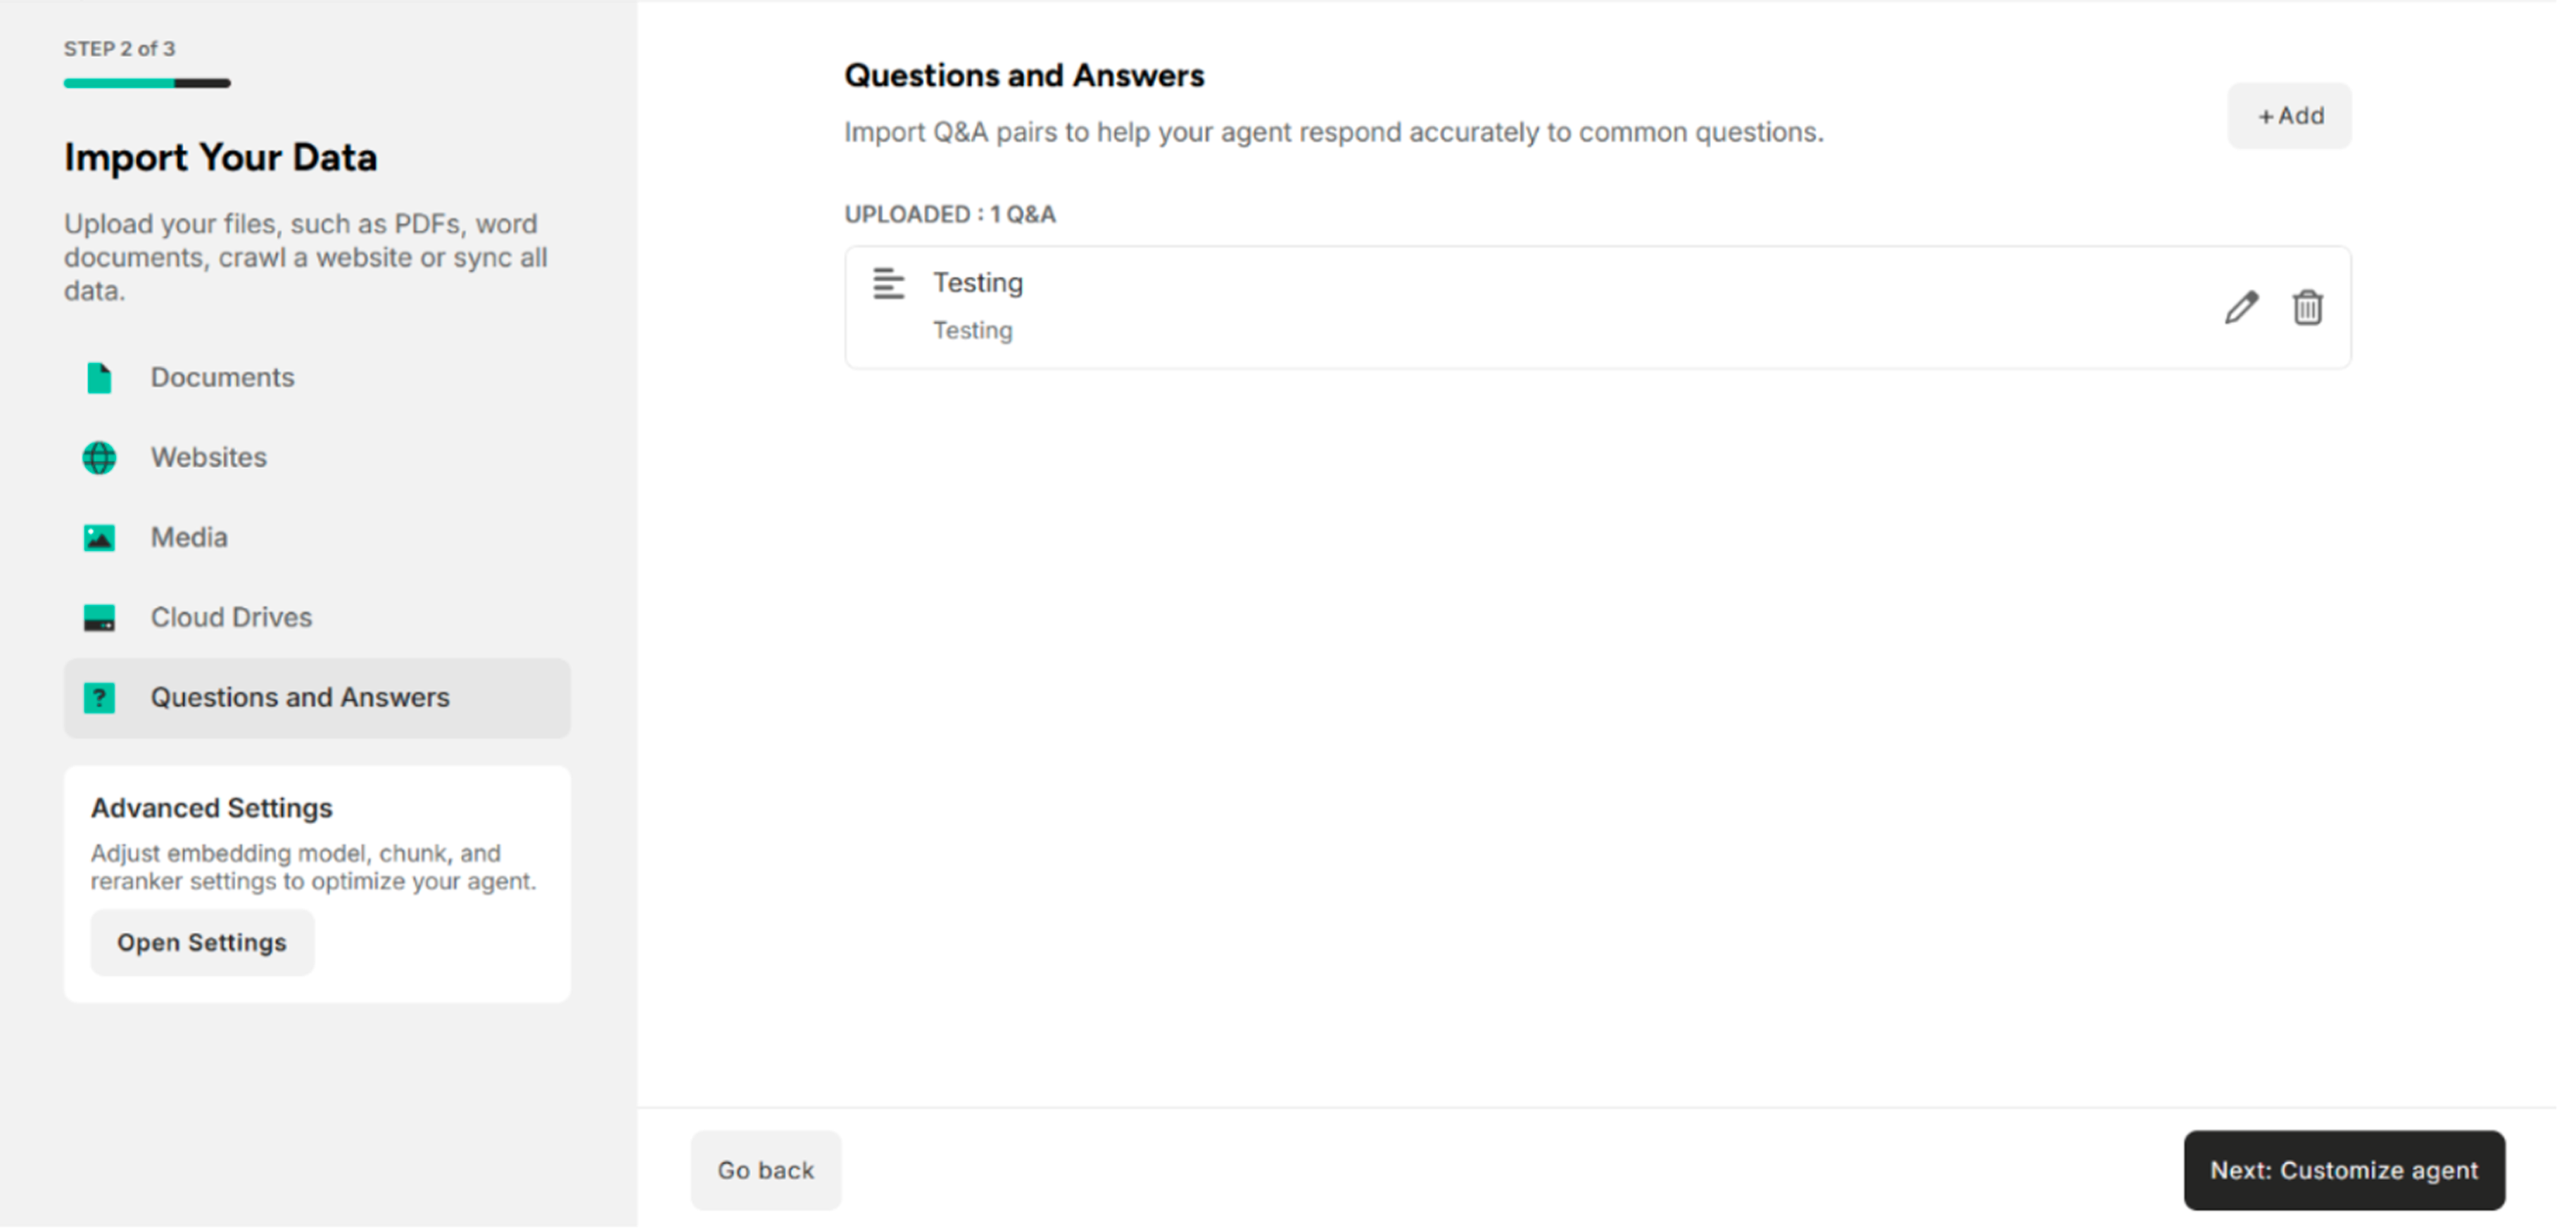
Step 3: Click the Delete Icon The system will successfully delete the added or updated Questions and Answers.
| Button | Description |
|---|---|
| + Add | Add the Questions and Answers pairs |
| Cancel | Cancel the Questions and Answers pairs |
| Update | Update the Questions and Answers pairs |
| Delete | Delete the added Questions and Answers pairs |
The following buttons are available in the Import Your Data Interface:
| Button | Description |
|---|---|
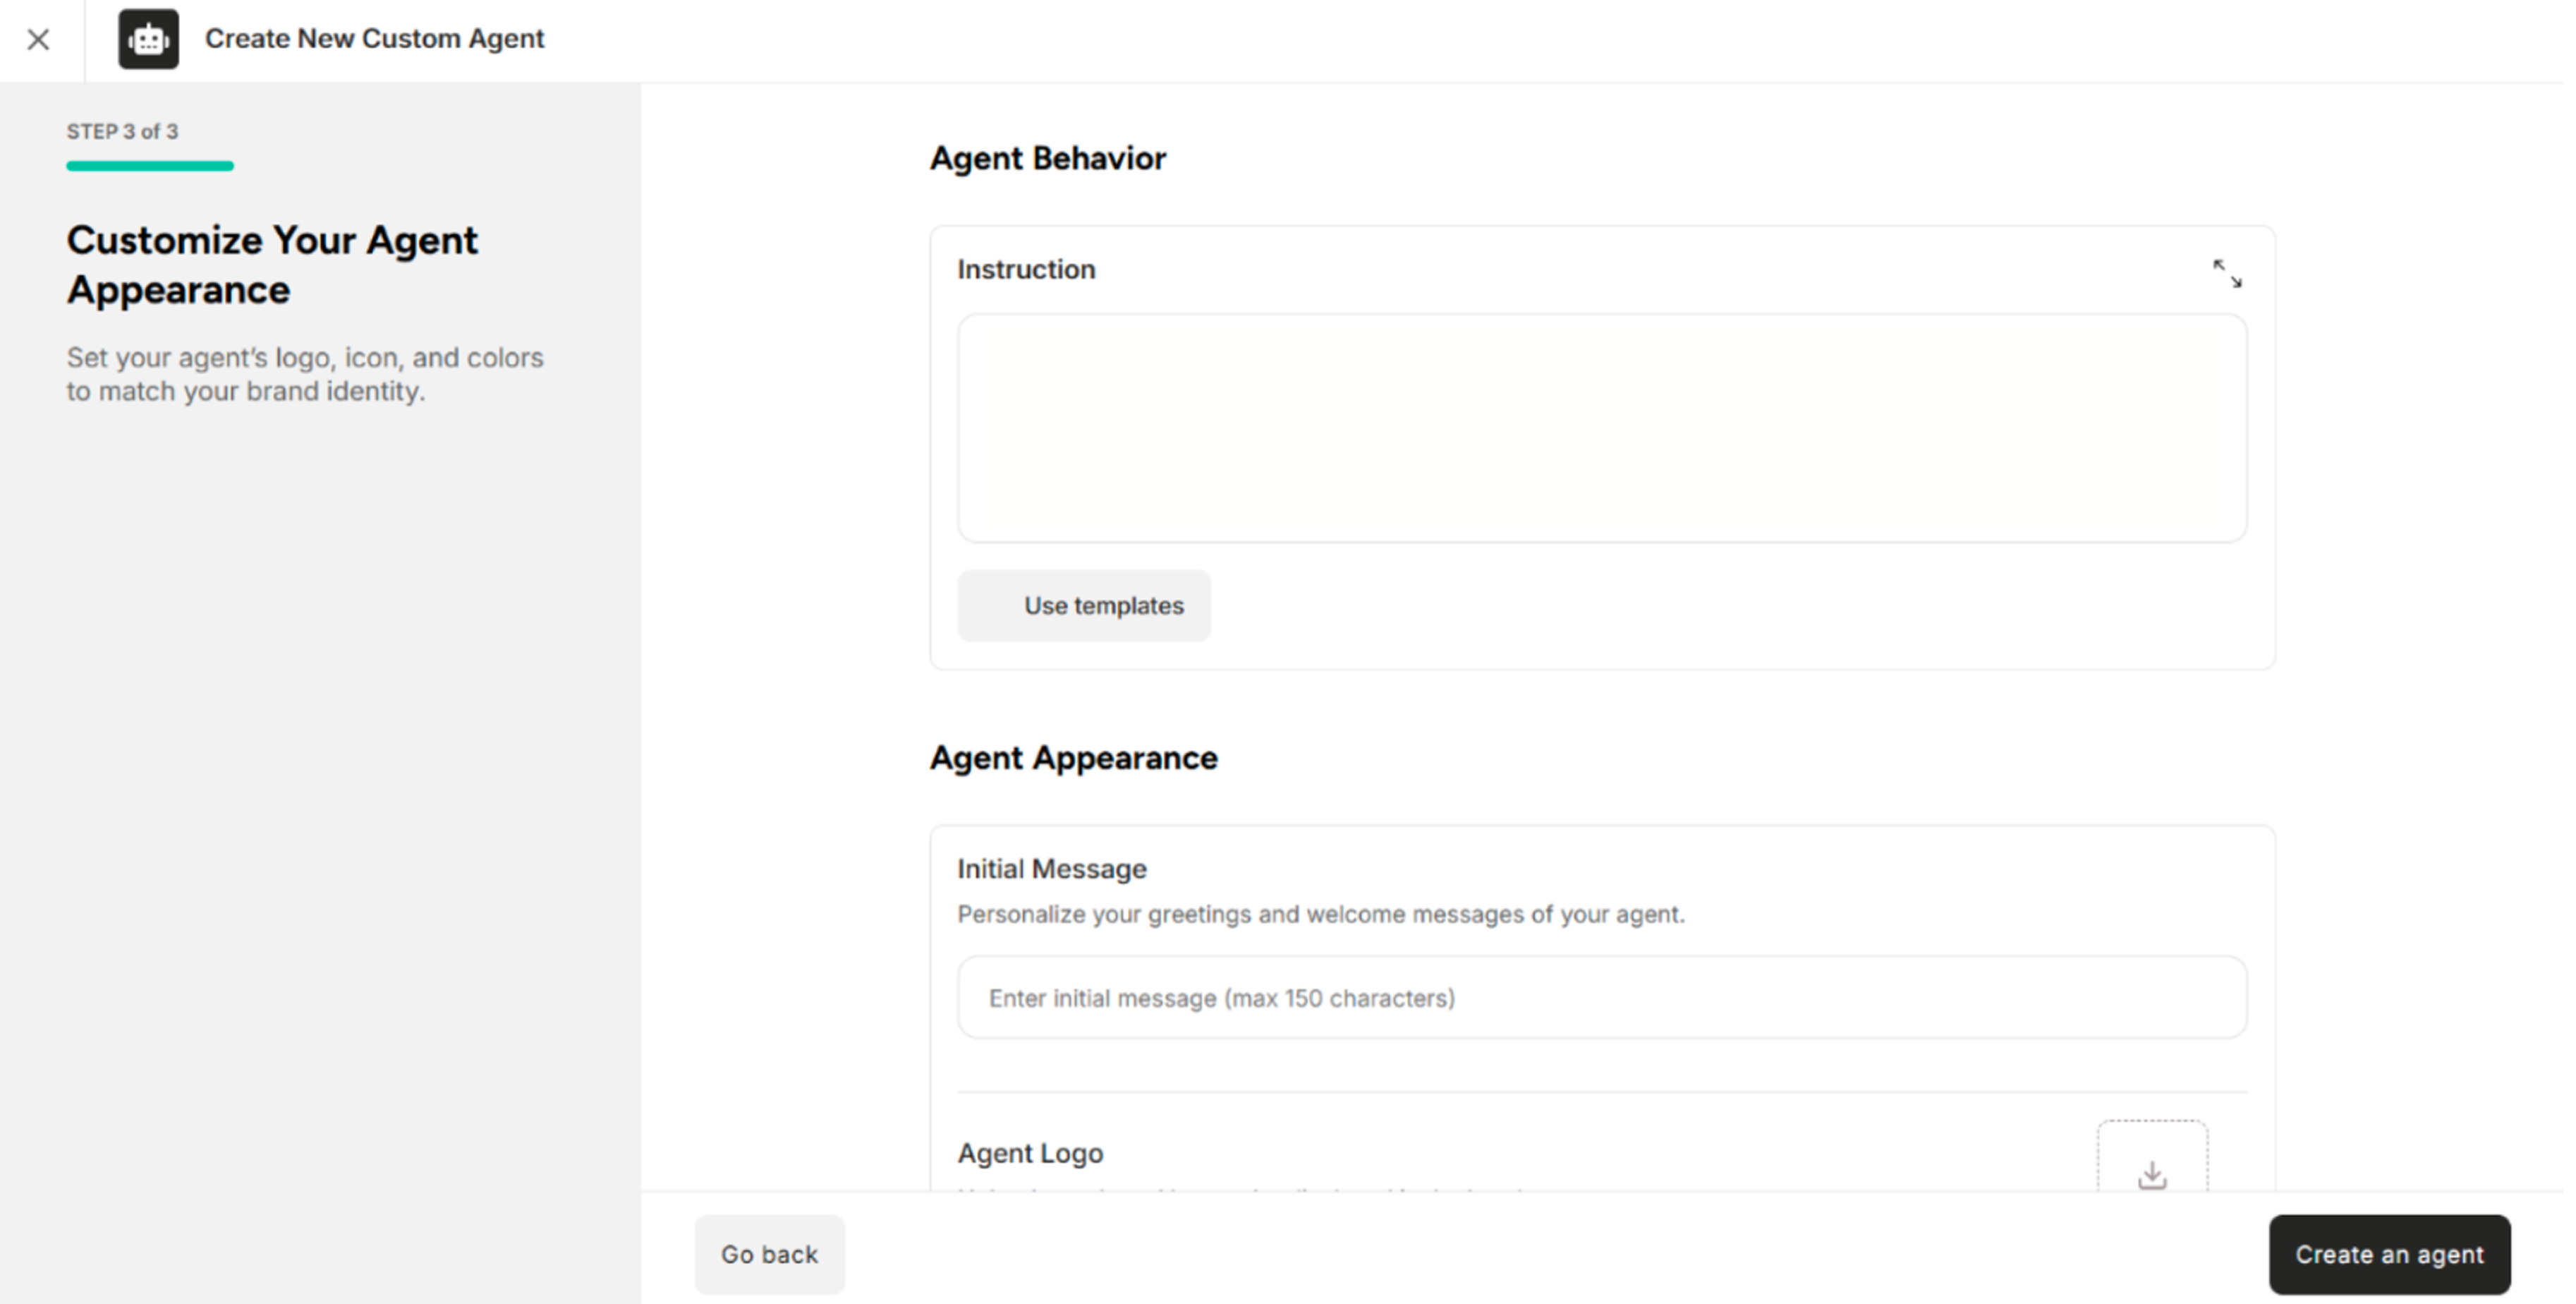
| Next: Customize agent | Customize the agent |
| Go back | Return to Step 1 where the agent information was added |
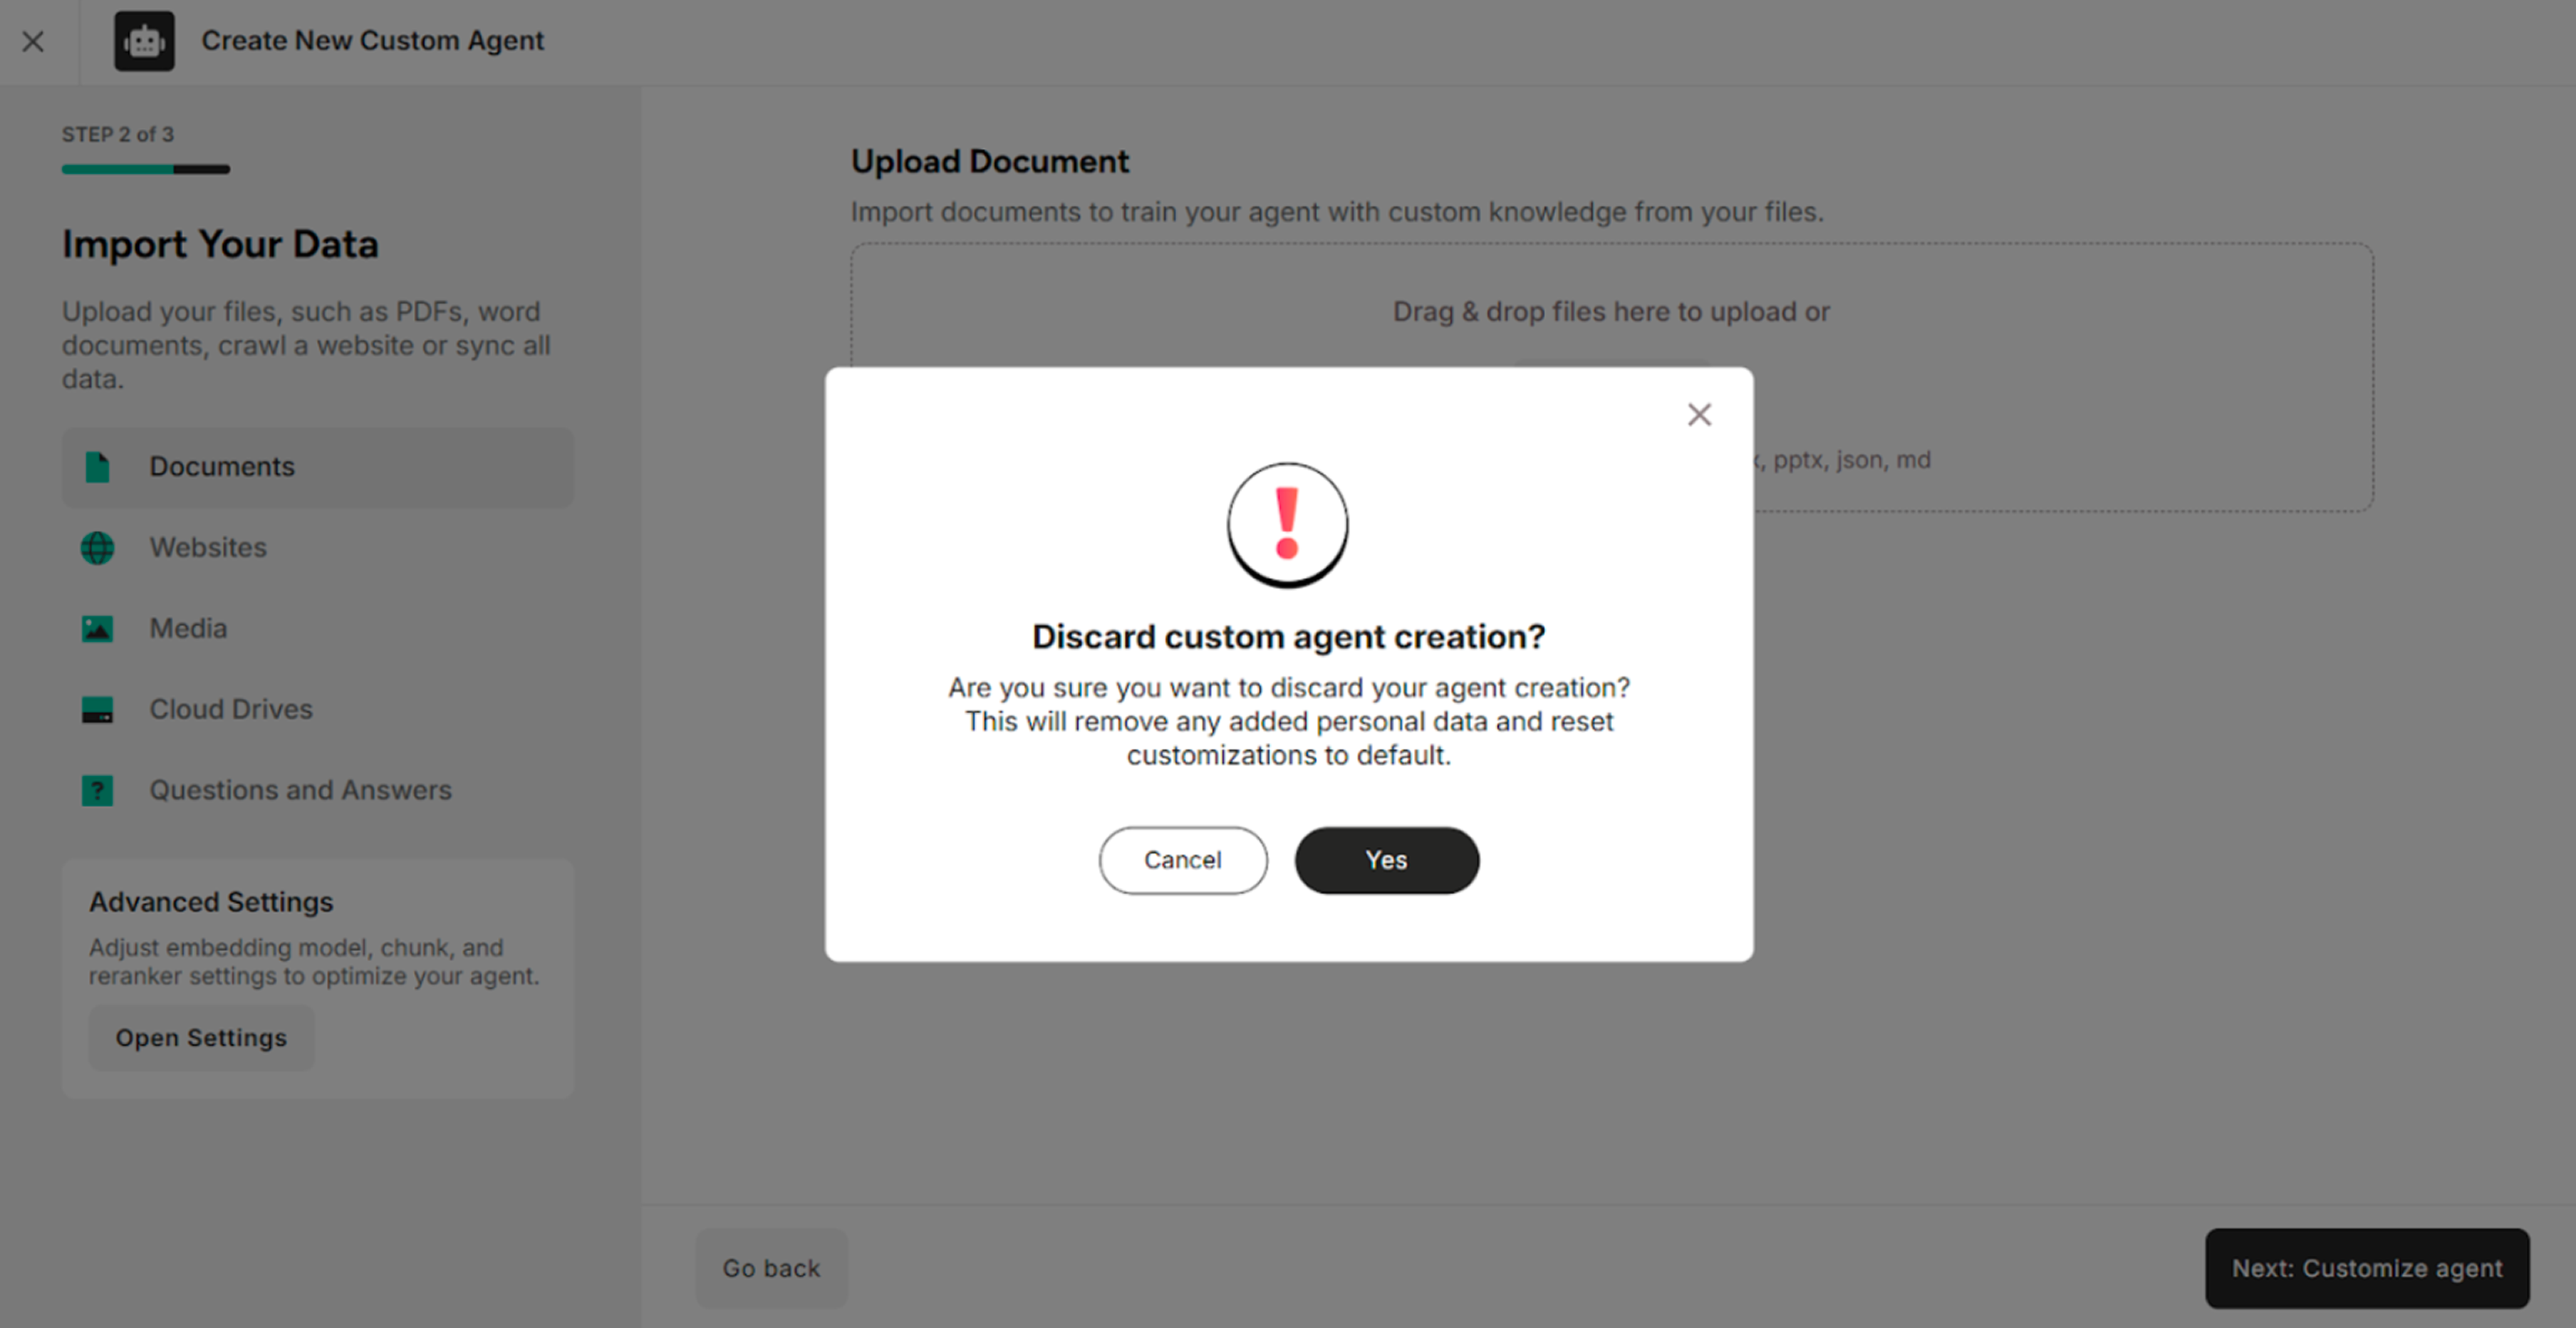
| Cross Button | Discard the process of creating the agent |